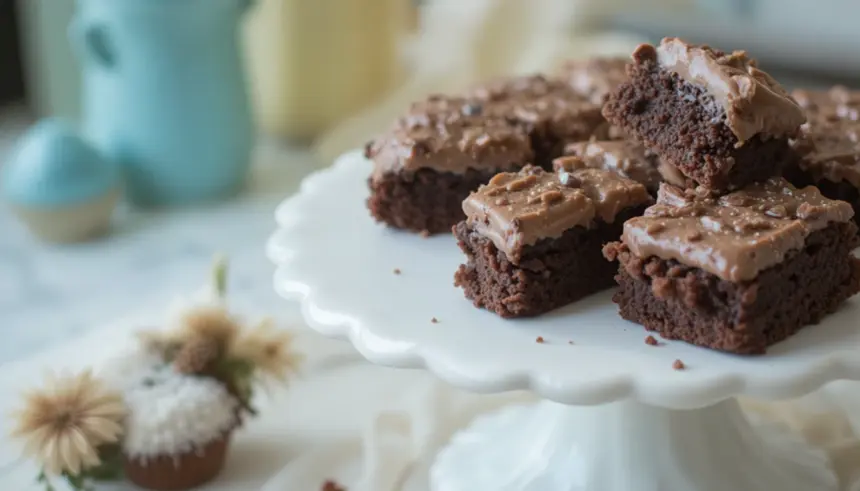
So you’re craving something tasty but too lazy to spend forever in the kitchen, huh? Same. 🙂 But you also want something that looks and tastes like you actually tried? Like, *really* tried? Well, my friend, you’ve stumbled upon the magic that is Mini Brownies with Frosting. They’re basically bite-sized happiness bombs, perfect for when you need a little pick-me-up without the commitment of a full-sized dessert. And let’s be real, anything mini automatically feels healthier, right? (Don’t tell anyone I said that.)
Why This Recipe is Awesome
Okay, so why should you make these little guys instead of, you know, just buying a box of mediocre brownies? First off, they’re ridiculously easy. I’m talking “I can barely boil water and I still nailed this” easy. Secondly, the frosting. Oh, the frosting! It takes these already-delicious brownies from “pretty good” to “OMG, is this heaven?” territory. Plus, you can totally customize the frosting. Think sprinkles, chocolate chips, a drizzle of caramel – your wildest dessert dreams come true. And the best part? You get to feel like a baking rockstar without the stress. It’s a win-win-win!
Ingredients You’ll Need
- 1/2 cup (1 stick) unsalted butter, melted (Use the good stuff, it makes a difference, promise!)
- 1 cup granulated sugar (The white stuff, not brown. Unless you’re feeling rebellious.)
- 2 large eggs (Fresh ones, please. No fossilized eggs allowed.)
- 1 teaspoon vanilla extract (The real deal, not that imitation stuff that tastes like disappointment.)
- 1/3 cup unsweetened cocoa powder (This is where the magic happens.)
- 1/2 cup all-purpose flour (Just regular flour, nothing fancy.)
- 1/4 teaspoon salt (Don’t skip this! It balances the sweetness.)
- Optional: Chocolate chips, nuts, or sprinkles for the batter (Because MORE is always better.)
- For the Frosting:
- 1/2 cup unsalted butter, softened (Let it chill out on the counter for a bit.)
- 1 1/2 cups powdered sugar (Sifted, if you’re feeling fancy, but who has time for that?)
- 2 tablespoons milk (Or cream, if you’re feeling decadent.)
- 1/2 teaspoon vanilla extract (Yep, more vanilla goodness.)
- Optional: Food coloring, cocoa powder, or sprinkles for frosting
Step-by-Step Instructions
- Preheat your oven to 350°F (175°C). Lightly grease a 24-cup mini muffin tin or line it with mini muffin liners. Don’t forget this step unless you enjoy scraping burnt bits for an eternity.
- In a medium bowl, whisk together the melted butter and sugar until they’re best friends.
- Beat in the eggs one at a time, then stir in the vanilla extract. This is where you can add your chocolate chips or nuts if you’re going for that extra oomph in the brownie itself.
- In a separate small bowl, whisk together the cocoa powder, flour, and salt.
- Gradually add the dry ingredients to the wet ingredients, mixing until just combined. **Do NOT overmix!** Seriously, just stir until you don’t see any dry flour bits.
- Spoon the batter into the prepared mini muffin cups, filling each about two-thirds full.
- Bake for 18-20 minutes, or until a toothpick inserted into the center comes out with moist crumbs (not wet batter!).
- Let the brownies cool in the tin for a few minutes before transferring them to a wire rack to cool completely. This is crucial for easy frosting application.
- While the brownies cool, make the frosting: In a bowl, beat the softened butter until creamy. Gradually add the powdered sugar and milk, beating until smooth. Stir in the vanilla extract. Add any coloring or cocoa if you’re feeling artistic.
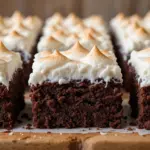
- Once the brownies are completely cool, frost them generously! Use a piping bag for fancy swirls or just go at it with a spoon. No judgment here.
Common Mistakes to Avoid
Let’s be real, we’ve all been there. But for these mini brownies, try to steer clear of these pitfalls:
- Overmixing the batter: This is a fast track to tough brownies. Just mix until *barely* combined.
- Not letting them cool completely before frosting: Melty frosting is a mess, not a masterpiece. Patience, grasshopper!
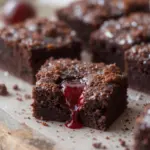
- Underbaking or Overbaking: A toothpick with wet batter means gooey insides (which can be good, but not always the goal). A toothpick with dry crumbs means they’re done! If it comes out clean, you’ve probably baked them too long.
- Using the wrong size pan: Mini muffin tins are key here. Regular muffin tins will make them too thin, and a brownie pan will make them too thick.
Alternatives & Substitutions
So, you’re missing an ingredient? No sweat! Here are some easy swaps:
- Butter: If you’re out of butter, you *could* use margarine, but honestly, the flavor won’t be as good. For a dairy-free option, a good quality vegan butter substitute works wonders.
- Cocoa Powder: If you don’t have unsweetened cocoa powder, you can try using Dutch-processed cocoa, but you might need to adjust the baking soda/powder (though for this simple recipe, it’s usually okay). If you’re really in a pinch and have chocolate chips, you could melt some and add them, but the texture will be different.
- Milk in Frosting: Heavy cream makes for a richer frosting, but milk is perfectly fine. If you’re dairy-free, almond milk or oat milk will do the trick.
- Flour: A gluten-free all-purpose flour blend can work here, but expect a slightly different texture.
FAQ (Frequently Asked Questions)
Got questions? I’ve got (mostly) casual answers!
- Can I make these ahead of time? Absolutely! They’re even better the next day, after the flavors have had time to hang out and get to know each other. Just store them in an airtight container.
- Can I skip the frosting? You *can*, but why would you do that to yourself? It’s like going to a concert and only listening to the opening act. But hey, if you must, they’re still decent brownies on their own.
- How long do they last? Properly stored, they’ll be good for about 3-4 days. Though, let’s be honest, they rarely last that long.
- Can I use a different size muffin tin? As mentioned, mini is the way to go. Regular size will bake much faster and be flatter, and loaf pans are a whole different ballgame. Stick to mini!
- Why are my brownies cakey instead of fudgy? Likely from overmixing, or using too much flour. Remember, gentle mixing is key!
- Can I freeze them? Yep! Freeze them unfrosted for best results, then frost them once thawed. They’ll still be delicious.
Final Thoughts
There you have it! Your new go-to for a quick, delicious, and utterly adorable dessert. They’re perfect for parties, bake sales, or just a Tuesday afternoon when you need a little chocolate hug. Now go impress someone—or yourself—with your new culinary skills. You’ve earned it!
