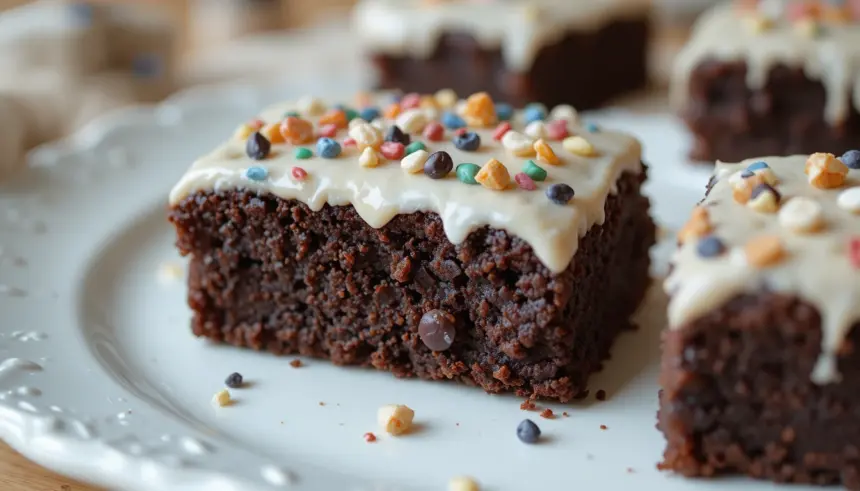
So you’re craving something tasty but too lazy to spend forever in the kitchen, huh? Same. 🙂 We all have those days where the siren song of a perfectly fudgy brownie with a swirl of sweet icing is just too loud to ignore. But who has time for complicated recipes that require a culinary degree and a mystical ingredient only found on a moonlit mountaintop? Not me, that’s for sure. That’s why I’m sharing my go-to “school brownie” recipe. It’s the kind of magic that transports you back to those simpler times (and tastes way better than anything you actually ate at school).
Why This Recipe is Awesome
Let’s be real. This recipe is awesome because it’s practically idiot-proof. Seriously, if I can make these without accidentally setting off the smoke alarm (a common occurrence, FYI), then you, my friend, can absolutely nail it. It’s quick, requires minimal fancy equipment, and the result? Pure chocolatey bliss. It’s the kind of brownie that’s fudgy enough to satisfy your deepest cravings but cakey enough to not stick to your teeth for a week. Plus, the icing is the cherry on top, or rather, the sugar swirl on the brownie. It’s the perfect balance of effort and deliciousness.
Ingredients You’ll Need
Here’s what you’ll need to gather for your brownie adventure. Don’t stress, it’s all pretty standard stuff you probably have lurking in your pantry.
* **For the Brownies:**
* 1 cup (2 sticks) unsalted butter, melted (because life’s too short for subpar butter)
* 2 cups granulated sugar (the sweet stuff, obviously)
* 4 large eggs (fresh ones, please! No ancient bird embryos)
* 1 teaspoon vanilla extract (the secret weapon for flavor)
* 1 cup all-purpose flour (standard issue)
* ⅔ cup unsweetened cocoa powder (the darker, the better, IMO)
* ½ teaspoon baking powder (just a little lift, not a whole party)
* ½ teaspoon salt (balances the sweet, essential!)
* 1 cup chocolate chips (optional, but who are we kidding? Never optional.)
* **For the Icing:**
* ½ cup unsalted butter, softened (room temp is your friend here)
* 2 cups powdered sugar (aka confectioners’ sugar, don’t get fancy)
* ¼ cup milk (any kind will do, cow, almond, oat – your call)
* 1 teaspoon vanilla extract (yes, more vanilla, it’s that good)
* Pinch of salt (again, balance!)
Step-by-Step Instructions
Alright, apron on, oven preheated, let’s get this baking party started!
1. **Preheat & Prep:** First things first, preheat your oven to **350°F (175°C)**. Grease and flour a 9×13 inch baking pan. You can also line it with parchment paper for extra easy cleanup. Nobody likes scrubbing burnt brownie bits.
2. **Wet Ingredients:** In a large bowl, whisk together the melted butter and sugar until well combined. Then, beat in the eggs one at a time, followed by the vanilla extract. It should look a little glossy and smell amazing already.
3. **Dry Ingredients:** In a separate, medium bowl, whisk together the flour, cocoa powder, baking powder, and salt. This ensures everything is evenly distributed and you don’t get a surprise pocket of pure cocoa powder.
4. **Combine:** Gradually add the dry ingredients to the wet ingredients, mixing until just combined. **Don’t overmix!** Overmixing leads to tough brownies, and nobody wants tough brownies. Stir in the chocolate chips if you’re using them.
5. **Bake:** Pour the batter into your prepared pan and spread it evenly. Bake for **25-35 minutes**, or until a toothpick inserted into the center comes out with moist crumbs attached (not wet batter!).
6. **Cool:** Let the brownies cool in the pan for at least **15-20 minutes** before you even *think* about icing them. Patience, grasshopper!
7. **Make the Icing:** While the brownies are cooling, whip up the icing. In a medium bowl, beat the softened butter until creamy. Gradually add the powdered sugar, alternating with the milk, and beat until smooth and spreadable. Stir in the vanilla and salt. If it’s too thick, add a tiny bit more milk; if it’s too thin, add more powdered sugar.
8. **Ice ’em!** Once the brownies are mostly cooled (still a little warm is fine!), spread the icing evenly over the top. Let it set for a bit before cutting into squares of pure joy.
Common Mistakes to Avoid
Let’s prevent some brownie-based tragedies, shall we?
* **Overmixing the batter:** I said it before, but it bears repeating. Overmixing develops the gluten, making your brownies tough and chewy instead of deliciously fudgy.
* **Not preheating the oven:** Rookie mistake alert! An oven that’s not hot enough will result in flat, sad brownies. **Always preheat.**
* **Overbaking:** This is a big one. Brownies continue to cook as they cool. Take them out when a toothpick has moist crumbs, not when it comes out completely clean. That’s the key to fudgy goodness.
* **Cutting too soon:** As tempting as it is, resist the urge to hack into them immediately. Let them cool so they hold their shape and the icing has a chance to set.
Alternatives & Substitutions
Feeling adventurous, or just out of one ingredient? No worries!
* **Chocolate Chips:** If you don’t have chips, chopped chocolate bars work too! Or, skip them entirely if you’re feeling minimalist (though why would you do that to yourself?).
* **Cocoa Powder:** Dutch-processed cocoa will give you a darker, richer flavor. Natural cocoa is fine too! Just know they bake slightly differently, so stick to the measurements.
* **Milk in icing:** If you’re dairy-free, use almond milk, oat milk, or even a splash of water. It’ll still be delicious!
* **Butter in icing:** You *can* use margarine, but let’s be honest, butter tastes better and makes for a fluffier icing. It’s a treat, so go all out!
FAQ (Frequently Asked Questions)
**Can I make these ahead of time?**
Yup! They’re actually even better the next day when the flavors have melded. Store them in an airtight container at room temperature.
**What if my icing is too thick/thin?**
No sweat! Too thick? Add a tiny splash of milk (like, half a teaspoon at a time) and beat until it’s the right consistency. Too thin? Add a tablespoon of powdered sugar at a time until it’s nice and spreadable.
**Do I *really* need to use unsalted butter?**
For baking, yes, it’s generally best. It gives you more control over the salt content. Salted butter can make things a bit unpredictable flavor-wise.
**Can I use a different pan size?**
You can, but it will affect baking time. A smaller pan will require a longer bake, and a larger pan will need a shorter bake and might result in thinner brownies. Stick to 9×13 for these bad boys if you can!
**Why are my brownies hard?**
Most likely you overmixed the batter or overbaked them. Remember, moist crumbs on the toothpick are your friend!
**Can I add nuts?**
Absolutely! Chop up about ½ cup of your favorite nuts (walnuts or pecans are classic) and stir them in with the chocolate chips. Just make sure you don’t have any nut-allergy situations going on!
Final Thoughts
There you have it – ridiculously easy, incredibly delicious school brownies with icing. They’re the perfect pick-me-up, the ideal treat to share (or hoard, no judgment), and a surefire way to bring a little sweetness into your day. Now go impress someone—or yourself—with your new culinary skills. You’ve earned it! Happy baking!

