“`html
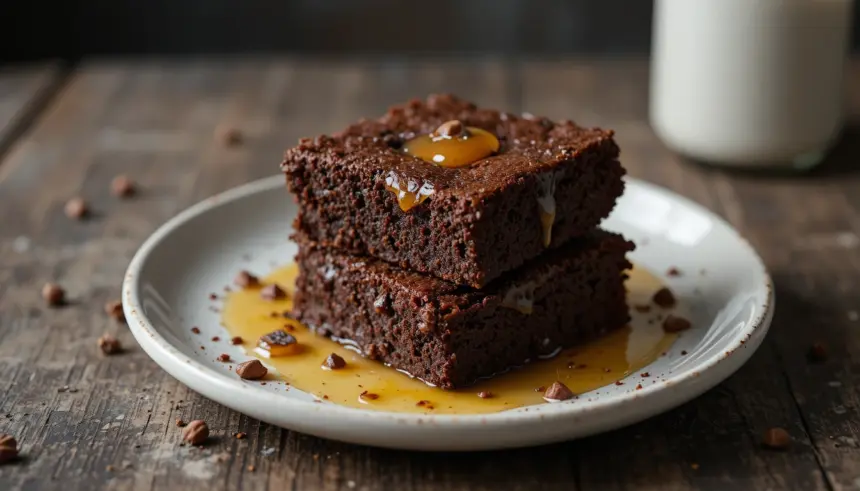
So, you’re craving something ridiculously chocolatey, fudgy, and utterly delicious, but the thought of a complicated recipe makes your brain do the Macarena? Yeah, me too. That’s why we’re diving headfirst into the magical world of cocoa brownies made with… wait for it… *oil*! Yep, forget the fussy creaming of butter; we’re keeping it simple and seriously satisfying.
Why This Recipe is Awesome
Let’s be real. Life’s too short for dry, crumbly brownies. This recipe is your golden ticket to fudgy nirvana, and the secret weapon? Oil! It keeps these bad boys impossibly moist and tender, even the next day (if they last that long, which, let’s be honest, is a big IF). Plus, it’s pretty much foolproof. Seriously, even if you’ve previously achieved legendary status for burning toast, you can nail these. They’re rich, intensely chocolatey, and require minimal effort for maximum brownie-loving impact. It’s the kind of baking where you can sip on your favorite drink and *still* end up with a masterpiece. High fives all around!
Ingredients You’ll Need
- 1 cup all-purpose flour (the usual suspect for baking)
- 1 ½ cups granulated sugar (for that perfect sweet hit)
- ¾ cup unsweetened cocoa powder (the star of the show, so don’t skimp!)
- 1 teaspoon baking powder (just a little lift, nothing crazy)
- ½ teaspoon salt (to balance all that sweetness, duh)
- ½ cup vegetable oil (or any neutral-flavored oil like canola or sunflower – this is our secret weapon!)
- 2 large eggs (the binders of joy)
- 1 teaspoon vanilla extract (for that extra layer of deliciousness)
- ½ cup milk (whole milk is king, but whatever you have will work)
- Optional: Chocolate chips, nuts, a sprinkle of flaky sea salt on top (because, why not?)
Step-by-Step Instructions
- Preheat your oven to 350°F (175°C) and grease and flour an 8×8 inch baking pan. Seriously, don’t skip the greasing and flouring unless you enjoy a spatula wrestling match later.
- In a large bowl, whisk together the flour, sugar, cocoa powder, baking powder, and salt. Give it a good mix so all those dry ingredients are besties.
- In a separate, smaller bowl (or just make a well in your dry ingredients, you rebel!), whisk together the oil, eggs, vanilla extract, and milk until it’s all happy and combined.
- Pour the wet ingredients into the dry ingredients. Stir everything together until *just* combined. Don’t go crazy here; overmixing is the enemy of tender brownies. A few streaks of flour are okay, they’ll disappear in the oven.
- If you’re feeling fancy (or just can’t resist), fold in your chocolate chips or nuts now.
- Pour the batter into your prepared pan and spread it evenly. If you’re using flaky sea salt, sprinkle it on top now for that gourmet touch.
- Bake for 25-30 minutes, or until a toothpick inserted into the center comes out with moist crumbs attached (not wet batter!). We want fudgy, not dry!
- Let them cool in the pan for at least 10-15 minutes before cutting. This is crucial for getting those clean cuts. Patience, my friend, patience!
Common Mistakes to Avoid
- Overmixing the batter: This develops the gluten too much, resulting in tough brownies. Mix until just combined, and then stop. Seriously, stop.
- Underbaking or Overbaking: Too little time and you’ll have a gooey mess that won’t hold its shape. Too much time, and you’ll regret it with every dry bite. Use the toothpick test and trust your gut!
- Not preheating the oven: This is a rookie error. Your brownies will bake unevenly, and frankly, it’s just not fair to the batter.
- Using low-quality cocoa powder: If you want intense chocolate flavor, invest in good cocoa. It makes a world of difference, IMO.
Alternatives & Substitutions
Feeling adventurous? Or just ran out of something? No worries! For the oil, any neutral vegetable oil works like a charm. Some people swear by melted butter for a richer flavor, and while it’s delicious, it *can* make them a little less fudgy compared to oil. Totally your call! For milk, you can use any kind, even a dairy-free alternative if that’s your jam. And if you don’t have baking powder, you can omit it, but they might be a little denser – which, let’s be honest, isn’t the worst outcome for a brownie.
FAQ (Frequently Asked Questions)
Can I make these gluten-free? Sure! Swap out the all-purpose flour for a good gluten-free baking blend. Just make sure it has xanthan gum in it, or you might need to add a touch yourself.
Final Thoughts
There you have it! Simple, delicious, and ridiculously fudgy cocoa brownies made with oil. See? Baking doesn’t have to be a competitive sport. Now go forth and bake. Whether you’re sharing them with friends, family, or just hoarding them for yourself (no judgment here!), enjoy every single chocolatey bite. You’ve earned it! Happy baking, you magnificent human!
“`
