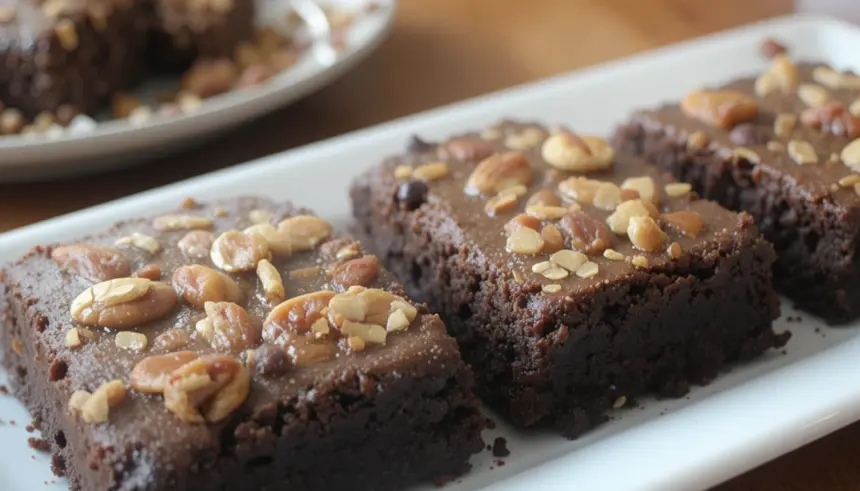
Homemade Brownies With Nuts: Because Life’s Too Short for Boring Desserts!
So you’re craving something intensely chocolatey, delightfully fudgy, and with a satisfying crunch, but the thought of a multi-step, finicky recipe makes you want to nap? Yup, I’m right there with you. This brownie recipe is basically your new best friend. It’s the kind of treat that says, “I’m awesome and I put in minimal effort to prove it.”
Why This Recipe is Awesome (Seriously, It’s Gold)
Let’s be real. We don’t always have the patience (or the professional pastry chef skills) for those fancy dessert projects. This recipe? It’s pretty darn foolproof. I’m talking melt-chocolate-stir-bake-eat level of easy. It’s the kind of brownie that makes you question why you ever bothered with those dry, sad boxed mixes. Plus, nuts! Because what’s a good brownie without a little something to chew on? It’s pure, unadulterated chocolate bliss without the fuss.
Ingredients You’ll Need (No Fancy Stuff Required)
* **Unsalted Butter:** About 1 cup (2 sticks). Because anything else is just… sad.
* **Granulated Sugar:** 1.5 cups. For that perfect sweet hug.
* **Eggs:** 3 large ones. The binder of dreams.
* **Vanilla Extract:** 1 teaspoon. A little magic goes a long way.
* **All-Purpose Flour:** 3/4 cup. Don’t go crazy here, we want fudgy, not cakey.
* **Unsweetened Cocoa Powder:** 1/2 cup. The star of the show, obviously.
* **Salt:** 1/4 teaspoon. Just to make the chocolate sing.
* **Chocolate Chips (Optional, but highly recommended):** 1 cup. Because double the chocolate never hurt anyone.
* **Nuts:** 1 cup. Your choice! Walnuts or pecans are classics for a reason. Chop ’em up!
Step-by-Step Instructions (Let’s Do This!)
1. **Preheat & Prep:** Crank your oven to 350°F (175°C). **Grease and flour an 8×8 inch baking pan.** Trust me, nobody likes a stuck brownie.
2. **Melt Magic:** In a heatproof bowl, melt your butter. You can do this over a double boiler or in the microwave in 30-second bursts, stirring in between. Don’t scorch it, okay?
3. **Sweeten the Deal:** Whisk the sugar into the melted butter until it’s smooth and combined. It might look a little glossy – that’s a good sign!
4. **Egg-cellent Additions:** Beat in the eggs, one at a time, followed by the vanilla. Stir until just combined. Don’t overmix, we’re not making meringue here.
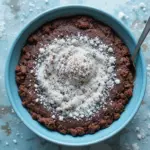
5. **Dry Ingredients Unite:** In a separate bowl, whisk together the flour, cocoa powder, and salt. Give it a good stir to get rid of any lumps.
6. **Combine and Conquer:** Gradually add the dry ingredients to the wet ingredients. **Stir until *just* combined.** Seriously, a few streaks of flour are fine. Overmixing is the enemy of fudgy.
7. **Nutty Business:** Fold in your chopped nuts and chocolate chips (if using). Gently does it.
8. **Bake ‘Em Up:** Pour the batter into your prepared pan and spread it evenly. Bake for 25-30 minutes. **The edges should be set, but the center should still look a little gooey.** This is key for fudginess! A toothpick inserted into the center should come out with moist crumbs, not wet batter.
9. **Cool Down:** Let them cool completely in the pan on a wire rack. This is the hardest part, I know. Patience, grasshopper!
Common Mistakes to Avoid (Don’t Be That Guy/Gal)
* **Overmixing:** I’ll say it again – overmixing = tough brownies. Stop stirring when you barely see any dry flour.
* **Undercooking:** If they’re still soupy in the middle after 30 minutes, that’s a problem. You want moist crumbs, not raw batter.
* **Overcooking:** The flip side! Bake them too long and you’ll end up with dry, crumbly pucks. Keep an eye on them!
* **Not Greasing the Pan:** I mean, just don’t. You’ll regret it.
* **Skipping the Salt:** That tiny bit of salt is a flavor enhancer. Don’t skip it.
Alternatives & Substitutions (Get Creative!)
* **Nuts:** Feel free to swap walnuts for pecans, almonds, or even macadamia nuts. Or, if you’re anti-nut (no judgment!), just leave them out and add more chocolate chips.
* **Chocolate Chips:** Use dark, milk, or white chocolate chips. A mix is also a brilliant idea. You could even add some M&Ms for a fun twist!
* **Cocoa Powder:** Dutch-processed cocoa powder will give you a darker, richer color and flavor.
* **Gluten-Free?** You can try a good quality gluten-free all-purpose flour blend. Results may vary, but it’s worth a shot!
FAQ (Your Burning Questions, Answered Casually)
* **Can I use salted butter?** You *can*, but you might want to reduce the added salt to just a pinch. Better to control the salt yourself, IMO.
* **My brownies look a little shiny on top, is that okay?** Oh, that’s the good stuff! That’s called the “fudgy sheen,” and it means you’re on the right track to brownie heaven.
* **Why do they need to cool completely?** Because hot brownies are a messy, gooey disaster. Letting them cool lets them set up properly, making them easier to cut and, well, much more enjoyable.
* **Can I make these ahead of time?** Absolutely! They’re often even better the next day after the flavors have melded. Store them in an airtight container at room temperature.
* **Can I use margarine instead of butter?** Technically, yes, but why would you do that to yourself? Butter adds flavor and richness that margarine just can’t replicate. For best results, stick with butter!
Final Thoughts (Go Bake Something Awesome!)
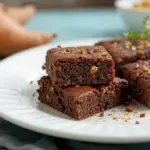
And there you have it! Delicious, homemade brownies with nuts that are way better than anything you’ll find in a store. They’re perfect for a movie night, a study session, or just because your taste buds are demanding something spectacular. So go forth, embrace the chocolate, and enjoy every single fudgy, nutty bite. You’ve earned it!
