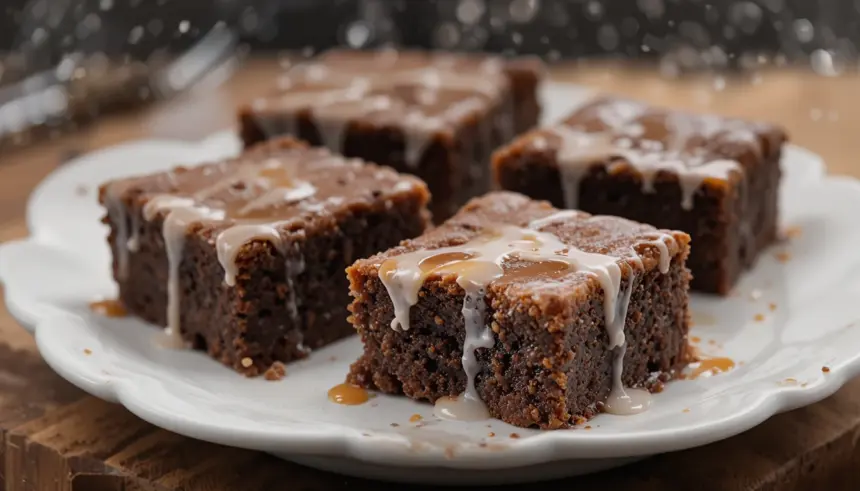
So, you’re staring into the abyss of your pantry, a deep, dark craving for something intensely chocolatey and utterly satisfying gnawing at your soul, but the thought of a complicated bake-a-thon makes you want to lie down and cry? Been there, my friend, been there. This, my culinary comrade, is your brownie salvation. We’re talking fudgy, chocolatey perfection, crowned with a glaze so shiny it’ll make your kitchen sparkle. And the best part? It’s ridiculously easy.
Why This Recipe is Awesome
Let’s be real. You want brownies, not a culinary degree. This recipe is like the best kind of friend: reliable, delicious, and doesn’t ask too many questions. It’s practically idiot-proof, which is a godsend for us mere mortals who sometimes burn water. Plus, the glaze? It’s the cherry on top, the sparkle on the disco ball, the… well, you get it. It elevates these humble brownies from “nice treat” to “OMG, where did you buy these?!” levels.
Ingredients You’ll Need
- Butter: One stick. Unsalted is usually the go-to for baking, but if you’re feeling rebellious, salted will work, just maybe skip some of the added salt later.
- Chocolate: About 4 ounces of good quality dark or semi-sweet chocolate. Don’t skimp here! This is the soul of your brownie.
- Sugar: One cup. Granulated sugar is fine. If you have brown sugar lying around, a mix is also boss.
- Eggs: Two large ones. They’re the binder of dreams.
- Vanilla Extract: One teaspoon. Because everything good needs a splash of vanilla.
- Flour: Half a cup. All-purpose is your best bet.
- Cocoa Powder: Quarter cup. Unsweetened, for maximum chocolate power.
- Salt: Half a teaspoon. Even chocolate needs a little salty counterpoint.
- For the Glaze: Powdered sugar (about 1 cup), a splash of milk or cream (start with 1-2 tablespoons and add more as needed), and a tiny bit of vanilla extract.
Step-by-Step Instructions
- Preheat your oven to 350°F (175°C) and grease and flour an 8×8 inch baking pan. Or, if you’re feeling lazy (again, I get it), line it with parchment paper and leave some overhang for easy lifting.
- Melt the butter and chopped chocolate together. You can do this in a microwave in 30-second bursts, stirring in between, or over a double boiler. Stir until it’s a smooth, glossy river of chocolatey goodness. Let it cool slightly.
- In a separate bowl, whisk the eggs and sugar together until they look a bit lighter and frothier. Then, stir in the vanilla extract.
- Pour the slightly cooled chocolate mixture into the egg mixture and whisk until it’s all combined and looks like a dark, mysterious potion.
- In yet another bowl (yes, I know, but it’s worth it!), whisk together the flour, cocoa powder, and salt. This is where you add a little bit of science to your art.
- Gradually add the dry ingredients to the wet ingredients, mixing until just combined. **Don’t overmix!** We want tender brownies, not chewy hockey pucks. A few streaks of flour are okay; they’ll disappear in the oven.
- Pour the batter into your prepared pan and spread it out evenly. This is where you give it a nice, flat surface to bake on.
- Bake for 20-25 minutes. A toothpick inserted into the center should come out with moist crumbs, not wet batter. This is the sweet spot for fudgy perfection. Overbaking is a crime against brownies.
- Let the brownies cool completely in the pan. Seriously, **wait!** Impatience is the enemy of a good brownie. Once cool, lift them out using the parchment paper or cut them directly in the pan.
- For the glaze: Whisk powdered sugar, a splash of milk, and vanilla until you have a smooth, pourable consistency. If it’s too thick, add more milk. If it’s too thin, add more powdered sugar. Drizzle or spread this glorious goo over your cooled brownies. Let the glaze set a bit before slicing.
Common Mistakes to Avoid
- Overmixing the batter: Seriously, guys, this is the #1 brownie killer. Just mix until *just* combined.
- Overbaking: Dry brownies are just sad. Aim for that moist crumb.
- Cutting them too soon: They need to cool and set. Trust the process!
- Using wimpy chocolate: Your brownies are only as good as your chocolate. Use something you’d happily eat on its own.
- Skipping the salt: It sounds weird, but a little salt really makes the chocolate flavor pop.
Alternatives & Substitutions
Got a hankering for nuts? Toss in a handful of chopped walnuts or pecans with your dry ingredients. Want to get fancy? A swirl of caramel or a sprinkle of sea salt on top of the glaze can be next-level. For the brave, a tablespoon of instant coffee granules in the batter can deepen that chocolate flavor like WOAH. If you’re out of milk for the glaze, a little bit of water works too, though it won’t be quite as rich.
FAQ (Frequently Asked Questions)
Can I use margarine instead of butter? Well, technically yes, but why hurt your soul like that? Butter gives you that rich flavor and texture that margarine just can’t replicate. IMO, stick with butter for best results.
What if I don’t have dark chocolate? Can I use milk chocolate? You *can*, but your brownies will be much sweeter. You might want to reduce the sugar a bit in the brownie batter if you go this route.
My brownies look a little… puffed up. What happened? Sometimes, overmixing can cause this. Also, if your oven runs too hot, they can puff up more. Don’t stress too much; they’ll likely settle as they cool.
Can I make these gluten-free? You probably could! You’d need to experiment with a gluten-free flour blend. I haven’t personally tested it, so I can’t give you exact measurements, but it’s a fun challenge if you’re feeling adventurous.
How long do these last? If they even make it past the first day, store them in an airtight container at room temperature for about 3-4 days. Though, let’s be honest, they’re best enjoyed fresh.
Can I freeze these? Absolutely! Once they’re completely cooled (glaze and all), you can wrap them tightly in plastic wrap and then foil and freeze them for up to 3 months. Thaw them at room temperature.
Final Thoughts
And there you have it! Your shortcut to brownie bliss. Go forth and bake! You’ve got this. Don’t be afraid to lick the spoon (it’s practically a rule). Now go impress someone—or yourself—with your new culinary skills. You’ve earned it!

