“`html
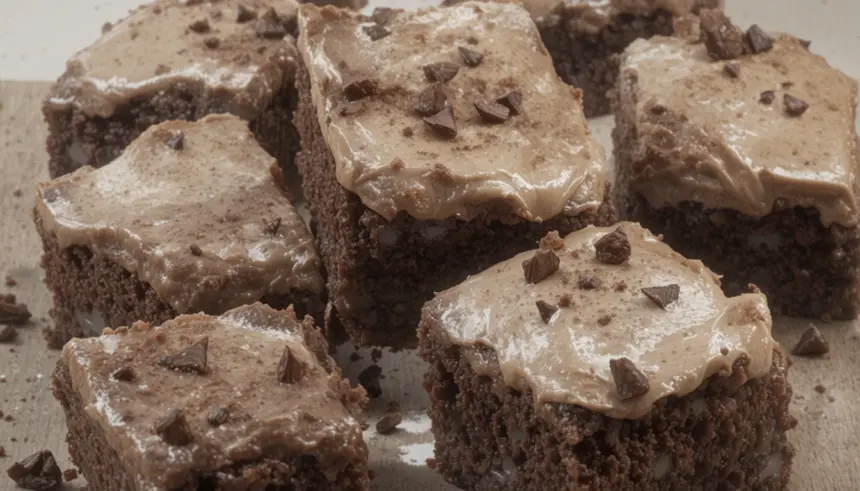
So, you’ve hit that inevitable moment, right? The one where your brain is screaming “CHOCOLATE NOW!” but your motivation is doing the exact opposite, like a grumpy cat being asked to take a bath. Don’t worry, friend, I’ve been there. And I’ve got the ultimate solution that’s basically a hug in cake form: ridiculously easy chocolate brownies with a frosting that’ll make you weep tears of pure joy. Let’s do this!
Why This Recipe is So Darn Awesome
Look, I’m not saying this recipe is *magic*, but I *am* saying that even if your baking skills are currently at the “burning toast” level, you can absolutely nail these. They’re fudgy, they’re chocolatey, and the frosting? Oh, the frosting. It’s the cherry on top of your already magnificent chocolate sundae. Plus, the “effort-to-deliciousness ratio” is off the charts. You’ll be hailed as a baking hero with minimal sweat equity. Win-win!
Ingredients You’ll Need (The Fun Stuff!)
- Butter: The unsalted kind, please. Unless you like your brownies salty, which, no judgment, but it’s not for me.
- Sugar: Regular granulated sugar. The sweeter, the better, IMO.
- Eggs: Two large ones. They’re the glue that holds our chocolate dreams together.
- Vanilla Extract: A splash of magic. Don’t skip this!
- All-Purpose Flour: Just a little bit to give it some structure. We don’t want a chocolate puddle (unless that’s your vibe).
- Cocoa Powder: The star of the show. Use unsweetened, unless you enjoy the taste of pure, unadulterated sweetness.
- Salt: A pinch. It enhances all that lovely chocolatey goodness.
- Chocolate Chips: Because why wouldn’t you? Milk, dark, semi-sweet – your call, boss.
- For the Frosting (The Glorious Crown):
- Powdered Sugar: The fluffy cloud that makes everything better.
- Butter: Softened. It’s crucial for that smooth, dreamy texture.
- Cocoa Powder: More chocolate? Yes, please.
- Milk or Cream: Just enough to get the consistency right.
- Vanilla Extract: A little extra hug of flavor.
Step-by-Step Instructions (Don’t Panic, It’s Easy!)
- Preheat your oven to 350°F (175°C) and grease an 8×8 inch baking pan. Line it with parchment paper too, unless you enjoy a frantic scraping session later.
- Melt the butter in a microwave-safe bowl. Then, stir in the sugar until it looks like a happy, golden-brown sandcastle.
- Whisk in the eggs one at a time, followed by the vanilla extract. It should look glossy and inviting.
- In a separate bowl, whisk together the flour, cocoa powder, and salt. Make sure there are no lumps – we’re aiming for smooth, not gritty.
- Gently fold the dry ingredients into the wet ingredients. Don’t overmix! Just combine until you don’t see any more dry flour.
- Stir in those glorious chocolate chips. You can reserve a few for topping if you’re feeling fancy.
- Pour the batter into your prepared pan and spread it out evenly.
- Bake for 25-30 minutes. How do you know it’s done? A toothpick inserted into the center should come out with a few moist crumbs, not completely clean. We want fudgy, not cakey!
- Let them cool completely in the pan. This is the hardest part, I know. Patience, grasshopper.
- Frosting Time! While the brownies cool, beat the softened butter until it’s creamy. Gradually add the powdered sugar and cocoa powder, alternating with the milk or cream. Beat until smooth and delicious. Stir in the vanilla.
- Once the brownies are totally cool, slather that frosting on like you mean it. Go wild!
Common Mistakes to Avoid (Don’t Be That Guy/Gal)
- Overbaking: Seriously, this is the cardinal sin of brownie-making. They’ll go from fudgy perfection to sad, dry bricks. Watch that toothpick test like a hawk!
- Not Measuring Properly: Baking is a science (sometimes). Too much flour or not enough cocoa can ruin your life.
- Skipping the Salt: It seems insignificant, but trust me, it makes a huge difference in bringing out the chocolate flavor.
- Cutting Them Too Soon: Resist the urge! Let them cool completely. If you cut them while warm, you’ll have a gooey mess that’s impossible to slice neatly.
Alternatives & Substitutions (Get Creative!)
Feeling adventurous? Or maybe you’re missing an ingredient? No worries! You can absolutely jazz these up.
- Add-ins: Toss in some chopped nuts (walnuts or pecans are divine), a handful of raspberries for a tart surprise, or even some mini marshmallows for gooey pockets of goodness.
- Frosting Flavors: Want to go beyond basic? Add a swirl of peanut butter to the frosting, or a hint of espresso powder for a mocha kick.
- Flour: If you’re gluten-free, you can try a good quality gluten-free flour blend. Results may vary, so manage expectations!
FAQ (Your Burning Questions, Answered Casually)
Can I use margarine instead of butter for the brownies? Well, technically yes, but why hurt your soul like that? Butter provides superior flavor and texture. Margarine can lead to a greasier, less satisfying brownie. It’s worth the splurge!
My brownies look a little shiny on top, is that normal? Yep! That’s called a “fudgy crust,” and it’s a sign of a job well done. Embrace the sheen!
Can I make these vegan? You can! Swap the butter for vegan butter or coconut oil, and use flax eggs (1 tbsp flaxseed meal + 3 tbsp water, let sit for 5 mins) instead of chicken eggs. For the frosting, use vegan butter and plant-based milk.
How long will these last? Honestly, if you don’t devour them in the first hour, they should last a good 3-4 days stored in an airtight container at room temperature. But I wouldn’t bet on it!
My frosting is too thick! What do I do? Add a tiny bit more milk or cream, about a teaspoon at a time, and beat until it reaches your desired consistency. Too thin? Add a bit more powdered sugar. Patience is key here!
Can I double this recipe? Absolutely! Just make sure you have a larger baking pan (like a 9×13 inch) and adjust the baking time accordingly. Keep an eye on it!
Final Thoughts
There you have it! Your ticket to brownie bliss. Making these isn’t just about the delicious outcome; it’s about the fun you have getting there. So, crank up your favorite tunes, maybe pour yourself a glass of milk (or something stronger, I won’t tell), and get baking. Now go impress someone—or yourself—with your new culinary skills. You’ve earned it!
“`
