So, You Want Brownies? Like, REALLY Want Brownies?
Let’s be honest. Sometimes, the siren song of chocolate is just too loud to ignore. And when that craving hits, you don’t want some fussy, complicated masterpiece. You want fudgy, decadent, ridiculously good brownies. Buttermilk Brownies, to be precise. And guess what? You’re in luck, because I’ve got the magic formula for you. Get ready to unleash your inner baking goddess (or god, no judgment here).
Why This Recipe is a Keeper (Seriously, It’s That Good)
Okay, so why buttermilk brownies, you ask? Because they’re ridiculously moist and have this subtle tang that cuts through the sweetness just right. It’s like a flavor party in your mouth, and everyone’s invited! Plus, this recipe is pretty much **foolproof**. I’ve tested it multiple times, and even on my most “I-might-have-had-coffee-for-breakfast” days, they turn out amazing. No weird, fancy ingredients needed. We’re talking simple, straightforward deliciousness.
Ingredients You’ll Need (Gather Your Troops!)
- 1 cup (2 sticks) unsalted butter, melted (because butter is life, duh)
- 2 cups granulated sugar (sweetness overload, in the best way)
- 4 large eggs (the glue that holds our brownie dreams together)
- 1 teaspoon vanilla extract (essential for that “wow” factor)
- 1 cup buttermilk (our secret weapon for ultimate moistness)
- 1 cup all-purpose flour (just enough to give it structure)
- 1/2 cup unsweetened cocoa powder (go for the good stuff, your taste buds will thank you)
- 1/2 teaspoon baking soda (a little lift, nothing too dramatic)
- 1/2 teaspoon salt (to balance all that sweetness)
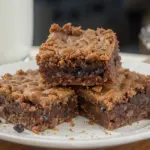
- Optional: 1 cup chocolate chips (because more chocolate is NEVER a bad idea)
- For the Frosting (because, why not?):
- 1/2 cup (1 stick) unsalted butter, softened
- 1/4 cup buttermilk
- 2 cups powdered sugar (sifted, for a smooth operator)
- 2 tablespoons unsweetened cocoa powder
- 1 teaspoon vanilla extract
Step-by-Step Brownie Bliss
- Preheat your oven to 350°F (175°C). Grease and flour a 9×13 inch baking pan. Trust me, you don’t want these sticking.
- In a large bowl, whisk together the melted butter and sugar until they look like a happy, creamy team.
- Beat in the eggs one at a time, followed by the vanilla extract and buttermilk. It might look a little weird at first, but have faith!
- In a separate bowl, whisk together the flour, cocoa powder, baking soda, and salt. Sifting is your friend here, FYI.
- Gradually add the dry ingredients to the wet ingredients, mixing until *just combined*. Overmixing is the enemy of fudgy brownies.
- If you’re feeling extra, fold in those chocolate chips.
- Pour the batter into your prepared pan and spread it evenly.
- Bake for 25-30 minutes, or until a toothpick inserted into the center comes out with moist crumbs (not wet batter!).
- Let them cool completely in the pan. This is the hardest part, I know. But it’s crucial for perfect texture.
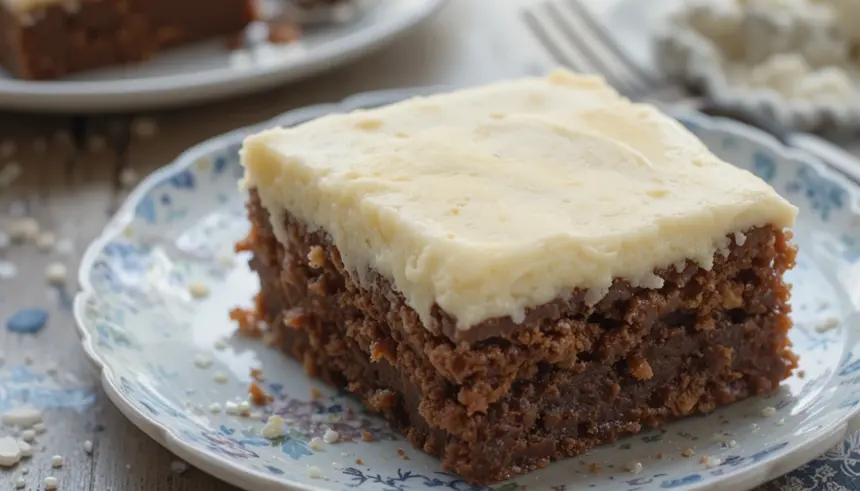
- While they cool, whip up the frosting: Beat the softened butter until creamy. Gradually add the buttermilk, powdered sugar, cocoa powder, and vanilla, beating until smooth and delicious.
- Once cooled, frost those bad boys generously.
Common Brownie Blunders to Avoid
- Overbaking: This is the cardinal sin. Dry brownies are sad brownies. Keep an eye on them!
- Under-mixing: You want everything incorporated, but don’t go all Hulk Smash on the batter.
- Not greasing the pan: Unless you enjoy chiseling brownies out of metal, don’t skip this step.
- Using old baking soda: It won’t give your brownies that little lift they need.
Swaps & Shenanigans (When You’re Feeling Adventurous)
- No buttermilk? No problem! Just add 1 tablespoon of white vinegar or lemon juice to 1 cup of milk and let it sit for 5-10 minutes. It’s like magic!
- Dark chocolate vs. milk chocolate chips? Go with what you love! Dark chocolate gives it a richer flavor, while milk chocolate makes it even sweeter.
- Nuts? If you’re a nut person, feel free to toss in some chopped walnuts or pecans.
FAQ: Your Burning Brownie Questions Answered
Q: Can I make these ahead of time?
A: Absolutely! They actually taste even better the next day. Just store them in an airtight container at room temperature.
Q: My frosting is too thin/thick. Help!
A: If it’s too thin, add more powdered sugar, a tablespoon at a time. Too thick? A splash more buttermilk or milk should do the trick.
Q: Can I use a different pan size?
A: You can, but you’ll need to adjust the baking time. A smaller pan will mean thicker brownies and longer baking, while a larger pan will result in thinner brownies that bake faster.
Q: Is it really necessary to let them cool completely?
A: For the best texture and clean slicing, yes! Warm brownies are delicious, but they’re also gooey and prone to crumbling. Patience, young grasshopper.
Q: Can I freeze these?
A: You bet! Wrap them tightly, and they’ll keep for a couple of months. Just thaw them at room temperature when you’re ready for a brownie fix.
Q: I don’t have buttermilk. Can I skip it?
A: You *could*, but then they wouldn’t be *buttermilk* brownies, would they? 😉 But seriously, the buttermilk makes them extra moist and tender. It’s worth the little effort to make your own substitute if you don’t have it!
Go Forth and Bake!
There you have it! Your ticket to brownie nirvana. These buttermilk brownies are seriously easy and incredibly satisfying. Now go forth and bake these bad boys. Impress your friends, your family, or just yourself. You deserve it. Happy baking!

