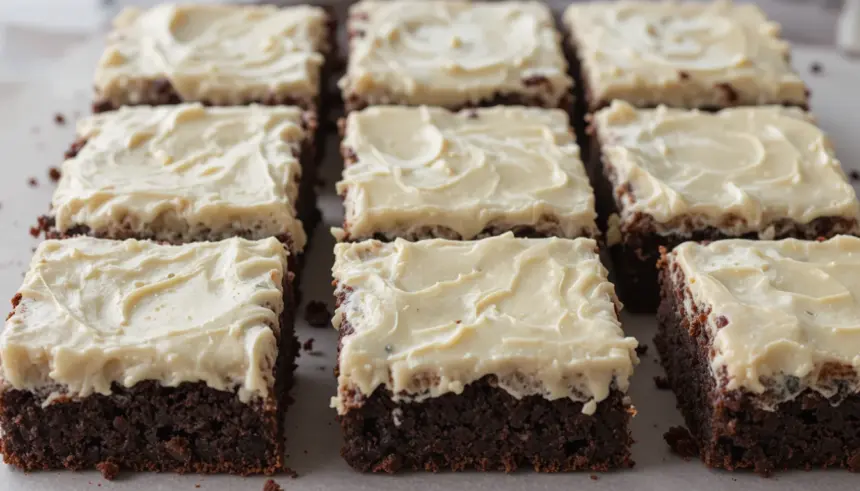
So, you’ve got that undeniable, can’t-shake-it craving for something fudgy, chocolatey, and downright delicious, but the thought of embarking on a culinary expedition that requires a map and a Sherpa is just… too much, right? Well, my friend, you’ve landed in the right spot. We’re talking about homemade brownies, people. The kind that make you question all your life choices that didn’t involve more brownies. And because we’re not savages, we’re topping them with frosting. Buckle up, buttercup, it’s going to be a deliciously easy ride.
Why This Recipe is Awesome
Honestly, this recipe is so straightforward, I’m pretty sure my cat could follow it (if he had opposable thumbs and an interest in baked goods, which, let’s be real, he probably does). We’re talking rich, chewy, intensely chocolatey brownies that bake up like a dream. No weird ingredients, no complicated techniques. Plus, the frosting? It’s the cherry on top of your chocolate sundae of happiness. It’s practically impossible to mess up, so even if your kitchen skills are currently limited to boiling water and ordering takeout, you’ve got this.
Ingredients You’ll Need
- Unsalted butter: The good stuff. Don’t skimp! We need 1 cup (2 sticks), melted.
- Granulated sugar: For sweetness that sings. 2 cups, because life is short and sugar makes it better.
- Eggs: Large ones, 4 to be exact. These are the magic binders.
- Vanilla extract: A splash of pure deliciousness. 2 teaspoons.
- All-purpose flour: Our structural hero. 1 cup. Don’t go crazy with it!
- Unsweetened cocoa powder: This is where the chocolate magic happens. 3/4 cup. Use the good stuff if you can.
- Salt: A pinch to make everything pop. 1/2 teaspoon.
- Chocolate chips: Optional, but highly, *highly* recommended. 1 cup of your favorites (dark, milk, semi-sweet – go wild!).
For the Frosting (because we’re extra like that):
- Powdered sugar: The fluffy foundation. 2 cups.
- Unsweetened cocoa powder: More chocolate! 1/2 cup.
- Melted butter: For that silky smooth texture. 1/4 cup.
- Milk or cream: To get the perfect consistency. Start with 2 tablespoons, add more if needed.
- Vanilla extract: Just a hint. 1 teaspoon.
Step-by-Step Instructions
- Preheat your oven to a toasty 350°F (175°C). Grease and flour a 9×13 inch baking pan, or line it with parchment paper for extra brownie-retrieval ease.
- In a large bowl, whisk together the melted butter and sugar until they look like a harmonious, sweet union.
- Beat in the eggs, one at a time, until fully incorporated. Then, stir in the vanilla. Smells good already, right?
- In a separate, smaller bowl, whisk together the flour, cocoa powder, and salt. This is your dry ingredient squad.
- Gradually add the dry ingredients to the wet ingredients, mixing until *just* combined. Overmixing is the enemy of chewy brownies, so be gentle!
- If you’re adding chocolate chips, fold them in now. Admire your beautiful brownie batter.
- Pour the batter into your prepared pan and spread it out evenly. Don’t leave any batter hiding in the bowl.
- Bake for 25-35 minutes, or until a toothpick inserted into the center comes out with a few moist crumbs attached (not wet batter!). Don’t overbake, or you’ll cry.
- Let the brownies cool completely in the pan before you even *think* about frosting them. Patience, my friend.
- While the brownies are cooling (or if you’re impatient like me, just whip it up!), make the frosting. In a medium bowl, whisk together the powdered sugar and cocoa powder.
- Add the melted butter, 2 tablespoons of milk/cream, and vanilla. Whisk until smooth and creamy. If it’s too thick, add more milk/cream a teaspoon at a time until it’s spreadable.
- Once the brownies are cool, spread that glorious frosting all over them.
- Cut into squares and try not to eat the entire pan in one sitting. Or do. I won’t judge.
Common Mistakes to Avoid
- Underbaking/Overbaking: This is brownie critical. Too little time and you have raw goo; too much time and they’re dry and sad. Aim for that toothpick test perfection!
- Overmixing the Batter: Seriously, **stop when the flour is just incorporated**. Overmixing develops gluten, which leads to tough brownies. Nobody wants a tough brownie.
- Not Letting Them Cool: I know, I know, the siren song of warm brownies is strong. But trying to frost warm brownies is like trying to hug a cactus – messy and painful.
- Using Low-Quality Cocoa Powder: This is a flavor game-changer. If you can, invest in a good unsweetened cocoa powder. It makes a world of difference!
Alternatives & Substitutions
Feeling a little adventurous? Or maybe you’re missing an ingredient? No biggie!
- Butter: Margarine can work in a pinch, but IMO, butter just tastes better and gives you that superior chew.
- Chocolate Chips: Feel free to swap them for chopped nuts (walnuts or pecans are divine!), M&Ms, or even a swirl of peanut butter.
- Milk/Cream for Frosting: Heavy cream will give you the richest frosting, but whole milk is perfectly fine. Even a splash of almond or oat milk could work.
- No Cocoa Powder for Frosting? You can skip the cocoa powder and make a vanilla buttercream frosting instead. Just omit the cocoa and maybe add a bit more powdered sugar and vanilla.
FAQ (Frequently Asked Questions)
Q: Can I make these gluten-free?
A: Yep! Just swap out the all-purpose flour for a good quality gluten-free all-purpose baking blend. You might need to adjust the liquid slightly, but generally, it’s a pretty good swap.
Q: My brownies came out cakey, not fudgy. What did I do wrong?
A: Usually, this is due to too much flour, overmixing, or overbaking. Next time, try to be more gentle with the flour and don’t let them stay in the oven a minute too long!
Q: Can I use melted chocolate instead of cocoa powder?
A: You *can*, but it changes the texture significantly. For this recipe as written, stick to the cocoa powder. If you want to use melted chocolate, you’ll need a different recipe designed for it.
Q: How long will these last?
A: In an airtight container at room temperature, they’re usually good for 3-4 days. If it’s super warm where you are, the fridge is your friend. They actually taste amazing cold!
Q: Can I freeze these?
A: Absolutely! Wrap them well in plastic wrap and then foil. They freeze beautifully for up to 3 months. Just thaw them on the counter.
Q: What’s the deal with the toothpick test?
A: It’s your brownie savior! You want it to come out with moist crumbs clinging to it. If it’s bone dry, you’ve gone too far. If it’s dripping with batter, it needs more time. It’s a delicate balance, like life itself.
Final Thoughts
There you have it! Your ticket to brownie bliss. Whether you’re baking these for a crowd, a significant other, or just for your own glorious self (no judgment here!), they’re guaranteed to bring smiles and satisfied sighs. So go forth, bake with joy, and remember: life is too short for mediocre brownies. Happy baking, you magnificent dessert artist!
