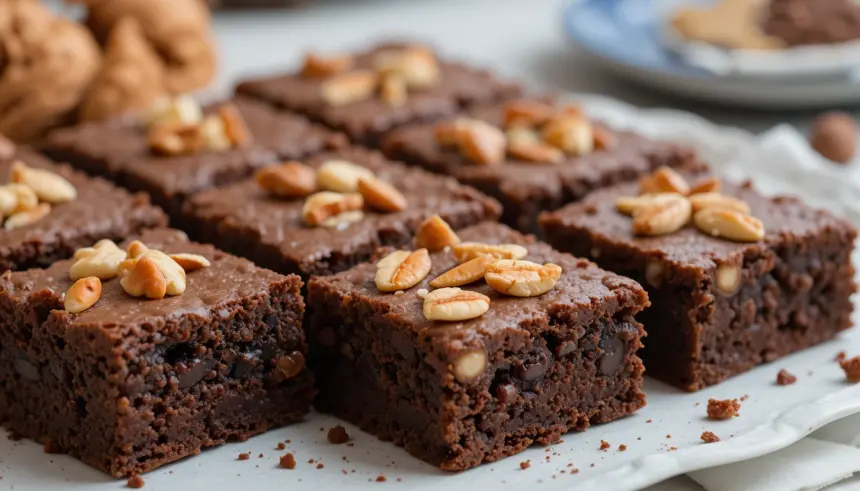
So you’re craving something fudgy, chocolatey, and with that delightful little crunch from nuts, but also, let’s be real, you don’t want to spend half your day in the kitchen? My friend, you’ve come to the right place. We’re diving headfirst into the glorious world of brownies with nuts, and trust me, it’s a delicious rabbit hole you’ll be happy to get lost in.
Why This Recipe is Awesome (Seriously)
Okay, let’s talk turkey. Why *this* brownie recipe? Because it’s ridiculously easy, tastes like it came from a fancy bakery (shhh, I won’t tell if you don’t), and it satisfies that primal urge for pure, unadulterated chocolate goodness. Plus, nuts! They’re like the tiny, crunchy cheerleaders of the brownie world, adding texture and flavor that just makes everything better. It’s practically idiot-proof. I’ve even managed not to burn them, and that’s saying something.
Ingredients You’ll Need (Don’t Freak Out)
- Unsalted Butter: About 1 cup (that’s 2 sticks, for those who prefer real-world measurements).
- Granulated Sugar: 1 3/4 cups. Yes, it’s a lot. Embrace it.
- Eggs: 3 large ones. No, they don’t need to be organic, just not *ancient*.
- Vanilla Extract: 1 teaspoon. The magic potion for all baked goods.
- All-Purpose Flour: 1 cup. Just your regular, run-of-the-mill flour.
- Unsweetened Cocoa Powder: 1/2 cup. Get the good stuff if you can, it makes a difference!
- Salt: 1/2 teaspoon. To balance all that sweetness.
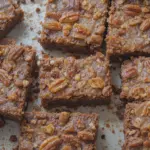
- Nuts: 1 cup, chopped. Walnuts or pecans are classic, but honestly, use whatever nuts you have lurking in your pantry. Almonds? Go for it!
Step-by-Step Instructions (You Got This!)
- Preheat and Prep: First things first, crank that oven up to 350°F (175°C). Then, grease and flour an 8×8 inch baking pan, or line it with parchment paper. This is crucial for easy brownie removal – nobody likes a stuck brownie.
- Melt & Mix (The Wet Stuff): In a microwave-safe bowl (or a saucepan if you’re feeling fancy), melt your butter. Once melted, stir in the sugar until it’s nicely combined. Beat in the eggs one at a time, then stir in that lovely vanilla extract.
- Dry Ingredients Unite: In a separate bowl, whisk together your flour, cocoa powder, and salt. This ensures no lumpy cocoa surprises in your finished brownies.
- Combine and Conquer: Gently fold the dry ingredients into the wet ingredients until *just* combined. Overmixing is the enemy here, folks! We want tender brownies, not hockey pucks.
- Nutty Goodness: Now for the fun part! Stir in your chopped nuts. Give it a good mix so they’re distributed evenly.
- Bake Away: Pour the batter into your prepared pan and spread it out evenly. Pop it in the oven and bake for about 25-30 minutes. You’re looking for the edges to be set and a toothpick inserted into the center to come out with moist crumbs attached (not wet batter!).
- Cool Down (The Hard Part): This is where patience is a virtue. Let those brownies cool in the pan for at least 15-20 minutes before attempting to cut them. Warm brownies are delicious, but they’re also a crumbly mess. Trust me on this.
Common Mistakes to Avoid (Don’t Be That Person)
- Skipping the Preheat: Seriously, the oven needs to be at the right temperature from the start. Don’t even think about putting those brownies in a cold oven.
- Overmixing the Batter: I know, I know, you’re excited. But overmixing develops gluten, which leads to tough, dry brownies. Gentle folding is key.
- Underbaking (or Overbaking!): Underbaked brownies will be gooey and delicious, but potentially a bit *too* gooey. Overbaked brownies? Dry, crumbly sadness. Watch for those moist crumbs!
- Cutting Them Too Soon: We already covered this, but it bears repeating. Patience, grasshopper!
Alternatives & Substitutions (Get Creative!)
Look, I love a classic walnut or pecan, but who says we have to stick to tradition?
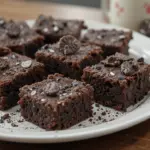
- Nuts: Feeling adventurous? Try macadamia nuts for a tropical vibe, or even some salty pistachios for a sweet-and-salty kick. If nuts aren’t your jam, just omit them or swap them for chocolate chips (mini or regular!).
- Cocoa Powder: If you only have Dutch-processed cocoa, go for it! It might make your brownies a bit darker and richer.
- Butter: Margarine can technically work, but IMO, real butter just tastes better and gives you that superior fudgy texture. Your call, but my heart (and taste buds) say butter.
FAQ (Your Burning Questions Answered)
Q: Can I use store-bought brownie mix?
A: Of course! But where’s the fun in that? This recipe is so easy, you might as well make it from scratch. Plus, you control the nut situation!
Q: My brownies look a little shiny on top. Is that normal?
A: Yup! That “fudgy crust” is a sign of a well-made brownie. It happens when the sugar caramelizes on top. It’s a good thing!
Q: How long do these brownies last?
A: If they last more than a day, you’re a stronger person than I am. Store them in an airtight container at room temperature for up to 3-4 days. They actually get fudgier with time!
Q: Can I make these dairy-free?
A: You can try using a dairy-free butter substitute and a dairy-free milk alternative. Just be aware that the texture might change slightly.
Q: What if I don’t have enough nuts?
A: Less nuts is totally fine! Or, fill the gap with more chocolate chips. Problem solved!
Final Thoughts (Go Forth and Bake!)
And there you have it! A simple, delicious, and totally achievable brownie recipe that’s guaranteed to be a crowd-pleaser (even if the crowd is just you and your Netflix queue). Don’t be afraid to experiment and make them your own. Now go forth and bake something amazing. You’ve earned those brownies!
