So you’re craving something ridiculously delicious but also, let’s be real, a little bit extra? You want that “wow” factor without the existential dread of a multi-day baking project. Well, my friend, you’ve come to the right place! We’re diving headfirst into the glorious world of Ice Cream Cake with Chocolate Decorations. Forget those sad, store-bought tubs; we’re about to create a masterpiece.
Why This Recipe is Awesome
Honestly, what’s not to love? It’s ice cream. It’s cake. It’s *decorated* with CHOCOLATE. It’s basically a party in your mouth. The best part? It’s surprisingly simple. We’re talking “I can totally do this after a long day of adulting” simple. Plus, it’s a total crowd-pleaser. Even your pickiest eater will be begging for seconds. And if you mess up a little? No one will ever know because, well, it’s ice cream and chocolate. It’s pretty forgiving, IMO.
Ingredients You’ll Need
- Your favorite ice cream flavors: Go wild! A classic combo like chocolate and vanilla is a safe bet, but why not get adventurous with mint chip and strawberry swirl? Let’s say about 1.5 quarts total.
- Cake (store-bought or homemade): A plain ol’ pound cake or sponge cake works like a charm. One 9-inch round cake will do. No need to be a baking wizard here.
- Chocolate chips: Milk, dark, semi-sweet – whatever makes your heart sing. About a cup, maybe a bit more if you’re feeling extra decadent.
- Butter: Just a tablespoon or two for melting the chocolate.
- Optional sprinkles, candy pieces, or cookie crumbles: For that extra pizzazz! Because more is more, right?
Step-by-Step Instructions
- First things first, let’s get that cake ready. If you’re using a store-bought cake, give it a gentle slice horizontally so you have two layers. If you baked your own, cool it completely and then do the same. We want a nice, even surface.
- Now, for the ice cream. Let it soften *just* enough so it’s spreadable, but not melty soup. Think “soft-serve consistency.” If it gets too soft, pop it back in the freezer for a bit. Patience, grasshopper!
- Line your 9-inch cake pan (or springform pan, if you have one) with plastic wrap. This is your secret weapon for easy removal later. Trust me on this one.
- Place one cake layer at the bottom of the pan. Spread about half of your first ice cream flavor evenly over the cake. Make it pretty! Or don’t. It’s going to be covered anyway.
- Add the second cake layer on top. Now, spread the rest of your first ice cream flavor over that. Then, layer on your second ice cream flavor (or just more of the first if you’re feeling minimalist). Smooth it all out.
- Pop the whole glorious creation into the freezer. Let it freeze solid, which usually takes at least 4-6 hours, or overnight. This is the hardest part – the waiting.
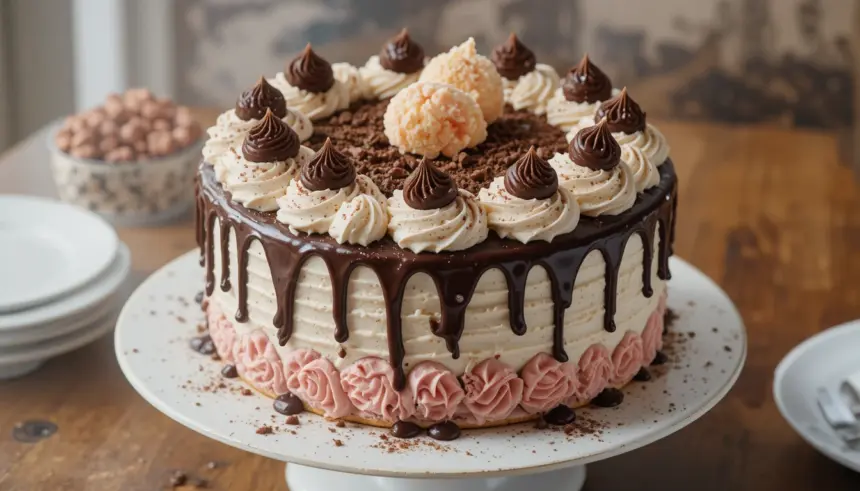
- Once your ice cream cake is rock solid, it’s time for the main event: chocolate decorations! Melt your chocolate chips with the butter in a microwave-safe bowl (in 30-second intervals, stirring in between) or over a double boiler. Get it smooth and glossy.
- Quickly unwrap your frozen cake masterpiece. Drizzle, drip, swirl – get creative with that melted chocolate! You can use a spoon, a piping bag (if you’re feeling fancy), or just go rogue. Add sprinkles, candy, or cookie crumbles while the chocolate is still wet.
- Return the cake to the freezer for at least another 30 minutes to let the chocolate decorations set. Then, let it sit at room temperature for about 5-10 minutes before slicing. This makes it easier to cut and serve without all the ice cream escaping.
Common Mistakes to Avoid
- Using ice cream that’s too soft: This is a recipe for a melty mess. Remember, we want spreadable, not soup.
- Not letting the cake freeze completely: Seriously, let it freeze solid. This is non-negotiable. Impatience here will be rewarded with a wobbly disaster.
- Trying to decorate a cake that’s too hard: If your cake is like a literal ice block, the chocolate might crack. A few minutes of thawing is your friend.
- Forgetting to line the pan: Unless you enjoy wrestling a frozen dessert out of a pan, don’t skip the plastic wrap.
Alternatives & Substitutions
Feeling like a rebel? Go for it! Instead of cake, try layers of crushed cookies (like Oreos or graham crackers) mixed with a little melted butter. Or maybe you don’t have two ice cream flavors? No sweat! Just double up on your favorite. For the chocolate decorations, you could also use a pre-made chocolate ganache or even melted candy melts. Whatever floats your boat, or freezes your cake, I guess!
FAQ
Can I make this ahead of time? Absolutely! This is the perfect make-ahead dessert. Just keep it frozen until you’re ready to dig in.
What if I don’t have a round cake pan? A square pan works just fine! Or, if you’re feeling super DIY, you can use a loaf pan for a more rectangular shape.
My chocolate decorations look messy. Is it ruined? Pfft, no way! “Rustic” is a culinary term, right? Embrace the imperfections. That’s part of its charm.
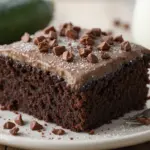
Can I use different types of cake? Yep! Brownies, chocolate cake, even red velvet – as long as they’re not too fragile and can stand up to the ice cream.
How do I slice it without it melting everywhere? A sharp knife dipped in hot water and then wiped dry works wonders. Slice it quickly and get it back in the freezer ASAP.
Is this a healthy dessert? Let’s just say it’s “joyfully indulgent.” We’re not aiming for kale smoothies here, my friend.
Final Thoughts
And there you have it! Your very own show-stopping, totally delicious ice cream cake. It’s a little bit of effort for a whole lotta reward. Now go impress someone – or yourself – with your new culinary skills. You’ve earned it! Happy scooping!
