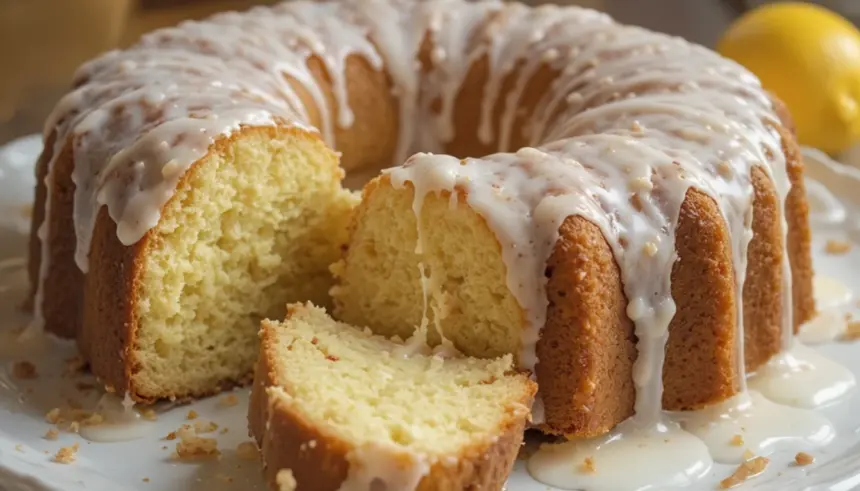
Lemon Pound Cake That’s Basically Sunshine in a Slice
So you’re craving something tasty but too lazy to spend forever in the kitchen, huh? Same. But what if I told you there’s a way to get that glorious, buttery, lemony goodness without breaking a sweat or calling your therapist? Enter: Lemon Pound Cake with a Lemon Glaze. This isn’t your grandma’s fussy, three-day cake project. This is the “I want cake, like, now” cake. And guess what? It’s ridiculously easy.
Why This Recipe is Awesome
Honestly, this recipe is a lifesaver. It’s practically foolproof, meaning even if your kitchen skills are usually limited to microwaving leftovers, you can totally nail this. It’s rich, it’s moist, and the lemon flavor is just bright enough to make you feel fancy without being overpowering. Plus, the glaze? It’s like a party on top of an already awesome party. It’s the kind of cake that makes people go, “Wow, you made this?” and you get to smugly reply, “Yep, and it was easy peasy.”
Ingredients You’ll Need
* For the Cake:
* 1 ½ cups (3 sticks) unsalted butter, softened (Don’t even think about margarine, we’re aiming for delicious here, not disappointment.)
* 3 cups granulated sugar (Yes, it’s a lot, but it’s POUND cake. Embrace the pound!)
* 6 large eggs (Room temperature, people. They blend better, trust me.)
* 1 tablespoon vanilla extract (The good stuff, if you have it.)
* 1 tablespoon lemon zest (From about 2-3 lemons. Get all those fragrant little oils out!)
* ½ cup fresh lemon juice (For that zesty kick. No store-bought stuff here!)
* 3 cups all-purpose flour (Sifted, because lumps are the enemy.)
* ½ teaspoon baking powder (Just a little lift, no need to go overboard.)
* ½ teaspoon salt (Brings out all the flavors, like a tiny flavor conductor.)
* For the Lemon Glaze:
* 1 ½ cups powdered sugar (Sifted, to avoid any grainy surprises.)
* 2-3 tablespoons fresh lemon juice (Adjust for your desired drizzling consistency.)
Step-by-Step Instructions
1. Preheat your oven to **325°F (160°C)**. Butter and flour a 9×5 inch loaf pan. This is crucial, otherwise, your masterpiece will stick.
2. In a large bowl, **cream the butter and sugar together** until light and fluffy. We’re talking 3-5 minutes with an electric mixer. This step is where the magic starts.
3. **Beat in the eggs one at a time**, mixing well after each addition. Then, stir in the vanilla extract, lemon zest, and lemon juice.
4. In a separate bowl, **whisk together the flour, baking powder, and salt**.
5. Gradually **add the dry ingredients to the wet ingredients**, mixing on low speed until just combined. Don’t overmix; we don’t want tough cake!
6. Pour the batter into your prepared loaf pan and **smooth the top**.
7. **Bake for 60-75 minutes**, or until a toothpick inserted into the center comes out clean. The smell will be heavenly, so try not to eat it straight from the oven.
8. Let the cake **cool in the pan for 10-15 minutes** before inverting it onto a wire rack to cool completely. Patience, grasshopper.
9. While the cake cools, **make the glaze**: Whisk together the powdered sugar and lemon juice until smooth and drizzle-able.
10. Once the cake is totally cool (seriously, wait!), **drizzle the glaze** all over the top. Let it set for a few minutes, then slice and enjoy your glorious creation!
Common Mistakes to Avoid
* **Using cold butter or eggs:** This is a recipe for a dense, sad cake. Room temperature is your friend.
* **Overmixing the batter:** Once the flour goes in, mix *just* until combined. Overworking the gluten makes for a tough cake. Nobody wants that.
* **Not preheating the oven:** Thinking you can sneak it in? Nope. It needs to be hot and ready.
* **Opening the oven door too early:** Resist the urge! Let it bake in peace. You’ll only mess with its temperature and potentially cause it to sink.
* **Glazing a warm cake:** The glaze will melt into a sad puddle instead of a pretty drizzle. Patience, my friend!
Alternatives & Substitutions
* **Orange Glaze:** Not a huge lemon fan? Swap the lemon juice for orange juice and zest in both the cake and the glaze. Orange pound cake is delicious too!
* **Poppy Seeds:** Add a couple of tablespoons of poppy seeds to the dry ingredients for a little textural surprise and a classic lemon-poppy seed combo.
* **Boozy Glaze:** Feeling adventurous? Add a tablespoon or two of limoncello or a good quality vodka to the glaze. Just saying. 😉
FAQ (Frequently Asked Questions)
* Can I use a different pan, like a bundt pan?
Sure thing! If you use a bundt pan, baking time might change. Keep an eye on it and use the toothpick test. It’ll probably need a bit longer, so don’t panic if it’s not done at the 75-minute mark.
* My cake is a little dry. What did I do wrong?
Likely suspects: overbaking or overmixing. Next time, **bake it for the minimum time** and check with a toothpick. And remember to mix the flour in *gently*.
* Can I make this gluten-free?
You can try using a good quality gluten-free all-purpose flour blend. Results can vary, but it’s worth a shot! You might need to adjust liquid slightly.
* How long does this cake last?
Well, if it lasts more than a day or two, you’re a saint! Stored in an airtight container at room temperature, it should be good for about **3-4 days**.
* Why is my glaze too thin/thick?
For a thinner glaze, add more lemon juice, a teaspoon at a time. For a thicker glaze, add more powdered sugar. It’s all about finding that perfect drizzling sweet spot.
* Can I freeze this cake?
Yes, you can! Wrap it well in plastic wrap and then foil. It should keep in the freezer for up to 2-3 months. Thaw at room temperature before glazing.
Final Thoughts
There you have it – a ridiculously easy, incredibly delicious Lemon Pound Cake that’s guaranteed to make your taste buds sing. It’s the perfect pick-me-up, the ideal dessert for unexpected guests, or just a well-deserved treat for yourself. So go ahead, preheat that oven, grab your lemons, and whip up some sunshine. You’ve got this! Now go impress someone—or yourself—with your new culinary skills. You’ve earned it!


