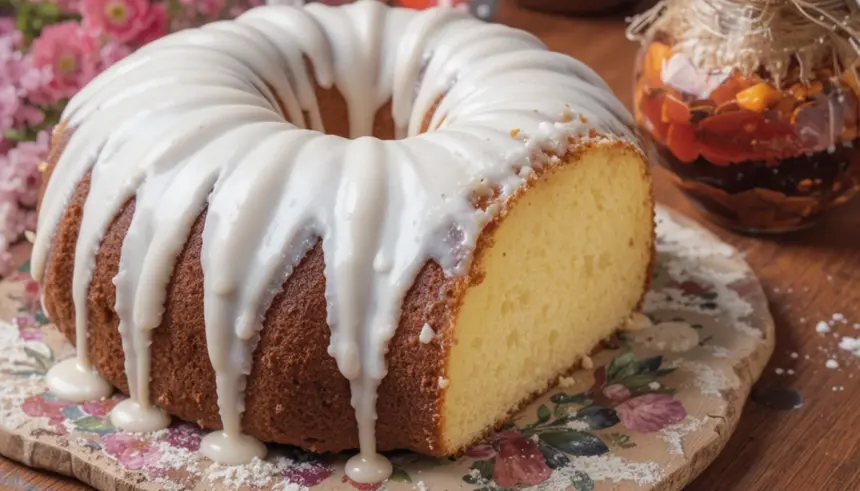
Sour Cream Pound Cake: Because Life’s Too Short for Boring Dessert!
So, you’re craving something undeniably delicious but, let’s be honest, a little intimidated by those fancy-pants cake recipes? Or maybe you just ate that entire bag of chips and now feel a sudden urge to repent with sugar? Whatever your vibe, I get it. And I’ve got the perfect solution: this ridiculously easy, ridiculously good Sour Cream Pound Cake with a dreamy Vanilla Glaze. It’s basically a hug in cake form, and who doesn’t need more hugs?
Why This Recipe is Awesome (Like, Seriously Awesome)
Let’s cut to the chase. This cake is amazing because:
- It’s practically foolproof. I’m talking “I once burned water” level of kitchen ineptitude and I nailed this.
- The sour cream makes it unbelievably moist and tender. No dry, sad cake crumbs here, my friends.
- The vanilla glaze is the perfect sweet kiss to top it all off. Simple, elegant, and oh-so-addictive.
- It uses ingredients you probably already have lurking in your pantry. No need for a 3-hour trek to a specialty store.
Ingredients You’ll Need (Don’t Panic, It’s Not That Scary)
Gather ’round, my baking buddies! Here’s what you need to wrangle:
For the Cake:
- 3 cups all-purpose flour (the regular kind, not the gluten-free magic dust unless you *really* want to test me)
- 1 ½ teaspoons baking powder (this little guy makes it rise like your spirits after a good nap)
- ½ teaspoon salt (don’t skip this, it makes the sweet stuff sing)
- 1 cup (2 sticks) unsalted butter, softened (leave it out on the counter, like a good friend)
- 2 ½ cups granulated sugar (yes, it’s a lot, but we’re making pound cake, not a diet muffin)
- 5 large eggs (room temperature, please and thank you)
- 1 teaspoon vanilla extract (the good stuff, if you have it)
- 1 cup full-fat sour cream (the key player! Don’t use light, it’s just not the same)
For the Vanilla Glaze:
- 2 cups powdered sugar (sifted if you’re feeling fancy, but I usually don’t bother)
- 3-4 tablespoons milk (or heavy cream if you’re feeling extra decadent)
- 1 teaspoon vanilla extract
Step-by-Step Instructions (Let’s Get This Party Started!)
1. Preheat your oven to **325°F (160°C)**. Butter and flour a **9×5 inch loaf pan**. This is your cake’s happy place.
2. In a medium bowl, whisk together the flour, baking powder, and salt. Set aside. This is your dry squad.
3. In a large bowl, beat the softened butter and granulated sugar together until light and fluffy. Imagine you’re whipping clouds.
4. Add the eggs, one at a time, beating well after each addition. Then, beat in the vanilla extract.
5. Reduce your mixer to low speed and **gradually add the dry ingredients alternately with the sour cream**, beginning and ending with the dry ingredients. Mix until *just* combined. Don’t overmix, or your cake will get tough. Nobody likes a tough cake.
6. Pour the batter into your prepared pan and spread it evenly. Give the pan a gentle tap on the counter to release any air bubbles.
7. Bake for **60-75 minutes**, or until a wooden skewer inserted into the center comes out clean. **Keep an eye on it!** Ovens can be dramatic.
8. Let the cake cool in the pan for **10-15 minutes** before inverting it onto a wire rack to cool completely. Patience, grasshopper!
9. While the cake cools, make the glaze: Whisk together the powdered sugar, milk, and vanilla extract until smooth. Add more milk a tablespoon at a time if it’s too thick, or more powdered sugar if it’s too thin. You’re the glaze boss!
10. Once the cake is *completely* cool (seriously, don’t rush this!), drizzle or spread the glaze over the top. Let it set for a bit, then slice and devour.
Common Mistakes to Avoid (Because We’ve All Been There)
Let’s be honest, baking isn’t always sunshine and rainbows. Here are a few pitfalls to dodge:
- Using cold butter or eggs: This will make your batter lumpy and sad. Soften that butter!
- Overmixing the batter: This leads to a tough, dense cake. Mix until *just* combined.
- Opening the oven door too early: Resist the urge! Your cake will sink like a deflated balloon.
- Not cooling the cake completely before glazing: The glaze will melt off into a puddle of sugary tears. Patience!
Alternatives & Substitutions (Because Life is Full of Choices)
* **No sour cream?** Full-fat Greek yogurt is your next best friend. It’s a pretty close swap and works like a charm.
* **Want more flavor?** Add a tablespoon of lemon zest to the batter for a bright, zingy twist. It’s surprisingly good!
* **Don’t have a loaf pan?** A bundt pan or a 9×13 inch baking dish will also work, but you might need to adjust the baking time. Just keep an eye on it.
* **Glaze alternatives?** A simple dusting of powdered sugar is always an option if you’re feeling minimalist. Or, melt some chocolate and drizzle that on. You do you!
FAQ (Your Burning Questions, Answered with Sass)
* Can I use margarine instead of butter? Well, technically yes, but IMO, you’re sacrificing a lot of flavor and texture. Butter is king for a reason, people!
* My cake sunk in the middle! What did I do wrong? Most likely, you opened the oven door too soon, or your oven temperature was a bit wonky. Next time, resist the urge to peek!
* How long will this cake last? In an airtight container at room temperature, it should be good for about 3-4 days. But let’s be real, it’ll be gone much sooner.
* Can I freeze this cake? Absolutely! Wrap it well in plastic wrap and then foil. It should last in the freezer for up to 3 months. Thaw it at room temperature.
* Why is it called “pound cake”? Legend has it, it was originally made with a pound of butter, a pound of sugar, a pound of eggs, and a pound of flour. Talk about a workout!
* Can I make cupcakes with this recipe? Yes! Bake them for about 20-25 minutes, or until a toothpick comes out clean. Just don’t forget to glaze them!
Final Thoughts (Go Forth and Bake!)
See? Not so scary, right? This Sour Cream Pound Cake is your new best friend for those “I need cake, like, yesterday” moments. It’s simple, comforting, and guaranteed to bring smiles. So, grab your apron (or don’t, I won’t judge), put on your favorite tunes, and get baking. Now go impress someone—or yourself—with your new culinary skills. You’ve earned it!

