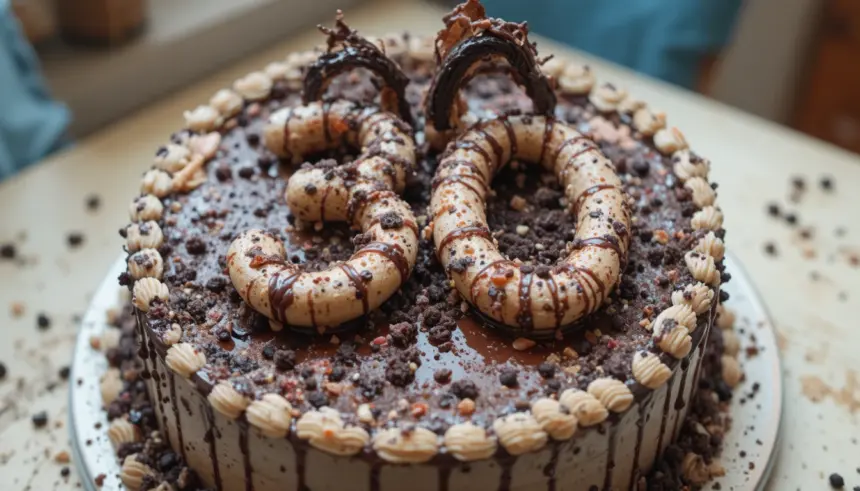
So, you’ve hit the big 3-0? Or maybe you’re baking for someone who has, and you’re looking for a cake that screams “I’m fabulous and I know it, but also I might need a nap.” Well, my friend, you’ve landed in the right digital kitchen. Forget those fussy, complicated cakes that require a degree in pastry engineering. We’re talking about a cake that’s delicious, a little bit decadent, and surprisingly, *actually* doable. Let’s get this birthday party started, shall we?
Why This Recipe is Awesome
Okay, so why should you ditch all those other Pinterest-perfect recipes and dive headfirst into this one? Simple. It’s ridiculously forgiving. Seriously, it’s the culinary equivalent of a comfy pair of sweatpants – reliable and always there for you. It tastes way more impressive than the effort you’ll put in (shhh, it’s our secret!), and it’s adaptable enough to suit your specific brand of fabulousness. Plus, it’s guaranteed to make anyone feel like they’re aging like a fine wine, not a bruised banana.
Ingredients You’ll Need
- All-purpose flour: The backbone of our operation. Don’t overthink it, just grab a bag.
- Granulated sugar: For that sweet, sweet life experience.
- Unsweetened cocoa powder: Because, let’s be honest, chocolate makes everything better. And if you disagree, you’re reading the wrong recipe.
- Baking soda & Baking powder: The dynamic duo that makes things rise and shine.
- Salt: Just a pinch to wake up all those flavors.
- Eggs: Room temperature, ideally. But hey, if they’re still cold, just cross your fingers.
- Milk (any kind!): Dairy, almond, oat – whatever floats your delicious boat.
- Vegetable oil: For that moist, tender crumb. Butter can be finicky; oil is your chill friend.
- Vanilla extract: The “essence of happiness,” IMO.
- Hot water or hot brewed coffee: This is the secret sauce for a super moist, intense chocolate flavor. Coffee is optional but highly recommended if you’re feeling brave.
- Your favorite frosting: Store-bought is totally fine. No judgment here.
Step-by-Step Instructions
- Preheat your oven to a nice, toasty 350°F (175°C). Grease and flour your cake pans like your life depends on it. We don’t want any cake drama.
- In a large bowl, whisk together your dry ingredients: flour, sugar, cocoa powder, baking soda, baking powder, and salt. Make sure it’s all nice and combined so you don’t end up with a pocket of baking soda surprise.
- In a separate, slightly smaller bowl, whisk together your wet ingredients: eggs, milk, oil, and vanilla extract. Give them a good swirl.
- Pour the wet ingredients into the dry ingredients and mix until just combined. Seriously, **don’t overmix**. A few lumps are fine; they add character.
- Carefully pour in the hot water or coffee. The batter will be thin, and that’s exactly what you want! It might look a little scary, but trust the process.
- Divide the batter evenly between your prepared pans. If you’re feeling fancy, use a kitchen scale. If not, just eyeball it and hope for the best.
- Bake for 30-35 minutes, or until a toothpick inserted into the center comes out clean. This is your moment of truth.
- Let the cakes cool in the pans for about 10-15 minutes before carefully inverting them onto a wire rack to cool completely. Patience, young padawan.
- Once cool, slather on your favorite frosting. Get wild with it. You’ve earned it.
Common Mistakes to Avoid
- Forgetting to preheat the oven: This is like showing up to a party in pajamas – just… no.
- Overmixing the batter: This results in a tough, sad cake. Gently does it!
- Opening the oven door too early: Let the cake do its thing without peeking constantly. The suspense is part of the fun, right?
- Not letting the cakes cool completely before frosting: Melty, sliding frosting is not a good look for anyone, especially on a birthday.
Alternatives & Substitutions
Feeling a little adventurous? Swap out the hot water for a shot of espresso to really amp up that chocolate flavor. If you’re not a huge chocolate fan (who are you?!), you can try a vanilla cake recipe, but honestly, this chocolate one is just *chef’s kiss*. For the frosting, a simple buttercream is classic, but a cream cheese frosting or even a decadent ganache would be divine. Your cake, your rules!
FAQ (Frequently Asked Questions)
Q: Can I make this into cupcakes?
A: Absolutely! Just reduce the baking time to about 20-25 minutes. They’re perfect for individual celebrations (or just sneaking one before anyone else sees).
Q: My batter looks super thin, is that normal?
A: YES! Totally normal. That hot liquid is your best friend for achieving ultimate moistness. Don’t panic!
Q: Can I use all-purpose flour if I only have self-rising?
A: Oof, this is tricky. Self-rising flour already has leavening agents, so your cake might get a bit too puffy and collapse. It’s best to stick to all-purpose if you can.
Q: What if I don’t have a stand mixer?
A: Hand mixer or even a sturdy whisk will do the job just fine. Get ready for a little arm workout – consider it part of your pre-birthday pampering.
Q: Can I make this gluten-free?
A: You *could* try with a good quality gluten-free flour blend, but results can vary wildly. For this specific recipe, I’d recommend sticking to the classic flour version unless you’re a GF baking pro.
Q: How long will this cake last?
A: Honestly? It rarely lasts more than a day or two in my house. But stored properly in an airtight container at room temperature, it should be good for about 3-4 days.
Final Thoughts
And there you have it! A birthday cake that’s more fun than a barrel of monkeys and easier to make than boiling water. Celebrate in style, eat too much cake, and don’t worry about a thing. Now go impress someone—or yourself—with your new culinary skills. You’ve earned it! Happy baking (and happy birthday)!

