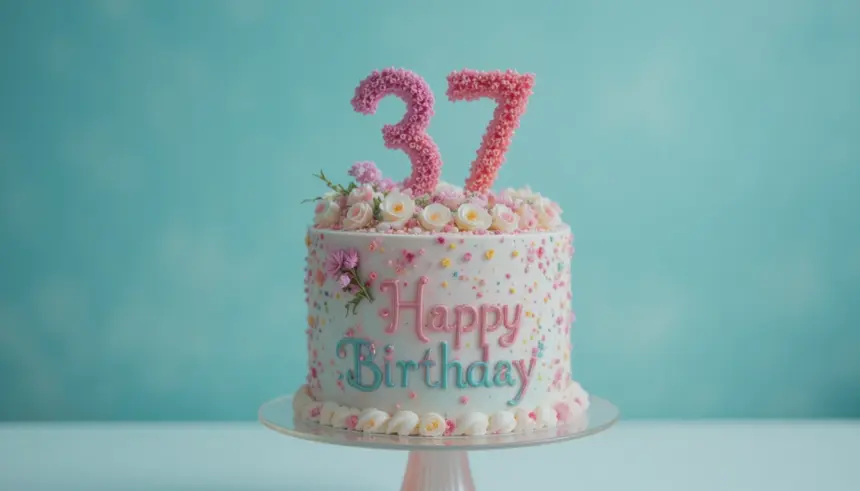
So, 37, huh? Not 21, not 30, but that glorious sweet spot where you know exactly what you want (and what you *don’t* want) in life… especially when it comes to cake. No more sad, supermarket sheet cakes or anything remotely resembling a child’s birthday party, honey. We’re making something that screams “I’m fabulous, I’m thriving, and I deserve this!” This isn’t just a cake; it’s an edible declaration of independence from bland bakes. And guess what? It’s surprisingly simple. Let’s get you baking something truly celebratory!
Why This Recipe is Awesome
Because it’s a showstopper without the show-off effort. This Raspberry Rose & White Chocolate Celebration Cake is shockingly easy to whip up, looks like you spent hours slaving away (you didn’t, *shhh*), and tastes like a dream. We’re talking delicate rose, tangy raspberry, and the sweet embrace of white chocolate. It’s sophisticated, fun, and totally foolproof – I mean, even *I* haven’t messed it up, and my kitchen disasters are legendary. Plus, it’s a cake that actually *feels* 37: confident, beautiful, and full of delicious layers. You’ll impress your friends, family, or, most importantly, yourself!
Ingredients You’ll Need
Get ready to gather your culinary arsenal! Here’s what you’ll need for this masterpiece. Nothing too fancy, promise!
- For the Cake:
- 2 ½ cups all-purpose flour (the basic stuff, no need to get spiritual)
- 1 ½ cups granulated sugar (sweetness for your sweet self)
- 2 teaspoons baking powder (our little lift-off secret)
- ½ teaspoon salt (because balance, darling)
- 1 cup (2 sticks) unsalted butter, softened (the real deal, no imposters!)
- 4 large eggs (your binding agents, literally)
- 1 cup whole milk (for that tender crumb)
- 1 teaspoon vanilla extract (because it just makes everything better)
- 1-2 teaspoons rosewater (optional, but trust me, it’s a game-changer for sophistication)
- 1 cup fresh raspberries (the tart little stars of our show)
- ½ cup white chocolate chips, roughly chopped (sweet little surprises)
- For the Cream Cheese Frosting:
- 1 (8-ounce) package cream cheese, softened (Philadelphia brand, IMO, makes the best frosting)
- ½ cup (1 stick) unsalted butter, softened
- 4-5 cups powdered sugar (sifted, unless you like lumpy frosting)
- 1 teaspoon vanilla extract
- 1-2 tablespoons milk or cream (to get that perfect spreadable consistency)
- For Garnish:
- Extra fresh raspberries
- Edible rose petals (totally optional, but super extra and beautiful!)
Step-by-Step Instructions
Alright, apron on, favorite playlist blasting? Let’s make some magic happen!
- Preheat & Prep: First things first, crank that oven to 350°F (175°C). Then, grease and flour two 8-inch round cake pans. Or, if you’re smart like me, line the bottoms with parchment paper. This prevents sticking and future meltdowns.
- Mix the Dry: In a medium bowl, whisk together the flour, granulated sugar, baking powder, and salt. Give it a good whisk, get all those ingredients acquainted.
- Cream the Wet (Part 1): In a large bowl (or stand mixer, if you’re feeling fancy), cream together the softened butter until light and fluffy. This takes about 2-3 minutes.
- Add Eggs: Beat in the eggs, one at a time, until fully incorporated. Scrape down the sides of the bowl after each addition to ensure everything gets mixed properly.
- Alternate Wet & Dry: Now, we’re going to add the dry ingredients and the milk/vanilla/rosewater mixture alternately to the butter/egg mixture. Start and end with the dry ingredients. So, add about a third of the dry, mix, then half the milk mixture, mix, another third of the dry, remaining milk, and finally the last of the dry. Don’t overmix! Stop as soon as it’s combined.
- Fold in the Goodies: Gently fold in the fresh raspberries and white chocolate chips. Be delicate, we don’t want raspberry mush!
- Bake Time! Divide the batter evenly between your prepared cake pans. Bake for 25-30 minutes, or until a wooden skewer inserted into the center comes out clean.
- Cool Down: Let the cakes cool in the pans for about 10 minutes before inverting them onto a wire rack to cool completely. Patience is a virtue here; attempting to frost warm cakes is a recipe for a sliding, gloopy mess.
- Whip up the Frosting: While the cakes are cooling, beat the softened cream cheese and butter together until smooth and creamy. Gradually add the powdered sugar, one cup at a time, beating until fluffy. Stir in the vanilla extract and a tablespoon or two of milk/cream until you reach your desired consistency.
- Assemble Your Masterpiece: Once the cakes are completely cool, place one layer on your serving plate. Spread a generous layer of frosting on top, and maybe scatter a few extra raspberries if you’re feeling extra. Place the second cake layer on top, then frost the top and sides of the entire cake.
- Garnish & Serve: Decorate with more fresh raspberries and those fancy edible rose petals if you grabbed some. Step back, admire your work, and then slice into that beauty!
Common Mistakes to Avoid
Listen, we all make mistakes. But these are the ones that will really rain on your parade, so let’s dodge ’em!
- Not Preheating the Oven: Rookie mistake! Your cakes won’t rise properly, and you’ll end up with dense hockey pucks instead of fluffy layers. Plan ahead!
- Overmixing the Batter: Once you add the flour, mix *just* until combined. Overmixing develops the gluten too much, leading to a tough, dry cake. Nobody wants a tough cake on their birthday, right?
- Opening the Oven Door Too Early: Resist the urge to peek! Opening the door lets cold air in, which can make your cake sink in the middle. Wait until at least 20 minutes in.
- Frosting a Warm Cake: I know, I know, you’re excited. But seriously, wait until those cakes are *completely* cool. Warm cake + frosting = sad, soupy frosting. Chill them if you’re impatient!
- Using Cold Butter/Cream Cheese: Softened means soft enough to easily dent with your finger, not melted. Cold ingredients don’t cream properly, and you’ll end up with lumpy frosting.
Alternatives & Substitutions
Feeling adventurous? Or maybe you just ran out of something vital. Here are some quick fixes and fun swaps:
- No Rosewater? No Problem! While the rosewater adds a lovely subtle floral note, if you don’t have it (or don’t fancy it), just omit it. The vanilla and raspberry will still shine through beautifully. You could also add a tiny dash of almond extract for a different flavor profile.
- Swap the Berries: Fresh strawberries, blueberries, or a mixed berry blend would be fantastic instead of raspberries.
- Dark Chocolate Lover? Not a fan of white chocolate? Feel free to swap it for semi-sweet or dark chocolate chips. It’ll give the cake a richer, deeper flavor.
- Different Frosting Vibe: If cream cheese frosting isn’t your jam, a classic vanilla buttercream would also be divine. Just swap out the cream cheese for more butter (usually a 1:1 ratio for powdered sugar to butter by weight, plus liquid).
- Gluten-Free Option: You can absolutely make this gluten-free! Just use a 1:1 gluten-free all-purpose flour blend (like Bob’s Red Mill or King Arthur) in place of regular flour.
FAQ (Frequently Asked Questions)
Got questions? I’ve got (mostly) witty answers!
- Can I make this cake ahead of time? Absolutely! You can bake the cake layers a day or two in advance. Store them tightly wrapped in plastic wrap at room temperature. The frosting can also be made a day ahead and stored in the fridge. Just let it come to room temperature and give it a good whip before frosting.
- Can I use margarine instead of butter? Well, technically yes, but why hurt your soul (and your cake’s flavor) like that? For the best taste and texture, stick to real butter. Seriously, it’s worth it.
- What if I don’t have buttermilk? No buttermilk needed here, but if a recipe ever calls for it and you don’t have it, you can make your own! Just add 1 tablespoon of lemon juice or white vinegar to 1 cup of regular milk, stir, and let it sit for 5-10 minutes until it curdles slightly.
- How do I store leftover cake? Keep it covered tightly in an airtight container in the refrigerator for up to 3-4 days. It’s especially important for cream cheese frosting!
- Can I freeze this cake? Yes! Unfrosted cake layers can be wrapped tightly in plastic wrap and then foil, and frozen for up to 2-3 months. Thaw in the fridge overnight before frosting. A frosted cake can also be frozen, but it’s best to freeze individual slices for easier thawing.
- My frosting is too thin/thick! Help! Too thin? Add more powdered sugar, a tablespoon at a time, beating after each addition. Too thick? Add milk or cream, a teaspoon at a time, until you reach your desired consistency.
- Do I *really* need to sift the powdered sugar? FYI, for truly smooth, lump-free frosting, yes. If you don’t mind a few sugar crystals, live dangerously! But a quick sift makes a world of difference.
Final Thoughts
And there you have it, superstar baker! You’ve just created a truly exceptional 37th birthday cake. Whether you’re making it for yourself, a bestie, or someone equally fabulous, this cake is a celebration in every single bite. So go ahead, impress someone – or yourself – with your new culinary skills. You’ve earned it! Now, who’s ready for a slice?


