Ever stared at a naked cake, feeling the immense pressure of its birthday destiny, but your inner artist is currently on vacation? Yeah, me too. We all want to whip up something that looks like it came straight out of a fancy bakery, without actually, you know, becoming a professional baker for the day. Good news: you don’t have to! This isn’t about perfectly piped rosettes or mirror glazes. This is about making a birthday cake look celebratory, delicious, and undeniably *yours* with minimal fuss and maximum fun. So, put down the fancy piping tips and grab your chill vibes, because we’re about to make decorating easy peasy, lemon squeezy!
Why This Recipe is Awesome
Okay, “recipe” might be a strong word here. Think of it more as a “guide to not stressing out about cake decoration.” This isn’t just easy; it’s “I woke up five minutes ago and still made this look fabulous” easy. Seriously. It’s perfect for those moments when you want to impress without, you know, actually *trying* too hard. No special skills needed, no fancy tools required, and absolutely zero judgment for using store-bought everything. In fact, we encourage it! This approach embraces the wonderfully imperfect, the delightfully delicious, and the sheer joy of celebrating without spending three hours agonizing over a fondant rose that will inevitably droop. It’s idiot-proof, even I didn’t mess it up (and that’s saying something!).
Ingredients You’ll Need
Get ready for the simplest “ingredient” list ever. These aren’t things you cook with; they’re your party-ready cake’s best friends!
- Your Pre-Baked Cake: This is the star of the show. Round, square, sheet cake – doesn’t matter. Just make sure it’s fully cooled. Like, completely. This is super important!
- Frosting (Store-Bought is Your BFF): Grab a tub or two of your favorite flavor. Vanilla, chocolate, cream cheese – whatever floats your boat. We’re going for convenience here, folks.
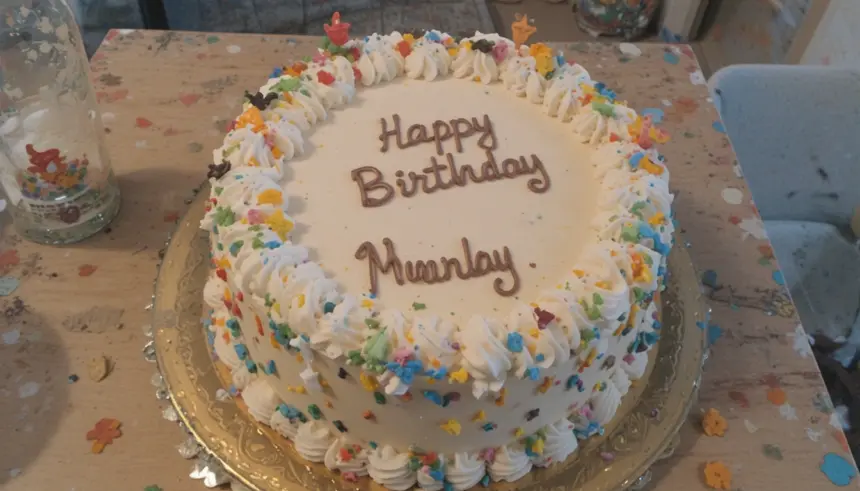
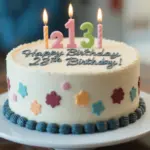
- Sprinkles, glorious sprinkles!: The more varieties, colors, and shapes, the merrier. Nonpareils, jimmies, edible glitter, even those fancy metallic ones. They instantly scream “PARTY!”
- Fresh Berries or Fruit: Think strawberries, raspberries, blueberries, sliced kiwi, or even orange segments. They add color, freshness, and look super chic with minimal effort.
- Assorted Candies & Cookies: Mini chocolate bars, M&Ms, Oreos (crushed or whole!), gummy bears, mini marshmallows – basically anything colorful and delicious you can pile on top.
- Chocolate or Caramel Sauce (Optional Drizzle): For that extra “oomph” factor. A little artistic drizzle never hurt anyone.
- A Spatula, Offset Spatula, or Even a Butter Knife: For spreading that glorious frosting. Don’t worry about perfection.
Step-by-Step Instructions
Alright, let’s get this birthday party started! This is less of a recipe and more of a creative playground. Don’t overthink it!
Cool Down, Buttercup: First things first, ensure your cake is *completely* cool. No warmth whatsoever. If it’s even slightly warm, your frosting will melt into a sad, sloppy mess. Pop it in the fridge for 20-30 minutes if you’re impatient.
The Crumb Coat (Your Secret Weapon): Grab a generous dollop of frosting and spread a very thin layer all over your cake – top and sides. This is your “crumb coat.” It traps all those pesky crumbs so your final layer is smooth and crumb-free. Don’t skip this, seriously. Chill the cake again for 10-15 minutes.
Frosting Time! The Main Event: Now for the good stuff. Apply a thicker, more generous layer of frosting to the top and sides of your chilled cake. Use your spatula (or butter knife!) to spread it relatively smoothly. Remember, perfection is overrated; a rustic, slightly wavy look is totally in. Embrace the “imperfectly perfect” vibe!
Sprinkle Party!: This is where the real fun begins! Grab your sprinkles and go wild. You can sprinkle them all over the top, press them gently onto the sides, create a border, or even make a pattern (if you’re feeling ambitious). There’s no wrong way to sprinkle!
Arrange Your Edible Jewels: Start placing your fresh fruit, candies, and cookies on top of the cake. You can create a beautiful border with berries, pile them in the center, or arrange them in a random, artistic way. Think about color and texture contrast. Don’t be afraid to break cookies or candies for an interesting look.
Drizzle for Drama (Optional): If you’re using chocolate or caramel sauce, now’s the time for that final flourish. Drizzle it artfully over the top of the cake, letting some drip down the sides. It adds a professional touch with minimal effort.
Showtime!: Pop your masterpiece in the fridge for another 15-30 minutes to let the frosting set, especially if it’s warm in your kitchen. Then, get ready to wow everyone (including yourself!) with your stunning, yet ridiculously easy, creation. Slice, serve, and bask in the glory!
Common Mistakes to Avoid
We all make mistakes, but let’s try to avoid these classic cake decorating blunders to keep your sanity (and your cake) intact:
- Decorating a Warm Cake: Rookie mistake! We covered this, but it bears repeating. Warm cake + frosting = sad, soupy disaster. Let that cake chill out, literally.
- Skipping the Crumb Coat: This is a big one. Without it, you’ll have crumbs *everywhere* in your final frosting layer, turning your smooth finish into a textured mess. Crumb coat is your friend!
- Being a Perfectionist: Seriously, let it go. This style is about embracing the charmingly imperfect. If a berry rolls off or the frosting isn’t perfectly smooth, who cares? It’s a birthday cake, not a gallery exhibit.
- Using Too Much Frosting at Once: Start with smaller amounts and add more as needed. Piling on too much can make it hard to spread evenly and create more crumb issues.
- Forgetting the Sprinkles: Is it even a birthday cake without sprinkles? IMO, no. Don’t deprive your cake of its celebratory confetti!
Alternatives & Substitutions
Life happens, ingredients run out, or you just want to shake things up. Here are some easy swaps:
- No Fresh Berries? No Prob! Use canned fruit (drained well!), frozen berries (thaw first!), or even colorful candies like Skittles or M&Ms to add a pop of color.
- Out of Your Favorite Sprinkles? Chop up some chocolate bars, crush some cookies (Oreos or wafers work great!), or finely chop nuts for a different kind of textured topping.
- Don’t Have an Offset Spatula? A simple butter knife, the back of a spoon, or even a clean flexible plastic card (like a gift card, just make sure it’s clean!) can work wonders for spreading frosting.
- Homemade Frosting Fanatic? Go for it! While store-bought is awesome for convenience, a homemade buttercream or cream cheese frosting will definitely elevate the flavor game. Just make sure it’s a good spreading consistency.
- No Drizzle Sauce? Melt some chocolate chips with a tiny bit of coconut oil or butter for a quick DIY chocolate sauce. Or skip it entirely; your cake will still be fabulous.
FAQ (Frequently Asked Questions)
- Do I *have* to crumb coat?
Oh, absolutely! Think of it as painting a wall – you need that primer. It locks in the crumbs so your final frosting layer is smooth and beautiful. It’s a non-negotiable step for a clean finish!
- Can I just dump all the sprinkles on?
Within reason, yes! For the top, go wild. For the sides, you might want to gently press them on with your hand or a piece of parchment paper to make them stick. Just don’t expect them to defy gravity, FYI.
- What if my frosting isn’t perfectly smooth?
Who cares?! Seriously, embrace the rustic look. Slightly imperfect frosting adds character and screams “homemade with love.” No need for a laser-level finish here!
- Can I use melted chocolate instead of a fancy chocolate sauce?
Totally! Just melt your favorite chocolate chips or a chocolate bar gently (microwave in 20-second bursts, stirring, or use a double boiler). If it’s too thick, add a tiny bit of neutral oil (like coconut or vegetable) to thin it out. Just make sure it’s not too hot before drizzling!
- How long will my beautifully decorated cake last?
Most cakes, especially with sturdy frosting and non-perishable decorations, will last a good 2-3 days in the fridge. If you used fresh, delicate fruit, it might be best consumed within a day or two for peak freshness. Cover it loosely to prevent it from drying out.
- What if I don’t have a piping bag for the drizzle?
No piping bag, no problem! Simply snip the corner off a small Ziploc bag, fill it with your sauce, and squeeze. Instant DIY piping bag! Or, just use a spoon and drizzle in a freehand, artistic way.
Final Thoughts
So there you have it, future cake decorating wizard! See? No sweat, no tears, just pure, unadulterated, delicious fun. This method proves you don’t need a culinary degree or an arsenal of specialized tools to create a show-stopping birthday cake. All you need is a little imagination, some sprinkles, and maybe a tub of frosting. The best part? It looks impressive, but your secret (that it was ridiculously easy) is safe with me. Now go impress someone—or yourself—with your new culinary skills. You’ve earned it! Happy decorating, my friend!

