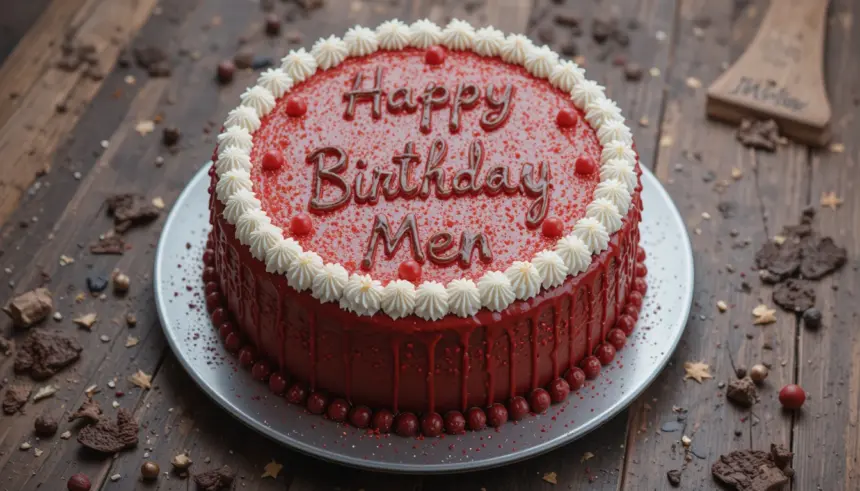
So, a special dude in your life has a birthday coming up, and you’re thinking beyond the basic store-bought sugar bomb, huh? Good for you! Or maybe you just want to celebrate YOU with something awesome, because you deserve it. Either way, you’ve landed in the right spot. We’re about to whip up a Red Birthday Cake that’s not only vibrant and delicious but also surprisingly easy to master. No stress, just good vibes and even better cake!
Why This Recipe is Awesome
Look, we get it. Baking can feel like rocket science, especially if your usual kitchen adventures involve pressing “start” on the microwave. But this red birthday cake? It’s practically foolproof. We’re talking “impress-your-friends-and-family-without-breaking-a-sweat” level easy. Plus, it’s red. And what’s more celebratory (and slightly badass) than a vibrant red cake, especially for a guy who appreciates good flavor without all the frills?
This cake is rich, unbelievably moist, and perfectly balanced—not overly sweet like some of those sugar bombs out there. It’s got that subtle hint of cocoa that makes red velvet so addictive, paired with a tangy, creamy frosting that’ll make you question all your life choices before this moment. Even if your culinary skills usually extend to ordering takeout, **you got this.** Seriously. I didn’t mess it up, so your chances are pretty darn good.
Ingredients You’ll Need
Gather your battle gear, bakers! Here’s what you’ll need for this epic red masterpiece and its glorious cream cheese frosting:
For the Red Cake:
- All-Purpose Flour: 2 ½ cups. The foundation of all deliciousness.
- Granulated Sugar: 1 ½ cups. For that sweet, sweet goodness.
- Unsweetened Cocoa Powder: 1 tablespoon. Just a touch, for depth and that signature red velvet tang, not full-on chocolate.
- Baking Soda: 1 teaspoon. Our trusty leavening agent.
- Salt: 1 teaspoon. Don’t skip it; it balances everything out, the unsung hero.
- Large Eggs: 2. Room temperature, please! They bind it all together, nature’s glue.
- Vegetable Oil: 1 ½ cups. Keeps it super moist and tender.
- Buttermilk: 1 cup. The secret to that incredible moistness and tangy flavor. Don’t skip this, it’s crucial!
- Vanilla Extract: 2 teaspoons. Essential. Don’t cheap out here, use the good stuff.
- Red Gel Food Coloring: 1-2 tablespoons. The star of the show. **Go for gel, it’s more potent** and won’t thin out your batter like liquid colors.
- White Vinegar: 1 teaspoon. Activates the baking soda for that perfect rise, science in action!
For the Cream Cheese Frosting:
- Cream Cheese: 16 ounces (two 8oz blocks), softened. Non-negotiable. Full-fat, please!
- Unsalted Butter: 1 cup (2 sticks), softened. The other half of the dynamic duo.
- Powdered Sugar (Confectioners’ Sugar): 4-5 cups, sifted. For the sweet, fluffy magic. Add more or less to taste and desired consistency.
- Vanilla Extract: 2 teaspoons. More vanilla! Because why not?
- Pinch of Salt: Again, balance! Cuts through the sweetness.
Step-by-Step Instructions
Alright, let’s get this party started! Follow these steps, and you’ll be a cake boss in no time.
- Get Ready, Bake! Preheat your oven to 350°F (175°C). Grease and flour two 9-inch round cake pans like you’re preparing them for royalty. Or, line them with parchment paper circles on the bottom for extra non-stick insurance. This is a crucial first step, so don’t rush it!
- Whisk the Dry Stuff. In a large bowl, whisk together the flour, sugar, cocoa powder, baking soda, and salt. Give it a good whisk to break up any lumps and combine everything evenly.
- Mix the Wet Stuff (Mostly). In a separate medium bowl, whisk together the eggs, vegetable oil, buttermilk, and vanilla extract until well combined.
- Combine Forces. Pour the wet ingredients into the dry ingredients. Mix on low speed with an electric mixer (or by hand with a whisk) until just combined. **Don’t overmix!** A few lumps are okay; overmixing makes tough cake.
- Add the Red Power. In a small bowl, mix the red gel food coloring and white vinegar. This ensures the color dissolves nicely and the vinegar activates the baking soda effectively. Pour this vibrant red mixture into your batter and mix on low speed until the color is evenly distributed and stunning.
- Bake Time! Divide the batter evenly between your prepared cake pans. Bake for 25-30 minutes, or until a wooden skewer or toothpick inserted into the center comes out clean.
- Cool Down. Let the cakes cool in their pans on a wire rack for about 10-15 minutes. Then, carefully invert them onto the wire rack to cool completely. **This is important!** Don’t try to frost warm cakes unless you enjoy a melted, sloppy mess.
- Whip Up the Frosting. While the cakes are cooling, beat the softened cream cheese and butter together in a large bowl with an electric mixer until smooth and creamy.
- Sweeten and Flavor. Gradually add the sifted powdered sugar, 1 cup at a time, beating well after each addition until smooth. Mix in the vanilla extract and a pinch of salt. Beat on medium-high speed until the frosting is light, fluffy, and spreadable. If it’s too thick, add a tiny splash of milk or cream. If too thin, add more powdered sugar.
- Assemble Your Masterpiece. Once the cakes are completely cool (and I mean COMPLETELY!), place one layer on your serving plate. Spread a generous amount of frosting evenly over the top. Place the second cake layer on top, then frost the top and sides of the entire cake. Get creative, or keep it rustic—it’s your cake!
- Devour! Slice it up and enjoy the fruits of your labor. You earned it!
Common Mistakes to Avoid
Nobody’s perfect, but we can avoid some common baking blunders that’ll send you into a sugar-fueled rage. Here are a few to watch out for:
- Thinking you don’t need to preheat the oven: Rookie mistake. A cold oven will mess with your cake’s rise and texture. **Always preheat!**
- Overmixing the batter: This is a cardinal sin in cake baking. Overmixing develops the gluten too much, leading to a tough, dense cake. Mix until just combined, then stop.
- Not cooling your cakes completely: Impatience is not a virtue here. Frosting a warm cake is a one-way ticket to frosting soup and a crumbling mess. Chill, literally.
- Using liquid food coloring instead of gel: You want a vibrant red, not a sad, pale pink. Liquid coloring requires more volume, which can mess with your batter’s consistency. **Gel is your friend for intense color.**
- Forgetting to soften butter and cream cheese: Cold ingredients don’t cream together properly, leading to lumpy frosting. Plan ahead and let them chill out on the counter for a bit.
- Ignoring the “sifted” part for powdered sugar: Powdered sugar often has lumps. Sifting ensures a silky-smooth, lump-free frosting. Trust me on this one.
Alternatives & Substitutions
Feeling a little rebellious? Want to put your own spin on it? I dig that. Here are some simple swaps and additions:
- For the Cake Base: If the man in question isn’t a red velvet purist, you can easily adapt this.
- Chocolate Cake: Just up the cocoa powder to about ½ cup and reduce the flour by a similar amount. Boom, rich chocolate cake!
- Vanilla Cake: Omit the cocoa powder entirely for a classic vanilla red cake.
- For the Frosting:
- Buttercream: If cream cheese isn’t his jam, a classic vanilla buttercream is always a winner. It’s a bit sweeter and less tangy.
- Store-bought Frosting: Hey, no judgment here! If you’re super pressed for time, a good quality store-bought cream cheese frosting can save the day. **(But homemade is undeniably better, IMO!)**
- Add-ins & Flavor Boosts:
- Chocolate Chips: Stir some mini chocolate chips into the batter for an extra treat.
- Nuts: Chopped pecans or walnuts can add a nice texture if he’s into that.
- Booze: A splash of bourbon or rum in the batter or frosting (or both!) can take this cake to an adult-friendly level. You’re a legend for even considering it.
FAQ (Frequently Asked Questions)
Got questions? I’ve got answers. Probably. 😉
- Can I use liquid red food coloring instead of gel? Well, technically yes, but why hurt your soul like that? Liquid coloring isn’t as potent, so you’ll need more of it, which can throw off your batter’s consistency and give you a sad, muted pink instead of a vibrant red. **Gel is king for color saturation.**
- My cakes aren’t coming out level. What gives? Could be your oven’s hot spots (rotate them halfway through baking!), or maybe uneven batter distribution. You can always trim the tops with a serrated knife once cooled to make them perfectly flat. Nobody will ever know!
- Can I make this cake ahead of time? Absolutely! You can bake the cake layers a day or two in advance, wrap them tightly in plastic wrap, and store them at room temperature. You can even freeze them for up to a month! Just thaw before frosting. The frosting can also be made a day ahead and stored in the fridge; just bring to room temp and re-whip before using.
- What if I don’t have buttermilk? No worries, DIY buttermilk is easy! Just pour 1 cup of regular milk into a liquid measuring cup, add 1 tablespoon of white vinegar or lemon juice, stir, and let it sit for 5-10 minutes until it slightly curdles. Voila!
- Can I make cupcakes instead? You betcha! This recipe makes about 24-30 cupcakes. Reduce baking time to 18-22 minutes. Keep an eye on them!
- How do I store leftover cake? Cover it tightly (a cake dome is perfect) and store at room temperature for up to 2 days, or in the fridge for up to 5 days because of the cream cheese frosting. It actually tastes even better the next day, IMO, as the flavors meld.
- Is there a way to make it less sweet? You can definitely reduce the sugar in the frosting by about ½ to 1 cup without affecting the texture too much. For the cake itself, the sugar is pretty essential for moisture and structure, so I wouldn’t mess with that too much.
Final Thoughts
And there you have it, folks! Your very own Red Birthday Cake, ready to rock someone’s special day (or just make your Tuesday a little brighter). You’ve proven that you don’t need to be a Michelin-star chef to bake something truly amazing. This cake is proof that delicious doesn’t have to mean difficult. Now go impress someone—or yourself—with your new culinary skills. You’ve earned it!
Happy baking, and remember: life’s too short for boring cake!


