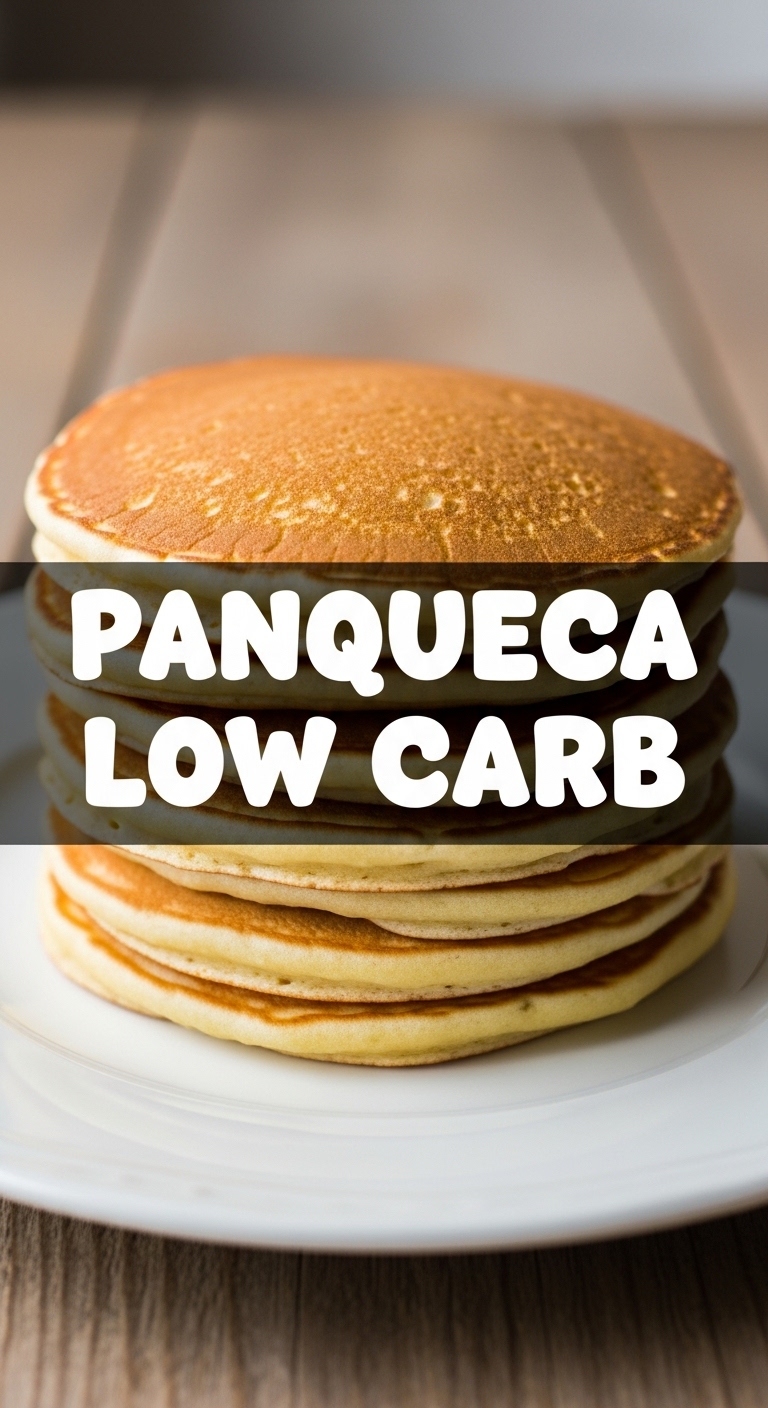
So you’re craving something tasty but too lazy to spend forever in the kitchen, huh? Same. And maybe, just maybe, you’re also trying to be a *little* bit mindful of those carbs without sacrificing all the fun? Welcome, my friend, to the delicious, low-carb paradise of Panquecas! No more guilt-trips from your plate, just pure, unadulterated (and healthy-ish) joy.
Why This Recipe is Awesome
Let’s be real, most “healthy” recipes taste like cardboard that went on a diet. Not these panquecas! This recipe is the culinary equivalent of finding money in an old jacket pocket – a pleasant surprise, utterly delightful, and makes you feel smarter than you probably are. Why is it awesome? First off, it’s **ridiculously easy**. Seriously, if you can whisk an egg, you can make these. It’s practically idiot-proof, even *I* didn’t mess it up! Secondly, it’s **low carb**, which means you can enjoy that pancake-y goodness without feeling like you need to run a marathon afterwards. And third, it’s a blank canvas for your wildest sweet or savory dreams. Your taste buds will thank you, your waistline might give you a high-five, and your inner chef will do a happy dance.
Ingredients You’ll Need
Gather ’round, fellow lazy gourmands! Here’s what you’ll need for your culinary masterpiece. Don’t worry, it’s nothing too fancy, just good stuff:
- 2 large eggs: The OGs of protein, holding this whole delicious thing together.
- 1/2 cup almond flour: Because regular flour is so… last decade. And full of carbs. This is your low-carb hero.
- 1/4 cup unsweetened almond milk (or coconut milk): Keeping it light and dairy-free-friendly. Or, if you’re feeling extra decadent, heavy cream works too (just saying!).
- 1-2 tablespoons sweetener of choice: Erythritol, xylitol, stevia – pick your poison! Or, you know, pick your non-sugar. Adjust to your sweet tooth’s demands.
- 1 teaspoon vanilla extract (optional but recommended): Because everything tastes better with a hint of fancy.
- Pinch of salt: Don’t skip it! It magically makes everything taste *more* like itself.
- Butter or coconut oil for the pan: Unless you enjoy scraping burnt bits, this is non-negotiable.
Step-by-Step Instructions
Alright, apron on (or not, we don’t judge), let’s get cooking! These steps are so simple, you’ll wonder why you ever bought pre-made mixes.
- **Get Your Whisk On:** Grab a medium bowl and crack those two eggs in. Whisk them like you’re trying to win a culinary Olympics – until they’re nice and frothy.
- **Liquid Gold (and Sweetness):** Add your almond milk, sweetener, vanilla extract (if using), and that crucial pinch of salt to the eggs. Whisk again until everything is well combined and your sweetener has dissolved.
- **Flour Power (Gentle Edition):** Now, gently fold in the almond flour. **Do not overmix!** You’re going for a smooth, slightly thick batter, not trying to develop gluten. A few small lumps are totally fine and add character.
- **Heat Things Up:** Place a non-stick frying pan over medium heat. Once it’s warm, add a small knob of butter or a teaspoon of coconut oil. Swirl it around to coat the bottom of the pan.
- **Pour and Swirl:** Once your fat is melted and shimmering, pour about 1/4 cup of batter into the pan. Immediately tilt and swirl the pan to spread the batter into a thin, even circle.
- **Cook and Watch:** Let it cook for 2-3 minutes, or until you see small bubbles forming on the surface and the edges start to look set and slightly golden. The bottom should be beautifully golden brown.
- **The Flip!** With a spatula, carefully slide under the panqueca and **confidently flip it!** Don’t be shy. Cook for another 1-2 minutes on the second side until it’s also golden and cooked through.
- **Repeat the Magic:** Remove the cooked panqueca and place it on a plate. Add more butter/oil if needed and repeat with the remaining batter. You should get about 4-6 panquecas, depending on size.
- **Serve ‘Em Up!** Stack ’em high or serve ’em individually. Top with your favorite low-carb fillings – berries, sugar-free syrup, cheese and ham, whatever your heart desires!
Common Mistakes to Avoid
Even though this recipe is practically a breeze, there are a few pitfalls eager chefs sometimes tumble into. Learn from my (and others’) mistakes, so you don’t have to!
- Overmixing the Batter: This isn’t a cake, folks! Too much whisking after adding the flour will develop the gluten (even in almond flour, to an extent) and give you tough, rubbery panquecas. We want tender, delicate goodness, not bouncy castles.
- Pan Too Hot or Too Cold: A pan that’s too hot will burn the outside before the inside cooks, giving you a tragic charcoal disc. Too cold, and they’ll just sit there, lazy and pale. **Medium heat is your sweet spot.**
- Not Enough Fat in the Pan: Thinking you can skip the butter/oil? Rookie mistake! You’ll end up with stuck, torn panquecas and a grumpy mood. Don’t be a hero, use the fat.
- Flipping Too Early: Patience, young padawan! If you try to flip before the panqueca is set and has bubbles, it’ll just tear apart. Wait for those beautiful bubbles and set edges.
Alternatives & Substitutions
Feeling adventurous or just missing an ingredient? No worries! This recipe is pretty forgiving. Here are some ideas to shake things up:
- No Almond Flour? You could try fine coconut flour, but be warned: coconut flour is super absorbent! You’ll need to **significantly reduce the amount (think 1/4 of what you’d use for almond flour)** and probably add more liquid. It’s a different beast, but doable.
- Sweetener Swap: If you’re not strictly low-carb, a drizzle of maple syrup or a spoonful of honey in the batter would be delicious. Just remember that it will add sugar and carbs.
- Milk Alternatives: Heavy cream will make them richer and even more keto-friendly. Full-fat coconut milk (from a can) will give them a lovely tropical flavor and a thicker texture.
- Flavor Boosters: A pinch of cinnamon or nutmeg goes great in the batter for a warmer spice profile. You could also add a tablespoon of cocoa powder for chocolate panquecas!
- Savory Mode: Skip the sweetener and vanilla extract. Add a pinch of garlic powder, onion powder, or some dried herbs to the batter. These are fantastic with cheese, ham, or even scrambled eggs inside!
FAQ (Frequently Asked Questions)
Got questions? I’ve got (casual and hopefully amusing) answers!
- Can I make these ahead of time? You totally can! They’re best fresh, but store any leftover panquecas in an airtight container in the fridge for up to 3 days. Reheat gently in a pan or microwave.
- Are they good cold? Eh, they’re *okay* cold. But like most good things in life (pizza, coffee), they really shine when warm.
- What if my batter is too thick/thin? Easy fix! If it’s too thick, add a splash more almond milk. If it’s too thin, stir in another half tablespoon of almond flour. **FYI**, almond flour can vary in absorbency.
- Can I use margarine instead of butter? Well, technically yes, but why hurt your soul like that? Butter or coconut oil give the best flavor and texture, IMO.
- What kind of pan works best? A good quality non-stick pan is your best friend here. Cast iron can work too, but make sure it’s well-seasoned and generously oiled.
- Can I double the recipe? Absolutely! Just make sure you have a big enough bowl and enough pan space.
Final Thoughts
And there you have it, folks! Your very own, incredibly delicious, and surprisingly easy low-carb panquecas. You’ve officially graduated from zero-chef to low-carb culinary wizard. Now go impress someone – or just yourself, because that’s important too – with your new skills. Top them with fresh berries, a dollop of whipped cream, or some savory fillings, and enjoy your guilt-free indulgence. You’ve earned it!

