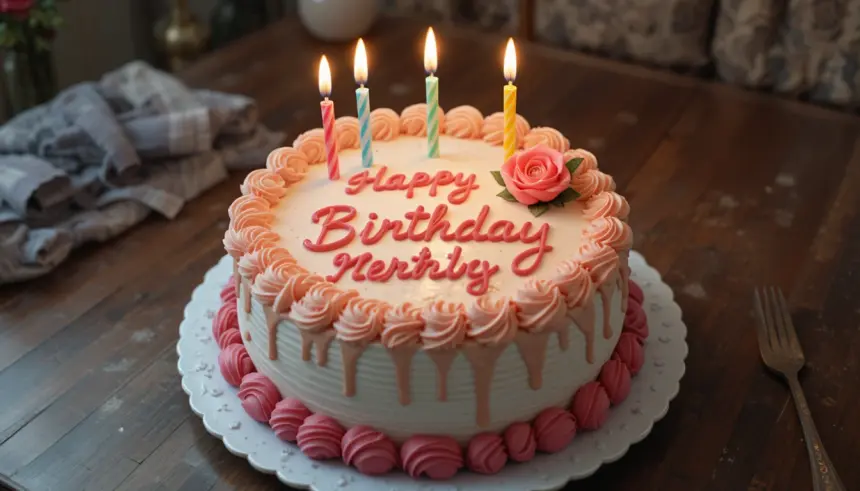
So, another birthday is rolling around, and you’re thinking, “Do I really have to bake the *same old* cake?” Or maybe you’re just craving something that screams “party in my mouth” but doesn’t require a culinary degree or a whole weekend of your precious time, huh? Same, friend, same. Well, dust off your apron (or, let’s be real, grab a clean-ish one), because we’re about to dive into a birthday cake recipe that’s so good, so simple, and so ridiculously fun, it might just become your new signature move. Get ready for the ultimate ‘Confetti Celebration Cake’!
Why This Recipe is Awesome
Okay, first things first: this isn’t just *any* birthday cake. This is THE birthday cake. Why? Because it’s moist enough to make your grandma nod in approval, fluffy enough to make you float, and loaded with enough sprinkles to cure any bad mood. It’s also pretty much **idiot-proof** – and trust me, if *I* can make it without setting off the smoke detector, you’re golden. Plus, it looks like a party exploded in the best possible way, and who doesn’t love that? It’s the perfect blend of classic comfort and whimsical joy, with a secret ingredient that keeps it unbelievably tender. You’re welcome.
Ingredients You’ll Need
Time to gather your edible confetti! No fancy trips to specialty stores needed, promise.
- 1 ½ cups (3 sticks) Unsalted Butter, softened (Don’t you dare use cold butter, it’s not a negotiation!)
- 2 cups Granulated Sugar (The sweet stuff that makes everyone happy)
- 4 Large Eggs (Room temperature, because science says so)
- 1 tbsp Vanilla Extract (Good quality, please! It makes all the difference.)
- 3 cups All-Purpose Flour (The foundation of our delicious empire)
- 1 tbsp Baking Powder (Our fluffy-maker)
- ½ tsp Salt (Don’t skip it; it balances the sweet!)
- 1 ½ cups Buttermilk (This is our secret weapon for *super* moist cake. If you don’t have it, see FAQ!)
- ½ cup Rainbow Sprinkles (The longer, skinnier ones work best for baking, FYI. Jimmies for the win!)
For the Easy Peasy Buttercream:
- 1 cup (2 sticks) Unsalted Butter, softened
- 4-5 cups Powdered Sugar (Sifted if you’re feeling fancy, but not strictly necessary for a chill vibe)
- 2-3 tbsp Milk or Cream (Whatever you have on hand that’s liquid and dairy-ish)
- 1 tsp Vanilla Extract
- Pinch of Salt
- More Rainbow Sprinkles (Because you can never have too many!)
Step-by-Step Instructions
Alright, let’s get this party started! Follow these steps, and you’ll be a cake boss in no time.
- Preheat & Prep: Preheat your oven to 350°F (175°C). Grease and flour two 8 or 9-inch round cake pans. Or, if you’re smart, line the bottoms with parchment paper and then grease and flour. This makes demolding a breeze!
- Cream it Good: In a large bowl, cream together the softened butter and granulated sugar until it’s light and fluffy. This usually takes about 3-5 minutes with an electric mixer. **Don’t rush this step; it incorporates air for a lighter cake!**
- Egg-cellent Addition: Add the eggs, one at a time, mixing well after each addition. Then stir in the vanilla extract. Scrape down the sides of the bowl to make sure everything is incorporated.
- Dry Mix Magic: In a separate bowl, whisk together the flour, baking powder, and salt. This ensures even distribution of your leavening agents.
- Alternate & Combine: Add about a third of the dry mixture to the wet mixture, mixing on low speed until just combined. Then add half of the buttermilk, mixing until just combined. Repeat this process: another third of the dry, the rest of the buttermilk, and finally the last of the dry ingredients. **Mix until *just* combined; overmixing develops gluten and can make your cake tough.**
- Sprinkle Time! Gently fold in the rainbow sprinkles. Be gentle, we don’t want them to bleed too much colour just yet.
- Bake Baby, Bake: Divide the batter evenly between your prepared cake pans. Bake for 28-32 minutes, or until a toothpick inserted into the center comes out clean.
- Cool Down: Let the cakes cool in the pans for about 10-15 minutes before inverting them onto a wire rack to cool completely. **Patience is a virtue here! Don’t try to frost a warm cake unless you enjoy a melted mess.**
- Frosting Fun: While the cakes cool, make your buttercream! Beat the softened butter until creamy. Gradually add the powdered sugar, one cup at a time, mixing until smooth. Add the milk/cream, vanilla, and salt, then beat on high for a few minutes until it’s light and fluffy. Fold in a generous amount of sprinkles.
- Assemble Your Masterpiece: Once the cakes are completely cool, level them if needed (a serrated knife works wonders). Place one layer on your serving plate, spread with a generous layer of frosting, top with the second layer, and then frost the top and sides. Decorate with even more sprinkles! Ta-da!
Common Mistakes to Avoid
Listen up, buttercup! Even the pros mess up sometimes, but you don’t have to make these rookie errors:
- Cold Ingredients: Using butter and eggs straight from the fridge is a big no-no. They emulsify better at room temp, leading to a smoother batter. Plan ahead, people!
- Overmixing: You’re not making bread, you’re making cake! Overmixing develops gluten, which means tough, dry cake. Mix until *just* combined, then stop. Seriously.
- Not Greasing Your Pans Properly: Thinking a quick swipe of butter is enough? Nope. Grease, flour, and consider parchment paper. Nobody wants half their cake stuck to the pan.
- Opening the Oven Door: Stop peeking! Opening the oven door too early can cause your cake to sink in the middle. Let it do its thing for at least two-thirds of the baking time.
- Frosting a Warm Cake: Unless you’re going for a puddle of sugary soup, let those cakes cool completely. We’re talking several hours, or even overnight. **This is crucial!**
Alternatives & Substitutions
Feeling a little rebellious? Here are some ways to shake things up:
- No Buttermilk? No Problem! Mix 1 ½ tbsp white vinegar or lemon juice into regular milk and let it sit for 5-10 minutes. Voila, instant buttermilk! It works like a charm.
- Different Sprinkles: Not a fan of jimmies? Use nonpareils for a different texture, or even mix in some fun shapes. Just be warned, nonpareils can bleed colour more.
- Flavor Boost: Add a teaspoon of almond extract along with the vanilla for a richer, more complex flavor. Or, if you’re feeling tropical, try coconut extract!
- Cream Cheese Frosting: If buttercream isn’t your jam, a classic cream cheese frosting (8 oz cream cheese, 1/2 cup butter, 3-4 cups powdered sugar, 1 tsp vanilla) would be absolutely divine with this cake!
- Chocolate Cake Base: Want to go chocolate? Swap out ½ cup of the flour for ½ cup of good quality unsweetened cocoa powder. Adjust baking time as needed.
FAQ (Frequently Asked Questions)
- Can I use margarine instead of butter? Well, technically yes, but why hurt your soul like that? Butter just tastes better and gives a superior texture. IMO, it’s worth the extra few cents.
- How long does this cake last? Covered and stored at room temperature, it’s typically good for 3-4 days. In the fridge, it can last up to a week. If it lasts that long, you’re stronger than I am!
- Can I make it ahead of time? Absolutely! You can bake the cake layers a day or two in advance, wrap them tightly in plastic wrap, and store them at room temp or even freeze them. Thaw before frosting.
- What if my cake sinks in the middle? Usually, this means it wasn’t fully baked, or you opened the oven door too soon. Next time, bake a few minutes longer and resist the urge to peek!
- My frosting is too thin/thick! Help! Too thin? Add more powdered sugar, a tablespoon at a time. Too thick? Add milk or cream, a teaspoon at a time, until you reach your desired consistency. You got this!
- Can I make cupcakes with this recipe? You bet! This recipe makes about 24 standard cupcakes. Bake for 18-22 minutes. Just as fun, maybe even more portable for a party!
Final Thoughts
So there you have it, your new favorite birthday cake recipe! It’s delicious, it’s fun, and it’s surprisingly simple. Whether you’re baking for a friend, a family member, or just yourself (because you absolutely deserve cake), this Confetti Celebration Cake is guaranteed to bring smiles. Now go impress someone—or yourself—with your new culinary skills. You’ve earned it, and don’t forget to send me a slice (or at least a pic)! Happy baking, superstar!

