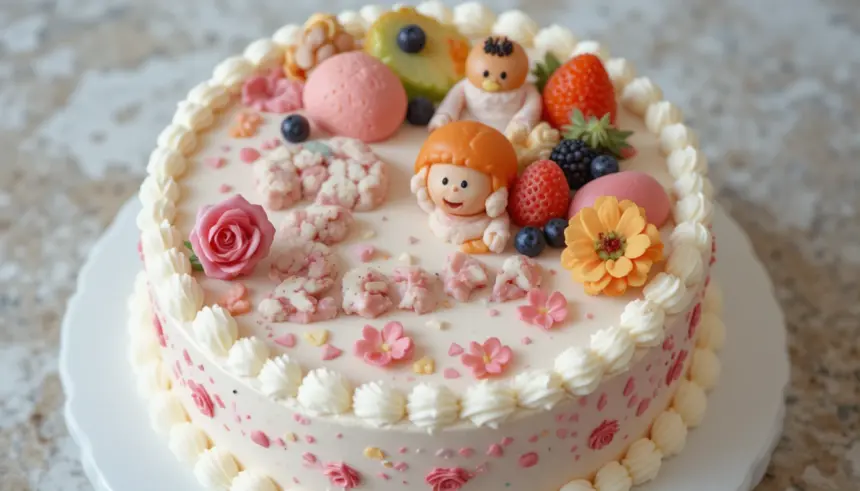
Okay, so your bestie, your sibling, or maybe *you* are about to hit the big 2-0. That’s two whole decades of being awesome, and frankly, that deserves more than just a regular cake. It deserves a *cute*, *personal*, and totally Instagrammable bento cake! Forget those giant, stressful baking projects that require a forklift; we’re going mini, we’re going personal, and we’re going **adorable**. Think of it as a tiny edible billboard celebrating two decades of fabulousness. Ready to get your bake on without actually, you know, baking a huge cake?
Why This Recipe/Idea Is Awesome
Because let’s be real, turning 20 is a big deal, but also, who has the energy for a multi-tiered fondant monstrosity? Not us, my friend. This bento cake idea is awesome because:
- It’s **small and mighty**: Less cake means less stress, less potential for disaster, and fewer dishes. Win-win-win!
- **Personalization Level: Expert**: You can literally make it say anything, or decorate it for *that specific person*. Their favorite color? A little inside joke? Go wild!
- **Looks Professional (ish) with Minimal Effort**: Seriously, bento cakes have a charming, rustic vibe even if your piping skills are, ahem, “developing.” It’s like the little black dress of cakes – always chic.
- **Perfect for Small Gatherings**: Or just one very deserving person. No awkward leftover cake taking up fridge space for a week.
- **It’s Idiot-Proof**: Even if you think a mixer is a DJ tool, you can nail this. Trust me, if I didn’t mess it up, neither will you.
Ingredients You’ll Need
Alright, gather your troops! Remember, we’re focusing on the *decorating* fun here, so a pre-made mini cake base is totally acceptable. No judgment, only deliciousness!
- **Pre-baked Mini Cake Layers:** Or just one if you want a super-duper mini. You can buy these, use a box mix in a small pan, or if you’re feeling extra Martha Stewart, bake from scratch. Your call, your level of ambition.
- **Unsalted Butter:** A couple of sticks, softened. This is for the buttercream. Don’t skimp; it’s the foundation of deliciousness.
- **Powdered Sugar (Icing Sugar):** Lots of it. Like, at least 4 cups. For that smooth, sweet buttercream magic.
- **Heavy Cream or Milk:** A few tablespoons. To get that buttercream to the perfect consistency – not too thick, not too runny.
- **Vanilla Extract:** A teaspoon or two. Elevates everything. Don’t skip it unless you hate joy.
- **Food Coloring Gels:** Your favorite hues! Gels are better than liquid for vibrant colors without thinning your frosting too much. Think celebratory 20th birthday vibes!
- **Piping Bags & Tips:** Round and star tips are great for beginners. Or, if you’re a rebel, just snip the corner off a Ziploc bag. DIY queen/king!
- **Sprinkles, Edible Glitter, Mini Candies:** The bling-bling for your cake baby! Edible pearls, confetti sprinkles, mini chocolate chips – go wild!
- **A Small Offset Spatula or Butter Knife:** For smoothing out that frosting.
- **A Cute Bento Box (optional, but highly recommended):** For that authentic “bento cake” presentation. Makes it feel extra special.
Step-by-Step Instructions
Deep breaths, you got this! We’re building a masterpiece, one tiny layer at a time.
- **Prep Your Cake Base:** If your mini cake layers have a domed top, gently level them with a serrated knife. You want nice, flat surfaces for stacking. Pop them in the fridge for about 15-20 minutes to firm up. This makes them much easier to handle.
- **Whip Up That Buttercream:** In a large bowl, beat your softened butter until it’s light and fluffy (about 2-3 minutes). Gradually add the powdered sugar, one cup at a time, mixing well between additions. Once incorporated, add the vanilla extract and a tablespoon of cream/milk. Beat on medium-high for another 3-5 minutes until it’s light, fluffy, and spreadable. Add more cream/milk if needed to reach desired consistency.
- **Color Your World:** Divide your buttercream into separate bowls if you’re using multiple colors. Add a tiny drop of food coloring gel at a time, mixing until you achieve your desired shade. Remember, a little goes a long way!
- **Assemble Your Masterpiece:** Place one cake layer on your serving plate or directly into your bento box if it’s snug. Spread a thin layer of buttercream evenly over the top. If using another cake layer, gently place it on top.
- **The Crumb Coat (Your New Best Friend):** Apply a very thin layer of buttercream all over your cake – top and sides. This is your “crumb coat” and it traps any loose crumbs. **Seriously, don’t skip this.** Chill the cake for 10-15 minutes to let the crumb coat set.
- **Final Frosting & Smoothing:** Once chilled, apply a thicker, even layer of your main buttercream color. Use your offset spatula or butter knife to smooth out the top and sides. Don’t stress too much about perfection; the charm is in the handmade look!
- **Decorate, Decorate, Decorate!** Now for the fun part! Fill your piping bags with your colored buttercreams. Pipe borders, write a cute message (“Happy 20th, [Name]!”), add dots, swirls – whatever your heart desires! Stick on those sprinkles, edible glitter, or mini candies. **This is where you make it truly unique.**
- **Chill Out & Serve:** Pop your decorated bento cake back into the fridge for at least 30 minutes to let the frosting set completely. Then, present your edible art and watch the birthday person’s face light up!
Common Mistakes to Avoid
Hey, we’ve all been there. Learning from mistakes is part of the fun! (Mostly.)
- **Warm Cake, Melted Dreams:** Trying to frost a warm cake is a recipe for a greasy, crumbly, sliding disaster. **Always chill your cake layers first!**
- **Skipping the Crumb Coat:** Thinking you’re too cool for school and don’t need a crumb coat? Rookie mistake! You’ll end up with crumbs *everywhere* in your final frosting, and it won’t look pretty.
- **Over-Mixing Buttercream:** If you beat the buttercream for too long *after* adding the sugar and liquid, it can sometimes get greasy or separate. Stop once it’s light and fluffy.
- **Impatience is Not a Virtue (Here):** Rushing the chilling steps between layers or before decorating will lead to frustration. Let those layers and coats set!
- **Trying to Be a Perfectionist:** Bento cakes are meant to be cute and charming, not perfectly engineered. Embrace the slight imperfections; they give it character!
Alternatives & Substitutions
Feeling a little rebellious? Want to switch things up? Here are some ideas:
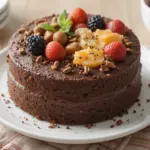
- **Cake Base Swap:** Instead of plain vanilla, how about a lemon zest mini cake? Or chocolate? Or even red velvet? The world is your oyster… or, well, your cake!
- **Frosting Flair:** Not a fan of traditional buttercream? Try a **cream cheese frosting** for a tangier taste, or a rich chocolate ganache if you’re feeling extra fancy (and brave). Just remember to adjust consistency for piping!
- **Decoration Evolution:**
- **Fresh Fruits:** Mini berries (raspberries, blueberries) can look super elegant.
- **Chocolate Shavings:** Use a veggie peeler on a chocolate bar for quick, classy curls.
- **Edible Flowers:** For a sophisticated, delicate touch.
- **Cookie Cutters:** Use small cookie cutters to press shapes into the top of the frosting before it sets, then fill with sprinkles or a contrasting color.
- **Flavor Fusion:** Add a thin layer of lemon curd, raspberry jam, or even a little Nutella between cake layers for an extra burst of flavor. Just don’t overdo it, or your cake might go for a slide!
FAQ (Frequently Asked Questions)
Got questions? I’ve got answers! (Mostly.)
Can I use a regular cake recipe and just make it small?
Absolutely, you genius! Just bake it in a smaller cake pan (like 4-inch or 6-inch) and adjust baking time accordingly. Keep an eye on it!
How long do bento cakes last?
Stored properly in an airtight container in the fridge, they’ll last about 3-4 days. But honestly, who can resist a cute cake for that long?
Do I need special equipment?
Nah, not really. While piping bags and tips are helpful, you can totally use a Ziploc bag with the corner snipped for piping, and a butter knife for smoothing. Resourcefulness is key!
Can I make it vegan/gluten-free?
Totally! Just make sure your cake base and buttercream ingredients (vegan butter, plant-based milk, GF flour for scratch baking) are compliant. The decorating fun remains the same!
What if my frosting looks lumpy?
If your butter wasn’t soft enough, or your powdered sugar had lumps, your frosting might be lumpy. **Sifting your powdered sugar** beforehand helps a lot! You can also try warming a small amount of buttercream, mixing it in, and beating again to smooth it out.
Can I put a real candle on it?
Yep! Just make sure it’s a mini candle appropriate for a small cake. Or even better, get those sparkler candles for extra flair! 🔥
What’s the best way to transport it?
In an actual bento box! Or any small, sturdy container with a lid. Keep it chilled until just before gifting/serving, especially if it’s a warm day. Nobody wants a sad, melted cake.
Final Thoughts
So there you have it! Your ultimate guide to crafting a 20th birthday bento cake that’s equal parts delicious, adorable, and stress-free. This isn’t just a cake; it’s a tiny, edible declaration of love, friendship, or self-celebration. Now go forth and create! Impress someone – or just yourself – with your new culinary skills. You’ve earned it! And remember, even if it’s not perfect, it’s *yours*, and that makes it awesome. Happy 20th!

