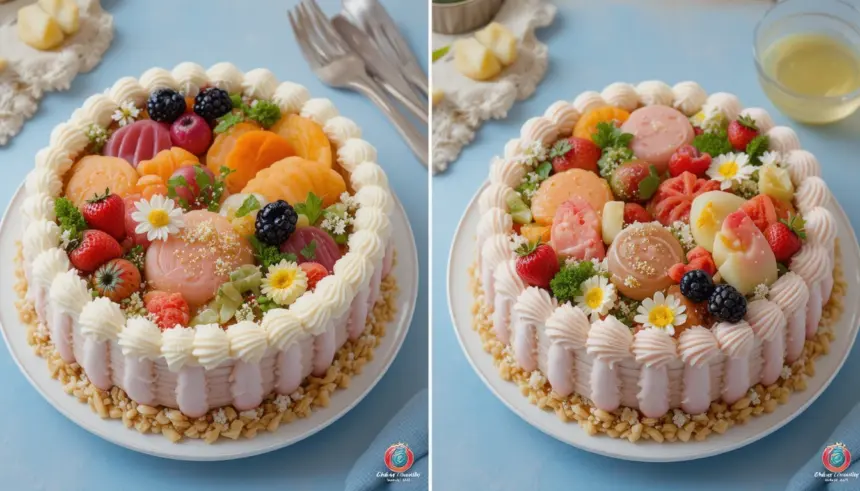
Ever looked at those adorable bento cakes and thought, ‘Cute, but I only have one stomach and zero patience for four different tiny cakes?’ Girl, I hear you. But what if I told you we could have our cake and eat *all four* designs in one go? Mind blown, right? Welcome to the magical world of the 4-in-1 Bento Cake!
Why This Recipe is Awesome
Why settle for one fabulous flavor or design when you can have a quartet of deliciousness in one tiny, Instagram-worthy package? This recipe isn’t just a cake; it’s a *statement*. It screams, ‘I’m indecisive but also incredibly talented!’ Plus, it’s surprisingly easier than it looks (shhh, don’t tell anyone, let them think you’re a baking wizard).
It’s perfect for when you want variety without baking four full-sized cakes – who has time for that?! And let’s be real, it’s also a great way to use up those random sprinkles you bought because they were ‘cute.’ It’s basically a party in a box, but the box is a cake, and the party is in your mouth. Win-win-win, IMO.
Ingredients You’ll Need
- Your favorite small cake batter: (Enough for one 4-inch cake. Store-bought mix is totally okay, no judgment here!).
- Unsalted Butter: About 1 cup (2 sticks), softened. Because everything’s better with butter, duh.
- Powdered Sugar (Confectioners’ Sugar): Around 3-4 cups, sifted. For that dreamy, smooth buttercream.
- Heavy Cream or Milk: 2-3 tablespoons. To make it creamy, not crumbly.
- Vanilla Extract: 1 teaspoon. The OG flavor enhancer.
- Gel Food Coloring: Assorted colors. Get wild! Or don’t. Your cake, your rules.
- Flavor Extracts (optional): Think lemon, almond, coffee, etc. For those extra “oomph” moments.
- Sprinkles, chocolate chips, mini candies: For decorating. Because plain is boring.
- The MVP: A 4-inch round cake pan. Or ramekins if you’re feeling rustic.
Step-by-Step Instructions
- Bake Your Base: Prepare your favorite small cake batter. Divide it evenly into your 4-inch pan(s). Bake according to instructions until a toothpick comes out clean. Let them cool completely. Seriously, completely. Warm cakes + frosting = melty disaster.
- Whip Up That Buttercream: In a large bowl, beat your softened butter until it’s light and fluffy. Gradually add the sifted powdered sugar, alternating with splashes of heavy cream/milk and vanilla extract. Beat until smooth and luscious. If it’s too thick, add more cream; too thin, more sugar!
- Divide and Conquer (Colors!): Divide your glorious buttercream into four small bowls. Now for the fun part: tint each bowl with a different gel food coloring. Add a drop or two of your optional flavor extracts to each bowl if you’re feeling fancy.
- Assemble the Masterpiece: Take your cooled cake. If it’s domed, level it with a serrated knife. Gently place it on a small cake board or a plate.
- Section It Out: Use a small knife or even a toothpick to lightly mark four equal quadrants on the top of your cake. This is your “blueprint” for the designs.
- Decorate Each Quadrant: Using a small offset spatula, piping bag, or even a spoon, decorate each quadrant with a different colored/flavored buttercream. Get creative! Swirls, rosettes, smooth layers – let your inner artist shine.
- Sprinkle Time! Embellish each quadrant with different sprinkles, mini candies, or chocolate shavings. Go wild! Or keep it minimal. No judging here.
- Chill Out: Pop your finished bento cake into the fridge for at least 30 minutes to let the buttercream firm up. This also makes it easier to transport and slice.
- Admire & Devour: Take a million pictures. Then, with a flourish, slice and serve your magnificent 4-in-1 creation. Enjoy the oohs and aahs!
Common Mistakes to Avoid
- Frosting a Warm Cake: Seriously, don’t. It’s a one-way ticket to soup-town. Patience, young grasshopper!
- Not Sifting Powdered Sugar: Unless you enjoy lumpy frosting (who does?), take the extra 30 seconds. Your future self will thank you.
- Using Liquid Food Coloring: Gel food coloring is your best friend here. Liquid stuff can thin out your buttercream too much. Nobody wants runny frosting.
- Overmixing the Batter: For the cake, not the frosting! Overmixing develops gluten and gives you a tough, dense cake. Mix until *just combined*.
- Not Having Fun: This is supposed to be enjoyable! Don’t stress the small stuff. Imperfections are just “rustic charm.”
Alternatives & Substitutions
- Cake Base: No time for scratch baking? A box mix is your BFF. Want to go gluten-free or vegan? Many great options exist!
- Buttercream: Not a fan of traditional buttercream? Try cream cheese frosting or even a whipped ganache. Just make sure it’s firm enough to hold its shape.
- Flavor Extracts: Get adventurous! Coffee extract, almond, peppermint, orange zest… the world is your oyster.
- Decorations: Sprinkles are just the beginning! Mini chocolate chips, crushed cookies, edible glitter, fresh berries, zest, mini M&Ms – go wild with what you have.
FAQ (Frequently Asked Questions)
- “Can I make this cake bigger?” Girl, if you want a giant 4-in-1 cake, who am I to stop you? Just adjust the batter and frosting quantities accordingly. Your friends will be impressed (and well-fed!).
- “How far in advance can I make this?” You can bake the cake layers a day or two ahead and keep them well-wrapped at room temp or in the fridge. Frost the day you plan to serve for peak freshness and Instagram-worthiness.
- “My buttercream is too soft! Help!” Pop it in the fridge for 15-20 minutes, then give it another quick whip. If it’s still too soft, add more sifted powdered sugar, a tablespoon at a time. Humidity can be a real party pooper, FYI.
- “Can I use store-bought frosting?” You *can*. But will it be as divine and customizable? Probably not. It’s your call, but homemade buttercream is truly superior for this kind of design. Just sayin’.
- “What if my cake pan is a different size?” No worries! Just ensure your cake is baked evenly and cooled. A slightly smaller or larger cake won’t break the magic. You might just have more or less frosting per quadrant!
- “Is this hard to clean up?” Let’s be real, any baking creates a “crime scene” in the kitchen. But the joy of eating this cake makes it all worth it, right? Right?!
Final Thoughts
And there you have it! Your very own, show-stopping, 4-in-1 bento cake. You’ve officially leveled up your dessert game without breaking a sweat (or at least, not too much!). Now go impress someone – or yourself – with your new culinary skills. You’ve earned those bragging rights, and definitely, that slice of cake. Go on, you magnificent baker, you!
