So, you just realized Halloween is practically knocking on your door, and your spooky spirit is high, but your baking motivation? Not so much, right? Same, friend, same. We’re talking about those adorable, personal-sized cakes that fit perfectly in a bento box (or, let’s be real, a really cute plate). They’re miniature masterpieces, perfect for gifting, a small gathering, or, dare I say, a solo movie night binge. Let’s get spooky-cute with some Halloween bento cake ideas!
Why This Recipe is Awesome
Okay, first things first: why bento cakes? Because they’re the coolest kid on the block right now, that’s why! This isn’t just a recipe; it’s a **stress-free ticket to looking like a baking guru** without actually having to spend your entire Saturday covered in flour. Seriously, it’s basically a personal party in a box. Here’s the lowdown:
- They’re small, so less cake to potentially mess up. And less guilt if you eat the whole thing. 😉
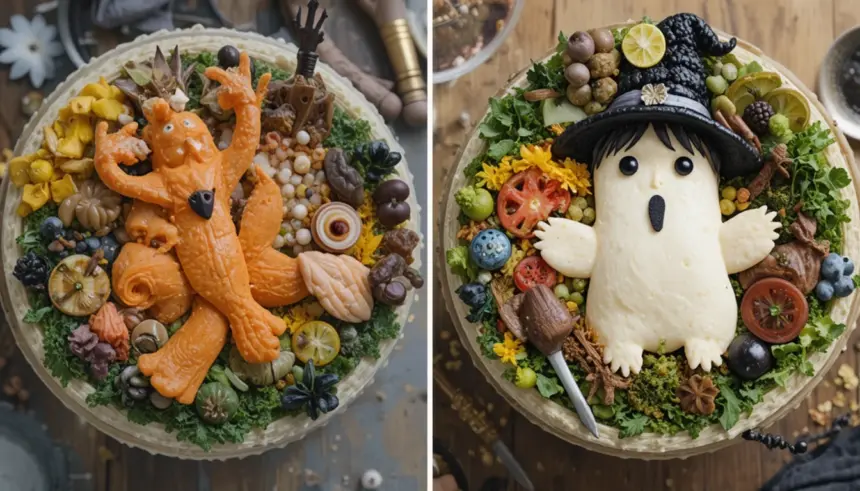
- **Super customizable!** Halloween gives us *all* the fun themes – ghosts, spiders, mummies, pumpkins.
- Looks incredibly impressive with minimal actual effort. Your friends will be like, “Whoa, did you *make* that?” You can just casually nod.
- Perfect for a small shindig or, if we’re being honest, just you and your couch marathoning horror movies.
Ingredients You’ll Need
No need for a grocery store scavenger hunt here. We’re keeping it simple and delicious.
- Your Favorite Cake Mix (or Scratch Recipe): Honestly, a boxed mix is your best friend here. Chocolate or vanilla works great. We’re aiming for easy, remember?
- Eggs, Oil/Butter, Milk/Water: Whatever your cake mix calls for. Follow those box instructions, folks!
- Unsalted Butter (softened): About a cup for the frosting. Don’t use cold butter unless you *want* lumpy frosting.
- Powdered Sugar (Icing Sugar): Roughly 3-4 cups. This is the magic dust that makes frosting, well, frosting.
- Milk or Heavy Cream: A few tablespoons for consistency. Start small! You can always add more, but you can’t take it away.
- Vanilla Extract: A teaspoon or two for that classic flavor. Or almond, if you’re feeling fancy.
- Gel Food Coloring: Black, orange, purple, green. The more ghoulish, the better! Liquid food coloring won’t give you that vibrant punch.
- Spooky Sprinkles & Candies: Eyeball candies, gummy worms, ghost sprinkles, tiny candy corn. Get creative!
- Chocolate Chips or Melts: For spiderwebs or other cool details.
- Small Cake Pans: Think 4-inch or 6-inch rounds. If you don’t have them, use cupcake liners and stack ’em!
Step-by-Step Instructions
- Bake Your Mini Cakes: Prepare your cake mix according to package directions. Divide the batter evenly among your greased and floured mini cake pans. Bake until a toothpick inserted into the center comes out clean. Let them cool completely on a wire rack. **Seriously, totally cool.**
- Whip Up the Frosting: In a large bowl, beat the softened butter until light and fluffy. Gradually add the powdered sugar, alternating with splashes of milk/cream, until you have a smooth, spreadable consistency. Beat in the vanilla extract.
- Color Your World (aka Frosting): Divide your glorious buttercream into separate bowls. Add a few drops of gel food coloring to each, stirring until you get those vibrant Halloween hues. Think black, orange, purple, maybe a slimy green!
- Level Up (Your Cakes!): Once cooled, use a serrated knife to level the tops of your cakes so they’re flat. This makes stacking a breeze and prevents leaning towers of cake.
- Stack and Crumb Coat: Place your first cake layer on your serving plate or bento box. Spread a thin layer of frosting, then top with the next cake layer. Repeat. Once stacked, apply a very thin “crumb coat” of frosting all over the cake. This traps any loose crumbs. **Chill it in the fridge for 15-20 minutes.**
- Frost and Decorate: Now for the fun part! Apply your final, thicker layer of colored frosting to your chilled cake. Get creative with designs!
- Spiderweb: Frost your cake black or purple. Melt some chocolate, put it in a piping bag (or a ziptop bag with the corner snipped). Pipe concentric circles on top, then drag a toothpick from the center outwards to create a web design.
- Mummy: Frost your cake a light color (white or light green). Use a piping bag with a flat tip (or just snip a line off a ziptop bag) to pipe strips of frosting across the cake, leaving a gap for the “eyes.” Add two candy eyeballs!
- Pumpkin: Frost your cake bright orange. Use a small round tip to pipe on a simple jack-o’-lantern face.
Common Mistakes to Avoid
Nobody’s perfect, and neither is baking every single time. Here are a few traps to sidestep:
- Not cooling your cakes completely: This is a cardinal sin! If your cakes are even slightly warm, your frosting will melt and slide right off. Think of it as a sad, sugary avalanche.
- Overmixing your batter/frosting: For cake batter, overmixing develops too much gluten, making your cake tough. For frosting, it can incorporate too much air, making it bubbly. **Mix until *just* combined.**
- Skipping the crumb coat: You might think it’s an extra step you can ditch, but trust me, it’s not. It’s like the invisible superhero that locks in crumbs, giving you a smooth canvas for your final frosting layer.
- Impatience: Baking is like a good horror movie—you need to build up to the climax. Rushing cooling, chilling, or decorating will just lead to jump scares (and messy cakes).
- Thinking you don’t need to preheat the oven: Rookie mistake! Always preheat. It ensures even baking from the get-go.
Alternatives & Substitutions
Feeling a little rebellious, or just missing an ingredient? No worries, we’ve got you covered!
- Pre-made Cake Layers: Shhh, I won’t tell anyone if you buy pre-baked mini cake layers or even use oversized cupcakes. Just trim them down and stack! It’s our little secret.
- Store-Bought Frosting: Totally acceptable! Just add a bit of powdered sugar if it’s too soft, or a tiny splash of milk if it’s too stiff. Then, color away!
- Vegan/Gluten-Free: Many brands offer awesome vegan or gluten-free cake mixes and frosting recipes. Don’t let dietary restrictions dull your spooky shine!
- Candies & Toppings: Don’t have those specific candy eyeballs? No stress! Use chocolate chips for eyes, broken pretzel sticks for “bones,” or just go wild with whatever Halloween candy you have lying around. (Or raid the kids’ trick-or-treat bags, IMO.)
- No Fancy Piping Tips? No problem! A Ziploc bag with a tiny corner snipped off works wonders for piping details. Or just spread the frosting on artfully with an offset spatula or butter knife for a rustic, spooky vibe.
FAQ (Frequently Asked Questions)
Got questions? We’ve got answers (and probably a joke or two).
- Can I use a regular-sized cake mix for bento cakes? Absolutely! A standard box mix usually makes enough for about 3-4 small bento cakes (depending on your pan size). Just divide the batter.
- How long do these mini masterpieces last? Covered tightly (especially in a bento box!), they’re good for 3-4 days at room temperature, or up to a week in the fridge. But honestly, who can resist them that long?
- Can I freeze the bento cakes? You bet! Bake the cakes, let them cool completely, then wrap them tightly in plastic wrap and foil. Freeze for up to a month. Thaw them before frosting. I wouldn’t recommend freezing them *after* decorating, though, unless you enjoy squished spiderwebs.
- My frosting is too runny/too stiff! Help! Easy fix! If it’s too runny, add more powdered sugar, a tablespoon at a time. If it’s too stiff, add a tiny bit more milk or cream, half a teaspoon at a time. You’ll get there!
- Where do I get bento boxes? Online marketplaces, party supply stores, or even some craft stores. But hey, a cute small plate works just as well if you’re not planning on transporting them.
- Do I *really* need all those different food colors? Nah, pick your faves! A black and an orange cake with some white ghost decorations can be super effective. Less is often more, especially when you’re going for a minimalist-spooky look.
- What if my cake sticks to the pan? A moment of silence for our fallen cake… To avoid this, always grease and flour your pans thoroughly, or use parchment paper circles at the bottom. **Parchment paper is your friend!**
Final Thoughts
There you have it, future baking superstar! Halloween bento cakes are the perfect blend of cute, spooky, and manageable. They’re a fantastic way to get into the Halloween spirit without committing to a full-on baking marathon. So, grab your apron, crank up a spooky playlist, and let your creativity (and maybe a little bit of frosting) flow. Now go impress someone—or yourself—with your new culinary skills. You’ve earned it!
