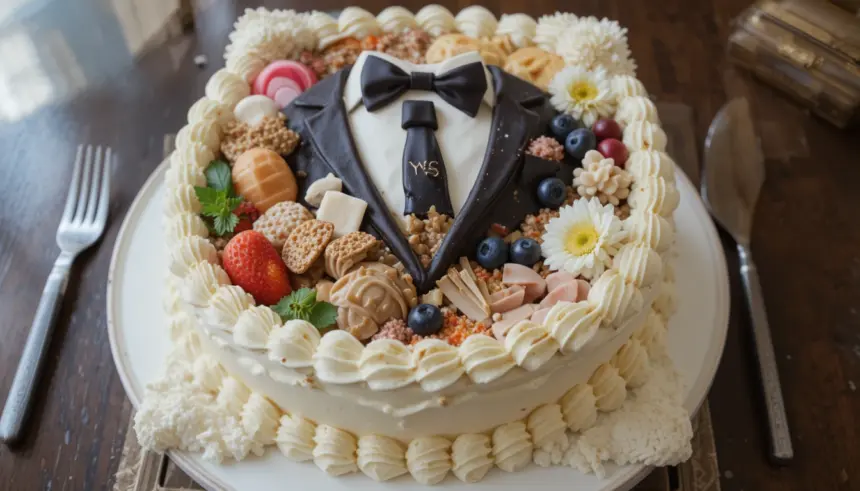
So you’re constantly buried under case files, staring at dense legal jargon, and dreaming of something sweet that doesn’t involve arguing a point? Or maybe you just finished a grueling cross-examination and need a win, stat? Yeah, I get it. We all crave something delicious that feels fancy but isn’t a complex legal brief to make. Enter: the Bento Cake. It’s tiny, adorable, and ridiculously easy. Perfect for a quick, personal indulgence when you need a little mental recess!
Why This Recipe is Awesome
Okay, let’s be real. After a day of drafting motions and dissecting contracts, the last thing you want is a recipe that requires a forensic investigation. This bento cake? It’s the culinary equivalent of an open-and-shut case. It’s **idiot-proof**, I swear, even I didn’t mess it up! It bakes up super fast, which is perfect because who has time to wait? Plus, its cute, individual size means **no sharing required** (unless you *want* to, which, after the day you’ve had, is entirely your call). It’s impressive enough to make you look like a baking superstar, but secretly requires minimal effort. Talk about a loophole!
Ingredients You’ll Need
Think of these as your key witnesses – essential for a solid outcome. And yes, measurements are key here, not like those ‘reasonable doubt’ kind of measurements. 😉
- For the Cake:
- 1/2 cup (113g) unsalted butter, softened. **Real butter, people!** Your taste buds deserve a win.
- 1 cup (200g) granulated sugar. To sweeten the deal, literally.
- 2 large eggs. Your binding agents.
- 1 1/2 cups (180g) all-purpose flour. The foundation of your case.
- 1 1/2 teaspoons baking powder. For that glorious lift!
- 1/2 teaspoon salt. To balance out all that sweetness.
- 1/2 cup (120ml) milk (any kind works!). Helps everything flow.
- 1 teaspoon vanilla extract. The *essence* of deliciousness. Get it?
- For the Frosting:
- 1/2 cup (113g) unsalted butter, softened. Again, only the best!
- 2-3 cups (240-360g) powdered sugar, sifted. Start with 2, add more if needed for consistency.
- 1/4 cup (60ml) heavy cream or milk. For creaminess!
- 1 teaspoon vanilla extract. More yummy vanilla!
- A pinch of salt (optional). Cuts through the sweetness.
- Food coloring (optional, but fun!). To make it pop, obviously.
Step-by-Step Instructions
Follow these steps closely, and you’ll have a delicious verdict in no time!
- Prep Your Pans & Oven: First things first, preheat your oven to 350°F (175°C). Grease and flour two 4-inch round cake pans or line a muffin tin (you’ll get about 4-6 cupcakes, which you can then trim into mini rounds if you’re feeling extra). **Don’t skip the preheat!** It’s like showing up to court without your brief.
- Cream the Good Stuff: In a large bowl, cream together the softened butter and granulated sugar until it’s light and fluffy. This usually takes 2-3 minutes with an electric mixer.
- Add the Eggs: Beat in the eggs, one at a time, making sure each is fully incorporated before adding the next. Then stir in the vanilla extract.
- Whisk Dry Ingredients: In a separate bowl, whisk together the flour, baking powder, and salt. This ensures even distribution – no lumpy surprises here!
- Combine Wet & Dry: Gradually add the dry ingredients to the wet ingredients, alternating with the milk. Start and end with dry. **Mix until just combined.** Overmixing is a common mistake and will lead to a tough cake, trust me.
- Bake It Up: Divide the batter evenly between your prepared pans. Bake for 20-25 minutes, or until a toothpick inserted into the center comes out clean. Think of it as a flawless cross-examination.
- Cool Down: Let the cakes cool in their pans for about 10 minutes before inverting them onto a wire rack to cool completely. This part is crucial!
- Whip Up the Frosting: While your cakes are cooling, beat the softened butter for the frosting until creamy. Gradually add the sifted powdered sugar, alternating with the heavy cream/milk and vanilla extract. Beat until smooth and fluffy. Add food coloring now if you’re feeling colorful!
- Assemble Your Masterpiece: Once the cakes are **completely cool** (I cannot stress this enough!), level them if needed. Place one cake layer on your serving plate or bento box, spread with a layer of frosting, top with the second cake layer, and then frost the top and sides. Decorate as you wish – a simple swirl or some fun piping!
Common Mistakes to Avoid
We’ve all been there. Here are some pitfalls to dodge on your path to bento cake glory:
- **Thinking you don’t need to preheat the oven:** Rookie mistake! Your cake won’t rise properly.
- **Overmixing the batter:** This is a big no-no. It develops the gluten too much, giving you a dense, chewy cake instead of a light, fluffy one. Mix until just combined, no more!
- **Frosting a warm cake:** You’ll end up with a sad, melty, sliding mess, not a beautiful bento. Patience is a virtue, my friend. Let it cool completely.
- **Eyeballing ingredients:** Baking is a science, unlike some of the… *interpretations*… you deal with daily. Use those measuring cups and spoons!
Alternatives & Substitutions
Feeling adventurous or just working with what you’ve got? No problem!
- Flavor Swaps: Want to switch things up? Replace vanilla extract with almond extract for a nutty twist, or a bit of lemon zest for a zesty kick. **FYI, a little cocoa powder** (about 1/4 cup, reducing flour by the same amount) turns this into a chocolate bento cake!
- Milk Matters: No regular milk? Buttermilk works wonders for extra tenderness. No buttermilk? Add a tiny bit (1/2 tsp) of lemon juice or white vinegar to regular milk and let it sit for 5 minutes. Voila!
- Frosting Fun: Not a fan of buttercream? A simple chocolate ganache (melted chocolate + heavy cream) is divine, or a tangy cream cheese frosting would also be amazing.
- Oil vs. Butter: You *can* use vegetable oil instead of butter for a slightly more moist cake, but IMO, butter gives a superior flavor and texture. Choose your fighter!
FAQ (Frequently Asked Questions)
Got questions? I’ve got answers – no cross-examination required!
Can I make this ahead of time? Absolutely! The unfrosted cake layers can be baked a day or two in advance, wrapped tightly in plastic wrap, and stored at room temperature. Frost the day you plan to serve.
What if I don’t have small cake pans? No worries! You can bake the batter in a muffin tin (filling each cup about 2/3 full) and then trim the tops for flatter layers. Or, bake in an 8-inch round pan and use a cookie cutter to cut out smaller circles.
My cake sunk in the middle, what happened? A few culprits: oven door opened too soon, old baking powder, or overmixing the batter. Always trust the toothpick test!
Can I use margarine instead of butter? Well, technically yes, but why hurt your soul like that? Butter just tastes better, period. For special treats, go for the good stuff.
How long does a bento cake last? Covered and stored at room temperature, it’s best within 2-3 days. In the fridge, it can last up to 5 days, but let it come to room temp before eating for the best flavor and texture.
Can I freeze the bento cake? Yes! Wrap unfrosted cake layers tightly in plastic wrap and then foil, and freeze for up to a month. Thaw at room temperature before frosting.
Is this recipe adaptable for other flavors? You bet! See the “Alternatives & Substitutions” section above for some ideas to get your creative juices flowing.
Final Thoughts
So there you have it, folks! Your very own delicious bento cake, ready to bring a little sweetness into your undoubtedly busy (and probably stressful) legal life. Whether you’re celebrating a win, commiserating a tough day, or just need a moment of delicious calm, this cake is your new best friend. Now go impress someone – or yourself – with your new culinary skills. You’ve earned this win!

