So you’re scrolling through Instagram, seeing all these adorable mini cakes, and thinking, “Ugh, I wish I could make that without spending three days in the kitchen.” Right? SAME. Friend, prepare to have your mind blown (and your sweet tooth satisfied) because we’re about to whip up a Cute Simple Bento Cake that’s practically magic. No stress, maximum deliciousness, and just enough cuteness to make your day!
Why This Recipe is Awesome
Let’s be real, who needs a giant cake when you just want a little slice of happiness? This bento cake recipe is a game-changer for several very important reasons:
- It’s tiny, so you don’t have to share (unless you *want* to, you generous soul). Or, you can eat the whole thing without an ounce of guilt. Win-win!
- It looks super fancy but is secretly **idiot-proof**. Seriously, if I can do it without burning down the kitchen, you absolutely can.
- Quick bake time, even quicker decorating time. We’re talking instant gratification, folks! Perfect for a spontaneous sweet craving.
- It’s the ultimate “treat yourself” moment without committing to a full-sized cake that stares judgmentally at you from the counter for a week.
Ingredients You’ll Need
Gather your troops! These are the heroes of our bento cake saga. Nothing too fancy, just good old reliable kitchen staples:
- All-purpose flour: The backbone of all delicious cakes. Don’t worry, it won’t judge your baking skills.
- Granulated sugar: Because life’s sweet, and so should your cake be. Duh.
- Baking powder: Our little lifting fairy. This is what makes your cake light and fluffy, not dense and sad.
- Salt: Just a tiny pinch, to make everything else taste better. Don’t skip it, it’s not just for savory stuff!
- Milk: Any kind works! Dairy, oat, almond – whatever you’ve got chilling in the fridge.
- Vegetable oil: Keeps it super moist. We’re talking melt-in-your-mouth moist, no dry cake vibes here.
- Vanilla extract: Essential for that classic “mmmm, cake” flavor. **Don’t cheap out on this!** Good vanilla makes a difference.
- Egg: One happy egg to bind it all together.
For the Dreamy Buttercream Frosting:
- Unsalted butter, softened: Leave it out for an hour or so before you start. Don’t microwave it into a melted puddle unless you want runny frosting and regrets.
- Powdered sugar: Sift it! Or you’ll have lumpy frosting and even more regrets. Trust me on this one.
- Vanilla extract: More vanilla, because why stop at one dose of deliciousness?
- Milk or heavy cream: Just a tablespoon or two, to get that perfect spreadable, fluffy consistency.
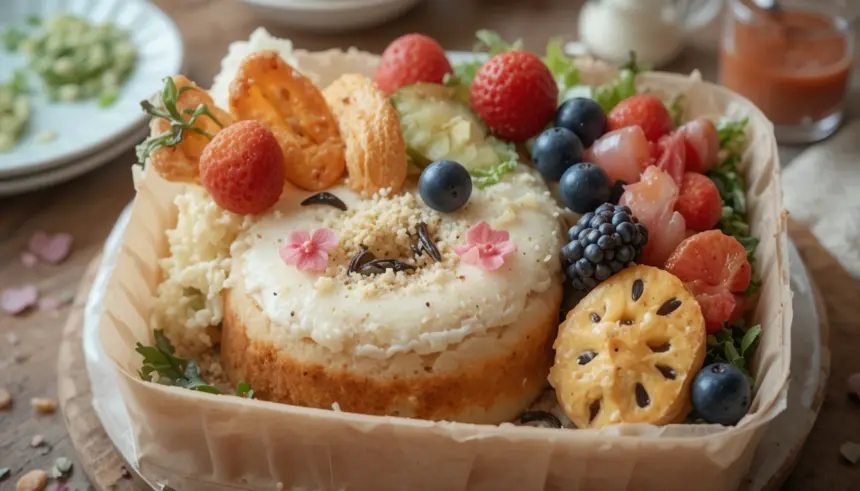
- Food coloring (optional): For making it extra cute! Pastels are the bento cake vibe.
Step-by-Step Instructions
Alright, apron on, game face ready! Let’s get baking!
- Prep Time! Preheat your oven to 350°F (175°C). Grab a small 6-inch round cake pan (or a few ramekins if you want individual mini cakes). **Line the bottom with parchment paper!** It’s your BFF for easy, tear-free cake release.
- Dry Mix Fun: In a medium bowl, whisk together the flour, sugar, baking powder, and salt. Give it a good whisk to make sure there are no lumpy bits.
- Wet Mix Wonders: In another bowl, combine the milk, oil, vanilla extract, and egg. Whisk until everything is happily blended and uniform.
- Combine & Conquer: Pour the wet ingredients into the dry ingredients. Mix until *just* combined. **Overmixing is the enemy of tender cake!** A few small lumps are perfectly okay.
- Bake It Up: Pour the batter into your prepared pan. Pop it in the oven and bake for 20-25 minutes, or until a toothpick inserted into the center comes out clean.
- Cool Down: Let the cake cool in the pan for about 10 minutes. Then, carefully invert it onto a wire rack to cool completely. **Patience, my friend!** Don’t even *think* about frosting a warm cake unless you want a melted, slidey mess.
- Frosting Frenzy: While the cake cools, let’s whip up that dreamy buttercream. Beat the softened butter in a bowl until it’s super creamy. Gradually add the powdered sugar, a little milk/cream, and vanilla extract. Beat until light, fluffy, and smooth. Now’s the time to add a few drops of food coloring if you’re going for a pastel masterpiece!
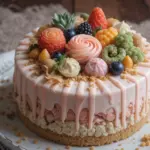
- Stack & Decorate: Once your cake is completely, utterly cool, you can carefully slice it in half horizontally to create two layers (or just keep it single-layered for super simplicity). Spread a generous layer of frosting between the layers, then frost the top and sides. Get creative with sprinkles, extra piping, or a cute little message!
Common Mistakes to Avoid
We’ve all been there, friend. Learn from my past (numerous) baking blunders:
- **Impatience is a virtue, but not in baking:** Trying to frost a warm cake is a rookie mistake. You’ll cry, your cake will cry (melt), and it won’t be pretty. **Let it cool completely!**
- **Overmixing the batter:** This is the quickest way to a tough, rubbery cake. We want tender, fluffy goodness! Mix until *just* combined, no more.
- **Forgetting to grease/line the pan:** Good luck getting that cake out in one piece. Seriously, parchment paper on the bottom is your hero. Don’t skip it.
- **Eyeballing ingredients:** Baking is a science, mostly. Use proper measurements, especially for flour and baking powder. This isn’t the time for “a little bit of this, a little bit of that.”
- **Using cold butter for frosting:** It will be lumpy, sad, and unspreadable. Softened butter is key for smooth, dreamy buttercream.
Alternatives & Substitutions
Feeling adventurous? Or maybe you’re just out of one ingredient? No worries, we’ve got options!
- Flour Power: All-purpose flour works perfectly, but if you’re feeling fancy, you can swap a tiny bit (say, 1-2 tablespoons) for almond flour for a slightly different texture. Don’t go wild though, stick mostly to all-purpose for structure.
- Milk Options: Any dairy milk, or non-dairy alternatives like almond, soy, or oat milk will work just fine. Your cake, your rules!
- Oil vs. Butter: Vegetable oil gives a super moist crumb, which is why we love it here. If you *really* want butter, you can use melted unsalted butter, but the cake’s texture might be slightly denser. IMO, stick with the oil for maximum moisture.
- Flavor Fun: Want to switch it up? Add a teaspoon of almond extract instead of vanilla, or a dash of lemon zest to the batter for a different twist. Feeling chocolatey? Throw in a handful of mini chocolate chips!
FAQ (Frequently Asked Questions)
Got questions? I’ve got (casual) answers!
- “Can I make this a chocolate bento cake?” Absolutely! Swap out 2 tablespoons of flour for 2 tablespoons of unsweetened cocoa powder. Add a little extra milk (about a tablespoon) if the batter seems too thick. Chocolate dreams, activated!
- “How do I store a bento cake?” Pop it in an airtight container at room temperature for up to 2 days. If you want it to last longer, stash it in the fridge for up to 5 days. Just remember to let it come to room temp before serving for the best flavor!
- “My cake stuck to the pan, what gives?” Uh oh! Did you grease and flour, or use that magical parchment paper I mentioned? **Told ya!** For next time, make sure your pan prep is super thorough. It’s the secret to easy release.
- “Can I use store-bought frosting instead of making my own?” *Gasp!* Okay, okay, if you’re in a super rush or feeling incredibly lazy, yes, you *can*. But homemade buttercream is SO much better and, TBH, really easy. It truly elevates the whole bento cake experience!
- “What size pan should I use?” A 6-inch round cake pan is ideal for a classic bento cake. If you want even smaller individual ones, use ramekins (just keep an eye on them, as bake time might be slightly less!).
Final Thoughts
So there you have it, future bento cake master! You’ve conquered the adorable mini cake without breaking a sweat (or a plate, hopefully). This little beauty is perfect for a solo indulgence, a cute gift for a friend, or just because you felt like making something sweet and didn’t want a week’s worth of leftovers.
Now go impress someone—or yourself—with your new culinary skills. You’ve earned it! Don’t forget to snap a pic and show off your masterpiece. Happy baking!

