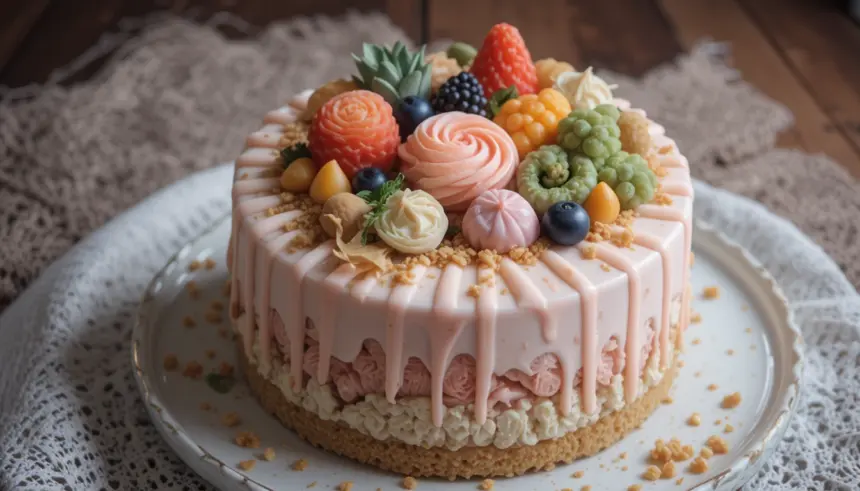
So, you’ve been scrolling through Instagram, drooling over those impossibly cute, perfectly designed mini cakes, haven’t you? The ones that fit neatly into a tiny box and look like they came straight out of a Pinterest dream board? Yeah, those are aesthetic bento cakes, and guess what? You, my friend, are about to learn how to whip up your own edible works of art without needing a culinary degree or, frankly, even much effort. Because who has time for complicated when you can have cute and delicious?
Why This Idea is Awesome (aka, Why You Need This in Your Life STAT)
First off, bento cakes are the ultimate “I made this!” flex without the full-blown, all-day kitchen marathon. They’re small, so you don’t need a gazillion ingredients or endless frosting. It’s like the snack-sized version of a big cake, meaning less commitment but maximum impact. Plus, they’re perfect for literally any occasion: a solo treat (no judgment here!), a thoughtful little gift, or even just an excuse to play with food coloring. It’s basically adult Play-Doh, but you get to eat your masterpiece. How awesome is that? It’s idiot-proof, honestly. Even I didn’t mess it up, and my kitchen adventures often involve smoke alarms.
Ingredients (aka, Your Artistic Supplies) You’ll Need
- Your Cake Base: A pre-baked mini cake (think 4-6 inches round), or even a few sturdy cupcakes you’ve leveled. If you’re feeling ambitious, bake your own! If not, grocery store bakery section is your bestie.
- Buttercream Frosting: The MVP of bento cakes. You’ll want a good, stable batch. Make it from scratch (butter, powdered sugar, a splash of milk/cream, vanilla) or grab a tub of good quality store-bought stuff. We’re talking 2-3 cups total.
- Gel Food Coloring: Forget the watery stuff, darling. Gel colors give you vibrant hues without messing with your frosting consistency. Get a few colors that make your heart sing!
- Piping Bags & Tips: A few disposable piping bags and a couple of basic tips (like a round tip and a star tip) will do wonders. Consider them your edible paintbrushes.
- Small Offset Spatula or Palette Knife: For smoothing that frosting like a pro. A butter knife works in a pinch if you’re feeling scrappy.
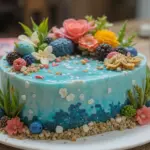
- Your Bling (Optional but Recommended!): Sprinkles, edible glitter, mini fresh berries, tiny candies, edible flowers – whatever makes your cake sparkle. This is where the ‘aesthetic’ truly comes alive!
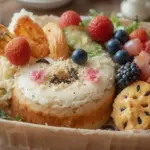
- Bento Box or Small Gift Box: To present your masterpiece. Because presentation is half the fun, right?
Step-by-Step Instructions (Let’s Get Frosty!)
- Prep Your Canvas: Make sure your mini cake (or cupcakes) is completely cool. Like, fridge-cold cool. If it’s still warm, your frosting will melt into a sad, sticky mess. Pro tip: Pop it in the fridge for 20-30 minutes before you start.
- Crumb Coat Magic: Apply a very thin layer of buttercream all over your cake. This “crumb coat” traps any loose crumbs, giving you a smooth, clean surface for your final frosting layer. Don’t worry about perfection here, just cover it. Chill the cake in the fridge for another 15-20 minutes until this coat is firm.
- Color Your World: Divide your remaining buttercream into separate bowls for each color you want to use. Add a tiny dab of gel food coloring to each bowl and mix until you achieve your desired shade. Remember, a little goes a long way!
- Smooth Operator: Now for the final, thicker layer of frosting. Use your offset spatula to apply an even layer of your base color all around the cake. Take your time to smooth out the sides and top. For extra smooth sides, gently heat your spatula under hot water, wipe dry, and then smooth. Back to the fridge for 10-15 minutes if you want your designs to sit perfectly.
- Let the Decorating Begin! This is where your inner artist shines. Fill your piping bags with your colored frostings and go wild! Think simple designs: dots, swirls, mini rosettes, a cute border, or even a small written message (e.g., “U Da Best”). Add your sprinkles, berries, or other bling. Don’t overthink it!
- Box It Up: Carefully transfer your finished bento cake into its box. Take a triumphant photo (or ten) for the ‘gram. You’ve earned it!
Common Mistakes to Avoid (So You Don’t Cry Over Spilled Frosting)
- Frosting a Warm Cake: Seriously, don’t do it. It’s a one-way ticket to a frosting landslide.
- Skipping the Crumb Coat: This is like trying to paint a wall without primer. You’ll end up with crumbs everywhere, and your final layer won’t look as pristine. Rookie mistake!
- Over-coloring Your Frosting: Adding too much liquid food coloring can thin out your buttercream. Gel colors are better, but still, add gradually. You can always add more, but you can’t take it away!
- Rushing the Chilling Steps: Patience, young padawan. Chilling the cake between steps makes frosting so much easier and gives you cleaner lines.
- Trying to Do Too Much: Sometimes, less is more. A simple, clean design with a pop of color or a few well-placed sprinkles looks way more aesthetic than an overloaded, messy cake, TBH.
Alternatives & Substitutions (Because We Like Options!)
- Frosting Flavors: Not a buttercream fan? Try cream cheese frosting, ganache, or even a stabilized whipped cream (just know it’ll be a bit softer for piping delicate details).
- Cake Base: Use mini cheesecakes, brownies, or even thick cookies as your “cake.” Get creative!
- Decorations Beyond Sprinkles: Edible glitter spray adds instant glam. Small candy melts can be melted and drizzled for patterns. For a more natural vibe, edible flowers or thinly sliced fruit work beautifully.
- Piping Bag Hacks: No piping bags? Cut the corner off a Ziploc bag. No fancy tips? Just snip a smaller hole for a round tip, or make a tiny ‘V’ cut for a leaf-like effect. It won’t be perfect, but it’ll get the job done!
FAQ (Frequently Asked & Funnily Answered Questions)
Can I use margarine instead of butter for the buttercream? Well, technically yes, but why hurt your soul like that? Real butter makes for a much richer, creamier, and more stable frosting. Your taste buds will thank you.
Do I *have* to use gel food coloring? Not if you enjoy pastel-colored, runny frosting that takes forever to dry. IMO, gel is superior for vibrant, concentrated colors without adding excess liquid. Invest in a small set; they last forever!
What if my frosting is too stiff or too soft? If it’s too stiff, add a tiny bit of milk or cream, a teaspoon at a time. Too soft? Pop it in the fridge for 15-20 minutes, then give it another mix. Temperature is key!
How long do these tiny masterpieces last? Covered in the fridge, typically 3-5 days, depending on your cake and frosting ingredients. But let’s be real, are they *really* going to last that long without being devoured?
Can I make these ahead of time? Absolutely! You can bake the cake a day or two ahead, wrap it well, and store it. Frosting can also be made a few days in advance and stored in the fridge (just bring it to room temp and re-whip before using). Assemble the day you plan to serve for peak freshness and aesthetic appeal.
I’m not artistic. Will mine look terrible? Nonsense! The beauty of bento cakes is in their charm. Simple dots, swirls, or even just a beautifully smoothed layer of frosting with a few sprinkles can be incredibly aesthetic. Plus, practice makes perfect. Have fun with it, that’s the main thing!
Final Thoughts (Go Forth and Create!)
See? That wasn’t so scary, was it? Bento cakes are all about embracing the cute, the personal, and the slightly less-intense side of baking. They’re a fantastic way to flex your creative muscles without the pressure of a giant, multi-tiered monstrosity. So, go on! Grab those ingredients, blast your favorite tunes, and get decorating. Now go impress someone—or yourself—with your new culinary skills. You’ve earned it!
