So, Easter’s hopping around the corner again, and you’re already picturing adorable bunnies, pastel eggs, and… a kitchen full of flour, sugar, and *regret*? Hold up! What if I told you there’s an easy Easter cake recipe that lets you look like a domestic goddess (or god!) without actually breaking a sweat? Yeah, I know, it sounds like a dream. But stick with me; we’re making some Easy Easter Cakes For Kids, and honestly, they’re so simple, even your pet goldfish could probably supervise.
Why This Recipe is Awesome
Because let’s be real, life is chaotic. Easter is about enjoying time with family, not about slaving over a hot oven for hours. This recipe is your secret weapon. It’s practically **idiot-proof** – and if I didn’t mess it up, you definitely won’t. Seriously, we’re talking minimal effort, maximum adorable factor. The kids will go bonkers, you’ll bask in the glory, and your kitchen will still be relatively intact. Plus, it involves a secret ingredient that makes baking almost too easy… (spoiler: it’s a box mix, don’t tell anyone I told you!).
Ingredients You’ll Need
Alright, let’s gather our troops! We’re not making rocket science here, just deliciousness.
- 1 Boxed Cake Mix (any flavor!): Vanilla, chocolate, funfetti – whatever screams “YUM!” to you. This is our cheat code.
- Ingredients listed on the cake mix box: Usually eggs, oil, and water or milk. Follow their instructions; they know what’s up.
- 1 tub of store-bought frosting: Seriously, don’t even *think* about making it from scratch. We’re cutting corners like a pro. White, vanilla, or cream cheese are great bases.
- Food coloring (optional): If you want to get fancy and make pastel frosting. Who doesn’t love a pink cake?
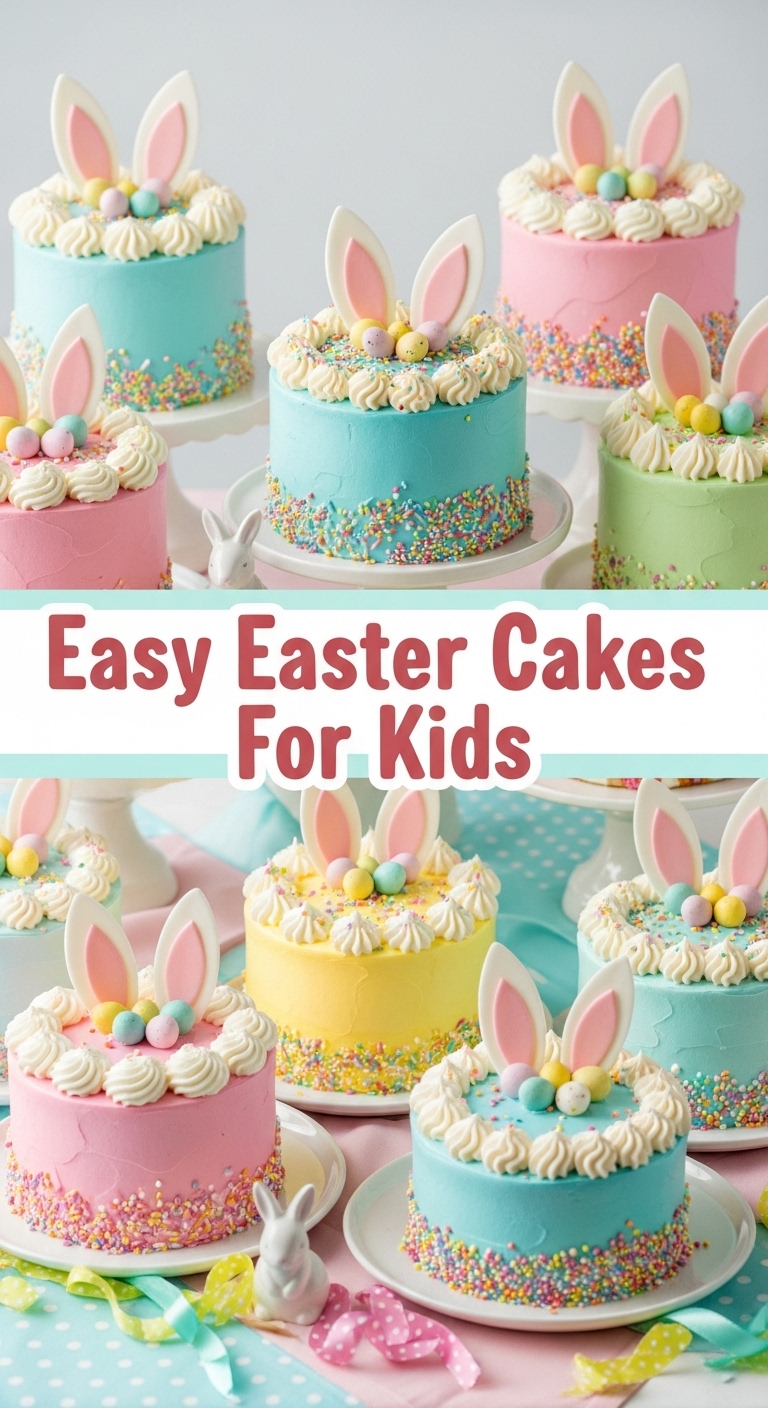
- Easter-themed sprinkles: The more colorful, the better! This is where the magic happens.
- Mini chocolate eggs, jelly beans, or small bunny candies: For that ultimate “Aww!” factor.
- Cupcake liners or a non-stick cake pan: Depending on if you’re going for individual cakes or one big masterpiece.
Step-by-Step Instructions
Get ready to be amazed at how quickly this comes together. It’s like magic, but with more sugar.
- First things first: **Preheat your oven** to the temperature specified on your cake mix box. This is crucial; don’t skip it unless you like sad, uneven cakes.
- In a large bowl, dump the cake mix, eggs, oil, and water/milk (or whatever the box tells you to use). Give it a good stir with an electric mixer or a whisk until everything is just combined. **Don’t overmix!** A few lumps are totally fine.
- If you’re making cupcakes, line your muffin tin with liners and fill each about two-thirds full. If you’re doing a cake, pour the batter into your prepared pan.
- Pop your cakes into the preheated oven and bake according to the box directions. Keep an eye on them towards the end. A toothpick inserted into the center should come out clean when they’re done.
- Once baked, let those beauties cool in the pan for about 10-15 minutes. Then, gently transfer them to a wire rack to cool completely. This part is **non-negotiable**! Frosting a warm cake is a recipe for disaster (and melted mess).
- Now for the fun part: the frosting! If you want colored frosting, divide your store-bought tub into smaller bowls and mix in a drop or two of food coloring until you get your desired pastel shades.
- Once the cakes are *completely* cool, frost them generously. Slap that frosting on with a knife or spatula. Don’t aim for perfection; rustic charm is totally in.
- Finally, unleash the kids (or your inner child) and decorate with those adorable sprinkles, mini chocolate eggs, and candies. Go wild! The more, the merrier.
Common Mistakes to Avoid
Even though this is easy peasy, a few common pitfalls can trip up even the most seasoned (read: lazy) bakers. Learn from my past blunders!
- Thinking you don’t need to preheat the oven. Rookie mistake! Your cakes won’t rise properly, and you’ll end up with dense, sad hockey pucks.
- Overmixing the batter. Once the dry ingredients are just wet, stop mixing! Overmixing develops gluten, leading to tough cakes. We want light and fluffy, people!
- Opening the oven door constantly. Resist the urge to peek! Every time you open that door, the temperature drops, and your cakes might sink.
- Frosting warm cakes. This is like trying to ice skate on a melted pond. You’ll just have a goopy, sticky, frosting-covered mess. Patience, young padawan!
- Letting the kids decorate *before* the frosting is applied. Trust me, it happens. They’ll just eat all the good stuff. Frost first, then unleash the candy tornado.
Alternatives & Substitutions
Feeling a bit adventurous, but still want to keep it simple? I got you!
- Change up the cake mix flavor: Who says Easter has to be vanilla? Chocolate cakes with green frosting can look like little grassy nests! Or go for a lemon mix for a zesty twist.
- Mix-ins for the batter: Want to be a little extra? Fold in some sprinkles into the batter before baking for a funfetti explosion, or a handful of mini chocolate chips.
- Different frostings: If you’re not into traditional buttercream, a simple whipped cream frosting (from a can, obvi!) or even melted white chocolate drizzled over can look super chic.
- Creative decorations: No mini eggs? No problem! Gummy bears, crushed Oreos (for “dirt” nests), M&Ms, or even simple edible glitter can transform your cakes. You could even use pretzels for little bunny ears!
FAQ (Frequently Asked Questions)
Got questions? I’ve got (casual) answers!
Can I use margarine instead of butter/oil? Well, technically yes, but why hurt your soul like that? Stick to what the box says for best results, IMO.
Do I *really* need to let them cool completely? Yes! I’m not shouting, just emphasizing. Unless you want a soupy, sliding mess of frosting, let those cakes chill out. **Patience is a virtue!**
My kids want to help. Is that a good idea? Absolutely! That’s half the fun. Just be prepared for a bit more mess and possibly a few “taste tests” of the frosting. Embrace the chaos!
How far in advance can I make these? You can bake the cakes a day ahead and store them covered at room temperature. Frost and decorate on Easter morning or the day before for peak freshness and cuteness.
What if I don’t have all the specific candies? Don’t stress! Any small, colorful candies will do. The goal is to make it fun and festive, not to win a baking competition. Use what you have!
Final Thoughts
See? That wasn’t so bad, was it? You just whipped up some adorable, kid-friendly Easter cakes without even breaking a sweat. Now you’re officially a super parent/aunt/uncle/friend who can bake! Go ahead, pat yourself on the back, grab a cup of coffee, and admire your handiwork. You’ve earned it. Now go impress someone—or yourself—with your new culinary skills. Happy Easter and happy baking!


