So you’re craving something tasty but too lazy to spend forever in the kitchen, huh? Same. We’ve all been there – scrolling through Pinterest, drooling over intricate cakes, then sighing dramatically because, let’s be real, who has that kind of time (or patience)? But what if I told you there’s a cake that’s ridiculously cute, super trendy, and shockingly easy to whip up? Enter the Korean Bento Box Cake, your new best friend for impressing literally everyone without breaking a sweat. It’s like a tiny, edible hug for your soul, and it looks *amazing* on Instagram.
Why This Recipe is Awesome
Okay, let’s cut to the chase: this isn’t just another cake recipe; it’s a life hack disguised as dessert. Why is it awesome? Because it’s idiot-proof, even I didn’t mess it up (and trust me, that’s saying something). These mini marvels are perfect for when you want a little slice of joy without committing to a full-sized cake that’ll haunt your fridge for a week. Think personal celebration, a thoughtful gift, or just a Tuesday treat because, why not? Plus, they’re so darn cute, you might shed a tear of happiness. Less cake, less guilt, maximum aesthetic appeal. Win-win-win!
Ingredients You’ll Need
Gather ’round, my fellow food adventurers! Here’s what you’ll need for your bento box cake adventure. Don’t worry, nothing too wild here:
- For the Tiny Cake:
- 1 ¼ cups (150g) All-Purpose Flour – The white stuff that makes magic happen.
- 1 teaspoon Baking Powder – For lift, because nobody likes a flat cake.
- ½ teaspoon Salt – Balances the sweet, makes things pop. Don’t skip!
- ½ cup (113g) Unsalted Butter, softened – Unsalted, because we add our own salt, thank you very much.
- 1 cup (200g) Granulated Sugar – Sweetness, obviously. Don’t skimp, unless you’re into sadness.
- 2 Large Eggs – The glue that holds your dreams (and cake) together.
- 1 teaspoon Vanilla Extract – Adds that ‘oomph.’
- ½ cup (120ml) Milk – Any kind works, even oat if you’re feeling fancy/dairy-averse.
- For the Dreamy Buttercream Frosting:
- ½ cup (113g) Unsalted Butter, softened – Again, the good stuff.
- 2 cups (240g) Powdered Sugar (confectioners’ sugar) – For frosting that’s fine and fluffy.
- 1-2 tablespoons Milk or Cream – To get that perfect consistency.
- ½ teaspoon Vanilla Extract – More oomph, because why not?
- Food Coloring (gel preferred) – Optional, but why be boring?
- For the Razzle-Dazzle:
- Sprinkles – For extra joy!
- Small piping bags and tips (or a Ziploc bag, we’re not fancy here) – For those cute messages.
Step-by-Step Instructions
Alright, apron on, game face ready! Let’s get baking. These steps are super straightforward, so no overthinking, okay?
- Get Prepped, Buttercup!
Preheat your oven to 350°F (175°C). Grease and flour two 4-inch round cake pans or even a couple of oven-safe ramekins. If you only have one pan, no worries, just bake one layer at a time.
- Mix the Dry Stuff.
In a medium bowl, whisk together your flour, baking powder, and salt. Give it a good whisk to make sure everything’s evenly distributed. This is important for a consistent crumb.
- Cream the Wet Gold.
In a larger bowl, using an electric mixer, cream together the softened butter and granulated sugar until it’s light and fluffy. This should take about 2-3 minutes. Don’t rush this step; it incorporates air for a lighter cake.
- Eggs In!
Add the eggs one at a time, beating well after each addition. Then, stir in the vanilla extract. Scrape down the sides of the bowl to make sure everything is fully incorporated.
- Alternating Act.
Gradually add the dry ingredient mixture to the wet mixture, alternating with the milk. Start and end with the dry ingredients. Mix until just combined; do not overmix! A few lumps are better than a tough cake.
- Bake It Up!
Divide the batter evenly between your prepared pans. Bake for 20-25 minutes, or until a wooden skewer inserted into the center comes out clean. Smaller ramekins might bake faster, so keep an eye on them.
- Chill Out.
Let the cakes cool in the pans for about 10 minutes before inverting them onto a wire rack to cool completely. This step is crucial! Frosting a warm cake is a one-way ticket to a melty disaster.
- Whip Up That Buttercream.
While the cakes cool, beat the softened butter with an electric mixer until creamy. Gradually add the powdered sugar, one cup at a time, mixing until smooth. Add milk/cream and vanilla extract, then beat until light and fluffy. If you’re using food coloring, add it now and mix until you achieve your desired shade.
- Time to Decorate!
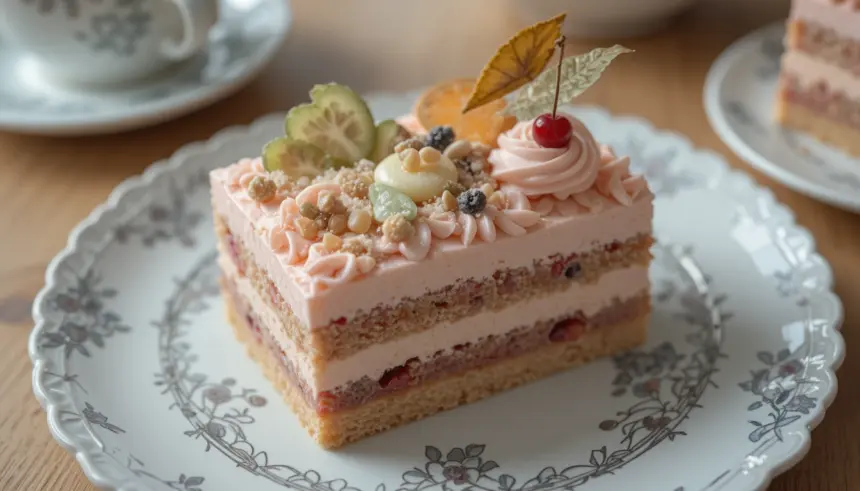
Once your cakes are completely cool, level them if needed (a serrated knife works great). Place one cake layer on your serving plate or directly into your bento box container. Spread a thin layer of frosting, then top with the second cake layer. Frost the entire cake with a thin crumb coat, then apply a final, smooth layer of frosting. Now for the fun part: decorate with sprinkles, pipe cute messages (like “HBD” or “ILY”), or create simple designs. Get creative!
Common Mistakes to Avoid
Nobody’s perfect, but we can learn from past blunders! Here are a few common rookie errors to dodge:
- Not Preheating the Oven: Seriously, this isn’t a suggestion, it’s a command. A cold oven messes with your cake’s rise and texture. Rookie mistake.
- Overmixing the Batter: I know, it’s tempting to keep beating, but overmixing develops the gluten, leading to a tough, dense cake. Mix until just combined, a few lumps are fine, promise.
- Opening the Oven Door Too Early: Patience, young padawan! Opening the oven door during baking can cause your cake to deflate, especially in the first two-thirds of baking time. Resist the urge to peek!
- Frosting a Warm Cake: Unless you’re aiming for a swampy, melted mess, let your cakes cool completely. This is probably the number one cause of frosting-related tears.
- Not Leveling Your Cakes: If your cake layers have domes, give them a gentle trim with a serrated knife. This ensures your bento cake sits flat and looks polished, not lopsided.
Alternatives & Substitutions
Feeling adventurous? Or just missing an ingredient? No stress, here are some ideas to mix things up:
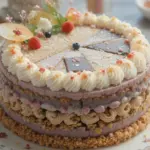
- Cake Flavor Swap: Instead of vanilla, try a chocolate bento cake by adding ¼ cup cocoa powder to your dry ingredients and reducing the flour by ¼ cup. Lemon zest in the batter and frosting also makes a super fresh version, IMO!
- Frosting Variations:
- Cream Cheese Frosting: Swap out half the butter for cream cheese for a tangy, less sweet option. Just make sure both are softened!
- Whipped Cream Frosting: For a lighter cake, use stabilized whipped cream. Be warned, it’s less sturdy for intricate piping and needs constant refrigeration.
- Dairy-Free Delight: Use plant-based milk (almond, soy, oat) and vegan butter sticks for a dairy-free version. They work surprisingly well!
- Gluten-Free Option: Use a 1:1 gluten-free flour blend. You might need a tiny bit more liquid, so add slowly until the batter reaches the right consistency.
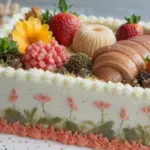
- Decoration Fun: Don’t limit yourself to sprinkles! Fresh berries, mini chocolate chips, edible flowers, or even a dusting of cocoa powder can make your bento cake pop.
FAQ (Frequently Asked Questions)
Got questions? I’ve got (mostly) witty answers!
- Can I use a regular muffin tin if I don’t have small cake pans?
Absolutely! Just fill the muffin cavities about two-thirds full. The baking time will be shorter, around 15-20 minutes, so keep a close eye on them. You’ll probably get 4-6 mini cakes this way.
- What if my frosting is too runny or too thick?
Ah, the classic buttercream dilemma! If it’s too runny, add more powdered sugar, a tablespoon at a time. If it’s too thick, add a tiny splash of milk or cream, half a teaspoon at a time, until it reaches that perfect, spreadable consistency.
- How long do these bento cakes last?
Stored in an airtight container in the fridge, they’ll happily last for 3-4 days. But let’s be real, they’ll probably be gone before then, right?
- Can I make the cake layers ahead of time?
Definitely! You can bake the cake layers, let them cool completely, wrap them tightly in plastic wrap, and store them at room temperature for a day or two, or freeze them for up to a month. Thaw before frosting!
- Do I need special piping bags and tips for the decorations?
Nope! A Ziploc bag with a tiny corner snipped off works perfectly for writing messages or simple dots. For fancier designs, a basic star tip is usually enough to get you started.
- Can I use margarine instead of butter for the cake or frosting?
Well, technically yes, but why hurt your soul like that? Butter just gives a superior flavor and texture that margarine can’t quite replicate. If you *have* to, go for it, but don’t say I didn’t warn you about the slight flavor sacrifice, lol.
- What’s the smallest pan size I can use?
Besides the 4-inch pans, you can use oven-safe ramekins (about 4-5 oz capacity) for individual servings. Just adjust baking time accordingly. They’ll be adorable, trust me.
Final Thoughts
And there you have it, folks! Your very own, totally adorable, and surprisingly easy Korean Bento Box Cake. You’ve officially leveled up your baking game without needing a culinary degree. These little cakes are proof that sometimes, the best things come in small packages. They’re perfect for brightening someone’s day (or, let’s be honest, your own). So go on, bask in the glory of your creation, snap a million pics for the ‘gram, and enjoy every single bite. Now go impress someone—or yourself—with your new culinary skills. You’ve earned it!
