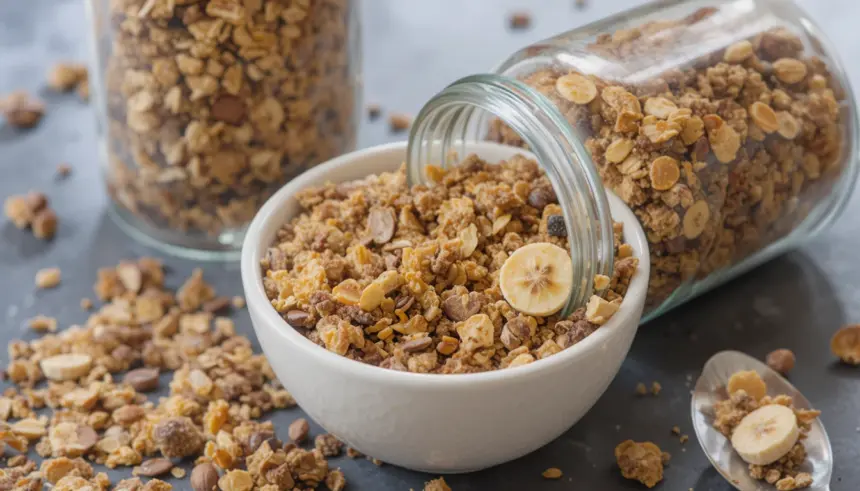
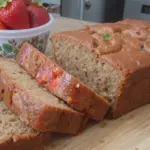
Okay, let’s be real. We all have those mornings where you want something comforting and delicious, but the idea of actually *making* banana bread feels like climbing Mount Everest before coffee. Plus, who has an hour to wait for it to bake when hunger strikes? Not me! But what if I told you there’s a way to get all those warm, cozy banana bread vibes without the whole “waiting forever for it to bake” drama? Enter: Banana Bread Granola. Your breakfast (or snack, or midnight munchie) game is about to change, my friend. Seriously, prepare for deliciousness!
Why This Recipe is Awesome
First off, it tastes like a hug from a very ripe banana. Second, it’s basically banana bread, but crunchy, and you can eat it with milk, yogurt, or just shovel it directly into your mouth. It’s also **super forgiving**, so even if your baking skills peak at toasting bread, you got this. This recipe is pretty much idiot-proof, even I didn’t mess it up! Plus, your kitchen will smell like a dream. Seriously, it’s better than any expensive candle, IMO.
Ingredients You’ll Need
- Rolled Oats: The star of the show! Don’t even *think* about instant oats unless you like sad, mushy granola. We want that hearty crunch!
- Very Ripe Bananas: We’re talking brown spots, practically liquefied. The uglier, the better for flavor. Trust me on this – they’re essential for that true banana bread sweetness.
- Maple Syrup: Or honey, if you’re feeling wild. This is our sticky-sweet binder and contributor to glorious clusters.
- Melted Coconut Oil: Or any neutral oil, but coconut oil adds that little extra somethin’ somethin’ to the aroma and crispness.
- Vanilla Extract: Don’t skip this! It’s like the secret handshake of deliciousness that makes everything pop.
- Cinnamon: Because what’s banana bread without a little warm spice? It just belongs.
- Salt: Just a pinch! It makes all the other flavors sing and prevents it from being too sweet.
- Optional Mix-ins: Chopped nuts (pecans, walnuts are classic!), chocolate chips (post-baking, please!), dried fruit (raisins, cranberries, whatever floats your boat!). Get creative!
Step-by-Step Instructions
- Preheat & Prep: Get your oven to a cozy 300°F (150°C) and line a big baking sheet with parchment paper. This makes cleanup a breeze, and nobody likes scrubbing baked-on granola. Seriously, do it.
- Mash ‘Em Up: In a large bowl, mash those gloriously ripe bananas until they’re mostly smooth. A few small lumps are fine—adds character, right? Just make sure there aren’t huge chunks.
- Wet Ingredients Party: Stir in the maple syrup, melted coconut oil, vanilla extract, cinnamon, and salt with the mashed bananas. Whisk it all together until it’s beautifully combined and smells amazing already.
- Oats Go In: Add the rolled oats to the wet mixture. Stir, stir, stir until every single oat flake is coated in that banana-y goodness. This is where the magic happens and flavor infuses.
- Spread It Out: Pour the mixture onto your prepared baking sheet. **Spread it thinly and evenly** with a spatula. We want maximum crispiness and even toasting here, so don’t be shy!
- Bake It Till Golden: Pop it in the oven for 30-40 minutes. Give it a gentle stir halfway through to ensure even toasting and prevent burning edges. Keep an eye on it—granola can go from perfect to burnt faster than you can say “oops.”
- Cool Down: Once it’s golden brown and smells heavenly, take it out. Let it **cool completely on the baking sheet** without touching it. This is CRUCIAL for getting those lovely crunchy clusters. Seriously, step away!
- Mix-in Time: Once cool, break it up into delightful clusters and stir in any optional mix-ins like chocolate chips or dried fruit. Store in an airtight container for up to two weeks (if it even lasts that long!).
Common Mistakes to Avoid
- Using under-ripe bananas: They’re just not sweet enough, and you’ll miss out on that true banana bread flavor. Patience, young padawan! Wait for those brown spots.
- Not spreading it thinly: A thick layer means uneven baking and no crunchy clusters. Nobody wants a sad, soft granola, do they? Spread it out, friend!
- Skipping the cooling step: Seriously, this is a biggie. Warm granola is soft granola. **Cooling equals crunch!** Don’t mess with the magic.
- Over-baking it: Keep an eye on your oven. Every oven is different, so adjust times as needed. Burnt granola is a sad, sad thing, and smells like a tragedy.
- Stirring too much while cooling: Resist the urge! Let those glorious clusters form undisturbed. Your patience will be rewarded.
Alternatives & Substitutions
- Sweetener Swap: Don’t have maple syrup? Honey works perfectly! Agave nectar is also an option if you prefer. Just keep the quantity similar for the best texture and sweetness.
- Oil Change: No coconut oil? Melted butter (unsalted, please!), avocado oil, or even vegetable oil will do the trick. The flavor might be slightly different, but still delish. **FYI**, butter will give it a slightly richer, almost caramel-like flavor.
- Spice It Up: Want more warmth? Add a pinch of nutmeg or allspice. Feeling adventurous? A tiny bit of ground ginger or cardamom could be surprisingly amazing.
- Nutty & Seedy: Walnuts and pecans are classic, but almonds, cashews, or even pumpkin seeds or sunflower seeds would be fantastic additions. Just add them in with the oats!
- Chocolate Dreams: If you’re adding chocolate chips, **do it after the granola has cooled**. Otherwise, you’ll end up with a melted chocolate mess. (Unless that’s your jam, then go for it, you rebel!)
FAQ (Frequently Asked Questions)
- Can I use instant oats? Well, you *can*, but it won’t be the same. They tend to get mushy and lose their texture, which is not what we’re going for in a crunchy granola. For best results, stick with old-fashioned rolled oats. You deserve better!
- How do I know my bananas are ripe enough? They should be covered in brown spots, soft to the touch, and practically begging to be mashed. If they’re still green or firm, wait a few more days. It’s totally worth it for the flavor boost!
- My granola isn’t clumpy. What did I do wrong? You probably didn’t spread it thinly enough, or you stirred it too much while it was cooling. Remember, **don’t touch it while it cools!** That’s the secret sauce for clusters.
- Can I make this gluten-free? Absolutely! Just make sure you use certified gluten-free rolled oats. Everything else in the basic recipe is naturally GF. Easy peasy!
- How long does it last? In an airtight container at room temperature, it should stay fresh and crunchy for up to two weeks. But honestly, it rarely lasts that long in my house! Consider yourself warned.
- Can I reduce the sugar? You can try reducing the maple syrup a little, but it helps with both flavor and crunch. If your bananas are super ripe, they’ll add a lot of natural sweetness, so maybe start there before cutting back on the syrup.
- What if I don’t like coconut oil? No worries! You can substitute with melted unsalted butter or a neutral-flavored oil like avocado or grapeseed oil. The banana flavor will still shine!
Final Thoughts
See? That wasn’t so scary, was it? You just whipped up a batch of glorious Banana Bread Granola. Now you’ve got a killer breakfast, a fancy snack, or just something to impress your friends with (or, let’s be real, to hoard all for yourself). So go forth, my friend, and enjoy your crunchy, banana-y masterpiece. You totally earned it!
