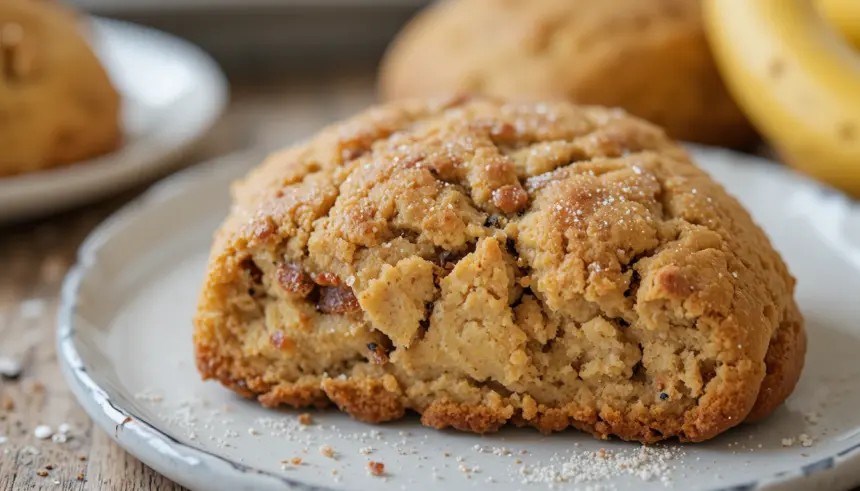
So, you’re craving something warm, comforting, and utterly delicious, but the thought of spending an entire afternoon baking a full-blown banana bread loaf just feels like… too much adulting? Same. You’ve got those suspiciously ripe (read: almost black) bananas glaring at you from the fruit bowl, practically begging for a purpose beyond attracting fruit flies. Well, my friend, welcome to your new favorite solution: Banana Bread Scones! It’s like banana bread had a quick, fancy, and less time-consuming fling with a scone, and the result is pure magic.
Why This Recipe is Awesome
Okay, let’s be real. We all love banana bread, but sometimes you just want that cozy vibe *now*, without the commitment of a whole loaf. This recipe delivers all the nostalgic, cinnamony, banana-y goodness in a fraction of the time. Plus, it’s pretty much **idiot-proof**. Seriously, even I, who once accidentally used salt instead of sugar in a batch of cookies (don’t ask), managed to pull these off. They’re quick, they’re easy, and they taste like a warm hug from a very skilled baker (which will be you!). Think instant gratification, but in a delicious, carb-loaded form.
Ingredients You’ll Need
Gather ’round, fellow culinary adventurers! Here’s what you’ll need for this delicious escapade. Don’t worry, nothing too exotic here – just the usual suspects, ready to become something spectacular.
- **2 cups All-Purpose Flour:** The foundation of our scone empire.
- **1/3 cup Granulated Sugar:** Just enough sweetness to make those bananas sing.
- **2 teaspoons Baking Powder:** Our leavening MVP, making sure these beauties rise.
- **1/2 teaspoon Baking Soda:** Works with the banana’s acidity for extra fluff.
- **1/2 teaspoon Salt:** Crucial for balancing all those sweet flavors.
- **1/2 teaspoon Cinnamon (or more!):** Because what’s banana bread without cinnamon?
- **1/2 cup (1 stick) Unsalted Butter, VERY COLD and cubed:** This is your secret weapon for flaky scones. Don’t skip the “cold” part!
- **3/4 cup Mashed Ripe Bananas:** About 2 medium-sized, super spotty, almost-black bananas. The riper, the better, people!
- **1/4 cup Milk or Heavy Cream:** Adds moisture and richness. Heavy cream is a flex, but milk works great too.
- **1 large Egg:** Whisked with a splash of milk for an egg wash (optional, but gives a lovely golden sheen).
- **Optional Add-ins:** 1/2 cup chocolate chips (milk, dark, whatever your heart desires!) or chopped walnuts/pecans.
Step-by-Step Instructions
Alright, apron on (or not, we don’t judge), let’s get baking! Remember, we’re going for delicious, not perfection. Unless perfection happens, then high-five yourself!
- **Preheat & Prep:** Preheat your oven to **400°F (200°C)**. Line a baking sheet with parchment paper. This is a non-negotiable step for easy cleanup, trust me.
- **Dry Mix Magic:** In a large bowl, whisk together the flour, sugar, baking powder, baking soda, salt, and cinnamon. Give it a good whisk to make sure everything is evenly distributed.
- **Butter Up (Coldly!):** Add your **cubed, cold butter** to the dry ingredients. Use a pastry blender, two forks, or your (cold) fingertips to cut the butter into the flour mixture until it resembles coarse crumbs with some pea-sized pieces remaining. This creates pockets of steam that make your scones flaky.
- **Banana Time:** In a separate small bowl, combine your mashed ripe bananas and milk/cream. Stir ’em up.
- **Combine Wet & Dry:** Pour the banana mixture into the flour and butter mixture. Stir with a wooden spoon or spatula **just until combined**. Don’t overmix! This is key. If using, fold in your chocolate chips or nuts now.
- **Form the Dough:** Turn the shaggy dough out onto a lightly floured surface. Gently pat it into a round disc, about 1-inch thick. Don’t knead it like bread; we want tender scones, not tough ones.
- **Cut ‘Em Up:** Using a sharp knife or a round cookie cutter, cut the disc into 8 wedges (like a pizza) or into rounds.
- **Bake ‘Em Pretty:** Carefully transfer the scones to your prepared baking sheet. If using an egg wash, brush the tops lightly with the whisked egg mixture for that gorgeous golden finish.
- **Golden Goodness:** Bake for **15-18 minutes**, or until the tops are golden brown and a toothpick inserted into the center comes out clean.
- **Cool (if you can wait):** Let them cool on the baking sheet for a few minutes before transferring to a wire rack. Or, you know, just eat one immediately while it’s still warm and slightly gooey. No judgment here.
Common Mistakes to Avoid
We’ve all been there, staring at a culinary “oopsie.” Here are a few traps to sidestep on your journey to scone glory:
- **Warm Butter is the Enemy:** Seriously, **cold butter** is the MVP here. If it’s warm, your scones will spread and be dense, not flaky. Rookie mistake!
- **Overmixing the Dough:** Thinking you need to knead it like bread? Nope! Overmixing develops gluten, which leads to tough, hockey-puck scones. We want tender, fluffy clouds. **Mix just until combined.**
- **Ignoring Ripe Bananas:** Those barely yellow bananas just won’t cut it. You need the brown-spotted, almost-mushy ones for maximum banana flavor and sweetness. Embrace the brown!
- **Not Preheating the Oven:** Your oven needs to be hot and ready to go as soon as those scones hit it. Cold oven = sad, sluggish rise.
Alternatives & Substitutions
Feeling creative? Or maybe you’re just out of one particular ingredient (we’ve all been there). Here are some easy swaps:
- **Dairy-Free Delight:** Swap the butter for a solid dairy-free butter substitute (like Miyoko’s Kitchen or Earth Balance sticks) and use your favorite plant-based milk (almond, soy, oat milk are great!).
- **Spice It Up:** Add a pinch of nutmeg, allspice, or even a tiny bit of ginger for extra warmth and complexity. A little cardamom would be amazing too, IMO.
- **Sweetener Swap:** Brown sugar can replace granulated sugar for a deeper, molasses-y flavor. Just be aware it might make the dough a bit stickier.
- **Different Mix-ins:** Not a chocolate chip person? Try dried cranberries, chopped dates, or even a sprinkle of toasted shredded coconut.
- **No Egg Wash? No Problem!** Just brush the tops with a little milk before baking for a softer crust, or skip it entirely. They’ll still be delicious!
FAQ (Frequently Asked Questions)
Got questions? I’ve got (casual, hopefully helpful) answers!
- **Can I use margarine instead of butter?** Well, technically yes, but why hurt your soul like that? Butter provides a flavor and flakiness that margarine just can’t quite replicate. For best results, stick with butter.
- **What if my bananas aren’t super ripe?** You can try baking them on a tray in their peels at 300°F (150°C) for 15-20 minutes until they’re black and soft. Or, honestly, just wait. The riper, the more intense the banana flavor!
- **Can I make the dough ahead of time?** Absolutely! You can cut the scones and then place them on a baking sheet, cover loosely with plastic wrap, and refrigerate for up to 12 hours. Bake straight from the fridge (you might need an extra minute or two).
- **How do I store leftover scones?** Keep them in an airtight container at room temperature for up to 2-3 days. Reheat briefly in the microwave or a toaster oven to bring back some of that fresh-baked magic.
- **Can I freeze these scones?** Heck yes! Bake them, let them cool completely, then freeze them in a single layer before transferring to a freezer-safe bag. They’ll keep for up to 3 months. Thaw at room temp or pop them frozen into a preheated oven until warm.
- **I don’t have heavy cream, only milk. Is that okay?** Totally fine! Heavy cream just adds a touch more richness, but regular milk works perfectly well and still makes delicious scones. Don’t sweat it!
- **My dough is too sticky/dry, what gives?** Banana sizes vary! If it’s too sticky, add a tiny bit more flour (like a tablespoon at a time). Too dry and crumbly? Add another tablespoon of milk until it just comes together. Trust your gut!
Final Thoughts
There you have it, folks! Your new go-to recipe for when you want banana bread vibes without the full commitment. These banana bread scones are proof that sometimes, the best things in life are quick, easy, and made with slightly bruised fruit. So go on, whip up a batch, make your kitchen smell amazing, and treat yourself. You deserve it! Now go impress someone—or yourself—with your new culinary skills. You’ve earned it!
