Hey there, fellow kitchen adventurer! Ever look at those super-cute, Pinterest-perfect treats and think, ‘Nah, my kids will eat anything that’s sweet, but I want to feel like a domestic goddess without the actual domestic goddess effort’? Oh, just me? Cool, cool. Well, buckle up, buttercup, because we’re about to make some seriously adorable Puppy Cupcakes that are so easy, even your dog could almost help (don’t let them, though).
Why This Recipe is Awesome
Let’s be real, you’re here because you want to impress without the stress. This recipe is basically your cheat code to ‘Parent of the Year’ status, or at least ‘Coolest Aunt/Uncle’ status. It’s **super simple**, takes less time than binge-watching half a season of that show you’re obsessed with, and the results are ridiculously cute. Plus, kids go absolutely wild for them. It’s a guaranteed smile-maker, and honestly, who doesn’t need more smiles?
And the best part? It’s pretty much **idiot-proof**. Even if you usually burn water, I promise, you can nail these. Plus, there’s a whole lot of room for creativity with the decorations, which is perfect for little hands who want to “help.”
Ingredients You’ll Need
Gather your troops! Here’s what you’ll need to transform into a puppy pastry Picasso:
- For the Cupcakes (makes 12-14):
- 1 ½ cups all-purpose flour (the basic stuff, no fancy flours needed)
- 1 ½ teaspoons baking powder (your cupcakes’ personal elevator)
- ½ teaspoon salt (just a pinch, for balance)
- ½ cup unsalted butter, softened (room temp is key, don’t be a monster and use it cold)
- 1 cup granulated sugar (the sweet stuff, obviously)
- 2 large eggs (happy chickens make happy cupcakes)
- 1 teaspoon vanilla extract (makes everything smell and taste like happiness)
- ½ cup milk (any kind works, unless you’re feeling adventurous with almond or oat)
- For the Frosting:
- ½ cup unsalted butter, softened (again, room temp!)
- 2 cups powdered sugar (also known as confectioners’ sugar, because fancy)
- 1 teaspoon vanilla extract (more happiness!)
- 2-3 tablespoons milk or heavy cream (for the perfect fluffy texture)
- 2 tablespoons unsweetened cocoa powder (for that puppy brown look, unless you want white puppies!)
- For the Puppy Decorations (get creative!):
- Oreo cookies (split in half for ears)
- M&M’s or chocolate chips (for noses and eyes)
- Mini chocolate chips (for pupils, or tiny spots)
- Pretzel sticks (for tongues, if you’re feeling extra cheeky)
- Mini marshmallows (for snout highlights)
Step-by-Step Instructions
Okay, let’s get baking! Follow these simple steps and try not to eat all the batter (I know, it’s hard).
- Preheat the Oven & Prep the Pan: First things first, crank your oven to 350°F (175°C). Line a 12-cup muffin tin with paper liners. This is super important unless you like scraping cupcakes off metal, which, trust me, you don’t.
- Whisk the Dry Stuff: In a medium bowl, whisk together the flour, baking powder, and salt. Give it a good mix so everything is friends.
- Cream the Wet Stuff: In a large bowl (or stand mixer, if you’re fancy), beat the softened butter and sugar together until it’s light and fluffy. This usually takes about 2-3 minutes.
- Add Eggs & Vanilla: Crack in the eggs one at a time, beating well after each addition. Then, stir in that glorious vanilla extract. Make sure everything is well combined and looking smooth.
- Alternate Dry & Wet: Now, add the dry ingredients to the wet ingredients in three additions, alternating with the milk. Start and end with the dry. Mix until *just* combined—**don’t overmix!** Overmixing is the enemy of fluffy cupcakes.
- Fill ‘Em Up: Divide the batter evenly among your prepared cupcake liners, filling each about two-thirds full. They’ll rise, promise!
- Bake ‘Em Pretty: Pop the tin into your preheated oven and bake for 18-22 minutes, or until a toothpick inserted into the center of a cupcake comes out clean.
- Cool Down: Let the cupcakes cool in the pan for a few minutes, then transfer them to a wire rack to cool completely. Patience is a virtue here; trying to frost warm cupcakes is a messy, melty disaster waiting to happen.
- Whip Up the Frosting: While the cupcakes are chilling out, beat the softened butter until creamy. Gradually add the powdered sugar, vanilla, and cocoa powder. Mix until smooth, then add milk/cream a tablespoon at a time until you reach your desired fluffy consistency.
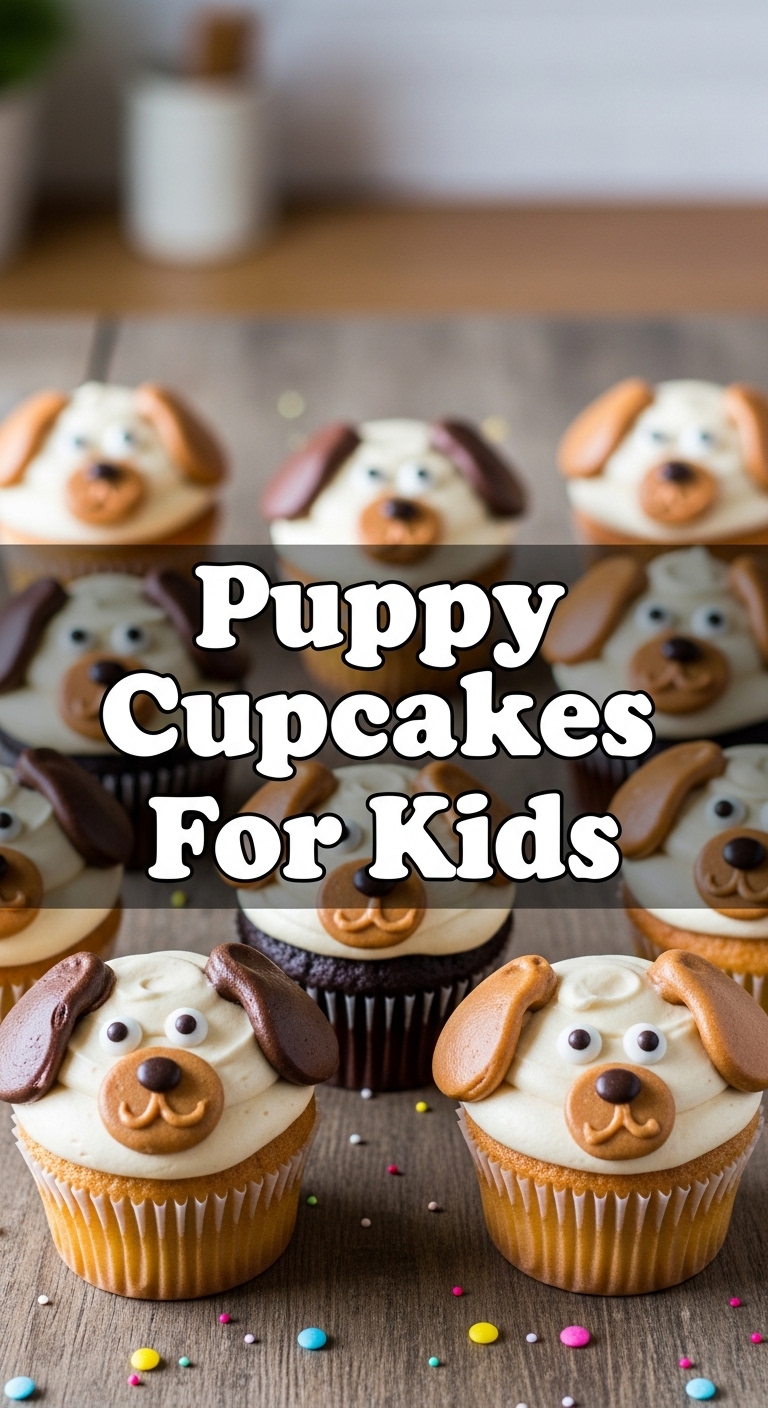
- Decorate Your Puppies! Once cupcakes are completely cool, frost them generously. Then, use your halved Oreos for ears, M&M’s or chocolate chips for eyes and nose, and get creative! This is where the magic happens.
Common Mistakes to Avoid
Listen up, buttercup, because avoiding these rookie errors will save you a headache (and a ruined batch of deliciousness):
- Not Preheating the Oven: Thinking you don’t need to preheat? **Rookie mistake!** Your oven needs to be at the right temp *before* the cupcakes go in, or they won’t rise properly.
- Overmixing the Batter: I said it once, I’ll say it again: **DON’T OVERMIX!** It develops the gluten too much, leading to tough, dense cupcakes. Mix until just combined, a few lumps are totally fine.
- Opening the Oven Door Too Early: Resist the urge! Opening the door lets cold air in, which can cause your cupcakes to fall flat. Wait until they’re almost done before you peek.
- Frosting Warm Cupcakes: Seriously, don’t do it. Unless you’re going for a lava cake vibe, let those puppies cool completely. Melted frosting is not a good look.
- Skimping on Decorations: You’re making *puppy* cupcakes! Go all out. The more adorable and goofy, the better. No one ever complained about too much cuteness.
Alternatives & Substitutions
Feeling a little rebellious, or just missing an ingredient? No stress, we can totally tweak this puppy party:
- Boxed Cake Mix: Look, no judgment here. If you’re short on time (or sanity), a yellow or white cake mix is a **perfectly acceptable shortcut**. Just follow the box instructions for baking, then come back for the frosting and decorating fun.
- Store-Bought Frosting: Same deal as the cake mix. Grab a can of vanilla or chocolate frosting. To make it more puppy-like, stir in some extra cocoa powder for a deeper brown, or just go with white puppies! IMO, homemade is better, but convenience wins sometimes.
- Different “Ears”: Don’t have Oreos? Try chocolate wafers, pretzel twists (just use one half), or even cut-up fruit leather for a more colorful ear.
- Dairy-Free Options: For a dairy-free version, swap out regular milk for almond or oat milk, and use a dairy-free butter substitute for both the cupcakes and frosting. FYI, they turn out just as yummy!
FAQ (Frequently Asked Questions)
Got questions? I’ve got answers. (Mostly.)
- Can I use a boxed cake mix instead of making from scratch?
Absolutely, you can! No judgment here, my friend. We all have those days. Just bake according to the box directions, then come back to us for the frosting and decorating fun. Easy peasy!
- How do I make the frosting brown for the puppies?
Super simple! Just whisk in some unsweetened cocoa powder when you’re making the frosting. Start with a couple of tablespoons and add more until you get that perfect puppy-dog brown. You can also use chocolate frosting, duh!
- Can kids help with decorating?
YES! That’s half the fun, isn’t it? Let them go wild with the Oreos, M&M’s, and whatever else you’ve got. Embrace the charmingly imperfect results—that’s what makes them special (and hilarious).
- How long do these puppy cupcakes last?
Stored in an airtight container at room temperature, they’re generally good for 2-3 days. But honestly, if they last that long, you’re doing something wrong. They tend to disappear quickly!
- What if I don’t have Oreo cookies for ears?
No problem! Get creative. You can use chocolate wafers, half-moon shaped pretzel thins, or even some dark chocolate cut into ear shapes. Necessity is the mother of invention, right?
- Can I make them gluten-free?
You bet! Swap out the all-purpose flour for a 1:1 gluten-free baking flour blend. Make sure it contains xanthan gum, or add ½ teaspoon to the mix. The rest of the recipe stays the same!
Final Thoughts
See? You’re basically a professional baker now! These Puppy Cupcakes are your new go-to for birthdays, playdates, or just a Tuesday when you need a little dose of cute (and sugar). Go forth, sprinkle joy (and sprinkles!), and enjoy the ooohs and ahhhs. You totally crushed it, and your stomach (and whoever you share with) will thank you. Now go impress someone—or yourself—with your new culinary skills. You’ve earned it!


