So you’re craving something tasty but too lazy to spend forever in the kitchen, huh? Same. High-five! Remember those glory days of popping open a Lunchable? The little circles of pure joy, perfectly portioned, ready for immediate consumption. Well, guess what? We’re taking that nostalgia, giving it a glow-up, and making it DIY. Because why buy ’em when you can make ’em *better* (and probably cheaper, shhh!) for the kiddos – or, let’s be real, for your inner child?
Why This Recipe is Awesome
Okay, let’s be brutally honest: this isn’t exactly a “recipe” in the traditional sense. It’s more like a highly advanced assembly project. And that, my friend, is why it’s pure genius! You get to feel like a culinary wizard without actually, you know, *cooking* anything. It’s **idiot-proof**, even I didn’t mess it up. Plus, you control the quality, skip the preservatives, and customize it to suit even the pickiest eaters. Say goodbye to mystery meat and hello to happy tummies!
Ingredients You’ll Need
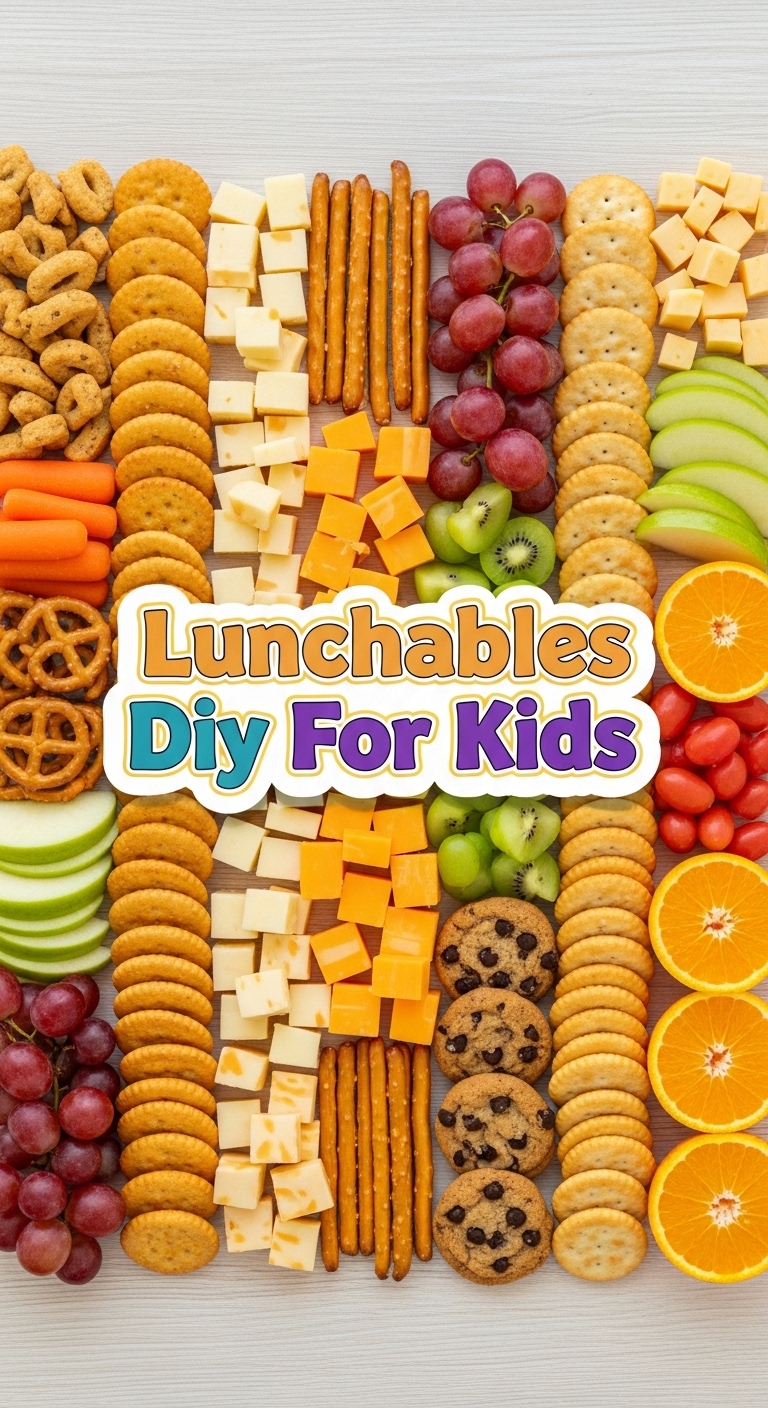
Gather your edible art supplies! The beauty here is flexibility, but these are the classics:
- **Crackers:** The round, buttery kind are iconic, but any shape works. Think Ritz, Club, or even those fancy whole-wheat ones if you’re feeling adventurous (your kids might side-eye you, just a warning).
- **Cheese Slices:** Cheddar, Colby Jack, mozzarella – whatever melts their heart (and fits on a cracker). Pre-sliced is a lifesaver.
- **Deli Meat:** Turkey, ham, pepperoni, salami. Get a few kinds for variety! Pro tip: if you ask nicely at the deli counter, they might even slice them super thin for you, just like the real deal.
- **Fun Extras (Optional but highly recommended):**
- **Fruit:** Grapes, apple slices (toss with a little lemon juice to prevent browning), berries, mandarin orange segments.
- **Veggies:** Baby carrots, cucumber slices, bell pepper strips.
- **Dipping Sauce:** Small containers of ranch, ketchup, or mustard.
- **A Treat!** Because balance, right? A mini cookie, some gummy bears, or a few chocolate chips. YOLO.
- **Containers:** Small bento boxes or divided containers work best to keep everything separate and neat.
Step-by-Step Instructions
Get ready for the most challenging culinary feat of your life. Just kidding, it’s seriously easy!
- **Gather Your Arsenal:** Lay out all your chosen ingredients on a clean counter. Think of yourself as a Lunchable architect.
- **Crackers First:** Pop those crackers into one section of your container. Don’t overcrowd them, nobody likes squished crackers.
- **Cheese Please:** Next, add your cheese slices. If they’re too big, grab a cookie cutter (a small circle one works wonders!) and make them “Lunchable-sized.” This is where you earn extra parent points.
- **Meat It Up:** Fold or stack your deli meats neatly into another section. Variety is the spice of life, even in a Lunchable.
- **Accessorize:** Fill the remaining sections with your chosen fruit, veggies, and that all-important treat. If you’re using a dip, put it in a tiny sealed container to avoid soggy surprises.
- **Seal and Deliver:** Close up your bento box, and boom! You’ve just handcrafted a custom, healthier (or at least more controlled) Lunchable. Now go pat yourself on the back.
Common Mistakes to Avoid
Even in this seemingly foolproof “recipe,” there are pitfalls. Learn from my (hypothetical) mistakes:
- **Forgetting the Treat:** This is a cardinal sin. Seriously, the treat is non-negotiable for kid-friendly appeal. Don’t be that parent.
- **Using Huge Crackers:** They just don’t fit well, and it breaks the aesthetic. Stick to smaller, rounder options for authenticity.
- **Trying to Make It *Too* Healthy:** While the goal is better ingredients, don’t ditch all the fun. A balanced approach means some “fun” foods alongside the good stuff. Your kids will thank you (eventually).
- **Not Separating Wet & Dry:** **Soggy crackers are the enemy.** Use divided containers or mini silicone cups for things like fruit or dips.
Alternatives & Substitutions
Feeling creative? Or just out of ham? No problem, we adapt and overcome!
- **Tortilla Roll-Ups:** Instead of crackers, use small flour tortillas. Spread with cream cheese or hummus, layer with meat and cheese, roll up, and slice into pinwheels. Super cute!
- **Hard-Boiled Eggs:** A great protein boost! Just peel and slice them, or offer them whole.
- **Different Dips:** Hummus, guacamole, even a little Greek yogurt for fruit. Get adventurous!
- **Nut-Free Options:** If school is nut-free, obviously skip anything with nuts. Sunflower butter on apple slices can be a fun alternative.
- **Pickles or Olives:** Some kids love these! Slice them up and add a few for a briny kick.
FAQ (Frequently Asked Questions)
Got questions? I’ve got answers (mostly sarcastic ones).
- **Can I make these the night before?** Absolutely! **This is a meal prep dream.** Just make sure everything is sealed tightly.
- **What if my kid hates cheese?** (Gasp!) Well, technically yes, but why hurt your soul like that? Just kidding! Offer hummus, cream cheese, or a hard-boiled egg instead.
- **Is this *really* cooking?** Debatable. But you assembled food, therefore you are a chef. Don’t let anyone tell you otherwise.
- **How long do these stay fresh?** If packed properly in a cooler with an ice pack, they’re good for a school day. If left on the counter… not so much.
- **Can adults eat this?** Uh, *duh*. Who do you think I’m making one for right now? It’s the perfect desk lunch, IMO.
- **What’s the best way to prevent soggy crackers?** Keep anything wet (fruit, certain veggies, dips) in a separate, sealed compartment. **Prevention is key!**
Final Thoughts
So there you have it, your master guide to crafting the ultimate DIY Lunchable. You’re basically a culinary architect now, a bento box Picasso. Go forth and assemble! Impress your kids (or yourself) with your newfound packing prowess. You’ve earned it, and honestly, you deserve a mini cookie. Now, if you’ll excuse me, I think I hear my own Lunchable calling my name…


