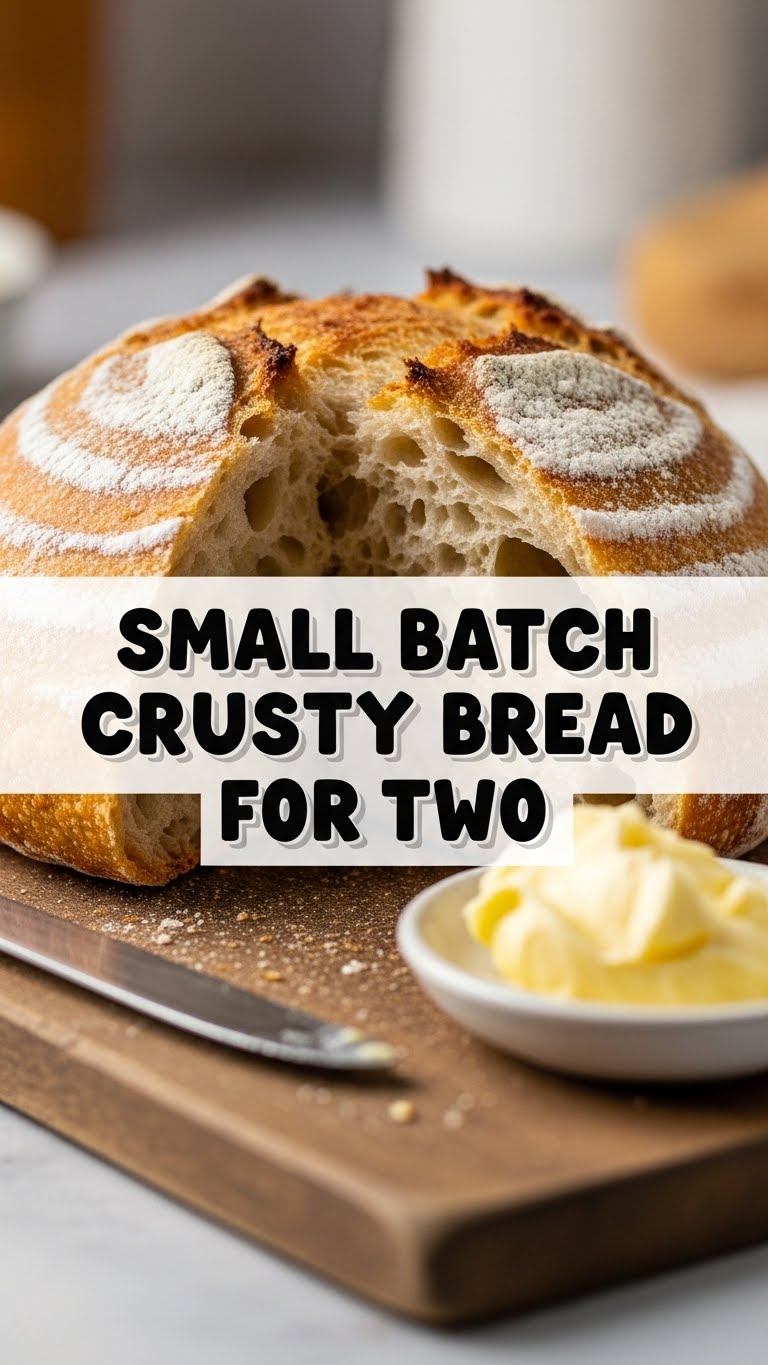
So, you’ve got that primal urge for warm, crusty bread, but the thought of baking a gigantic loaf just for you (and maybe a very lucky plus-one) feels like overkill? And honestly, who has the time to babysit a massive dough baby? Same, my friend, same. Welcome to your new favorite obsession!
Why This Recipe is Awesome
Okay, let’s be real. Most bread recipes are like, “Spend three days nurturing this living organism, and *maybe* you’ll get something edible.” Not this one! This small batch crusty bread is basically the cheat code for fresh bread. It’s **super forgiving**, even if your kitchen skills are usually limited to microwaving popcorn. It uses minimal ingredients, makes just enough for two very happy people (or one very hungry one, no judgment here!), and delivers that perfect crispy crust and chewy interior. Plus, the smell alone is worth the minimal effort. Seriously, you’ll feel like a bona fide artisan baker, but without the early morning wake-up calls or flour-dusted eyebrows.
Ingredients You’ll Need
- 1 cup All-Purpose Flour: Just your basic AP flour, nothing fancy, unless you *want* to be fancy, then go wild with some bread flour.
- 1/2 teaspoon Instant Yeast: Or active dry, if that’s what you’ve got. We’re not picky!
- 1/2 teaspoon Salt: Essential for flavor, unless you enjoy blandness (which, no one does).
- 1/2 cup + 1 tablespoon Lukewarm Water: Think of it as a comfy bath for your yeast – not too hot to kill it, not too cold to make it sluggish.
Step-by-Step Instructions
Mix the Dry Stuff: In a medium bowl, whisk together the flour, yeast, and salt. Make sure it’s all happy and combined. We’re aiming for even distribution, people!
Add the Wet Stuff: Pour in the lukewarm water. Grab a wooden spoon or spatula and mix until it’s just combined and forms a shaggy, sticky dough. Don’t overmix! We want a wet, loose dough here, almost like a thick batter. There’s no kneading involved, which is pretty awesome, IMO.
First Rise (The Chill-Out Session): Cover the bowl with plastic wrap or a clean kitchen towel. Let it hang out at room temperature for about 1.5 to 2 hours. It should get bubbly and roughly double in size. If your kitchen is a bit chilly, find it a warm spot to nap.
Shape It Up: Lightly flour your counter or a piece of parchment paper. Gently scrape the dough out of the bowl. It will be sticky, so flour your hands a bit too. Fold the edges of the dough into the center a few times to create a somewhat round shape with a taut surface. Don’t go crazy; a few gentle folds are all it needs. If using parchment, lift the dough on the parchment and place it in a small bowl or proofing basket.
Second Rise (Beauty Sleep): Cover the dough again and let it rest for another 30-45 minutes. While it’s resting, crank up your oven to 450°F (232°C) and place a small Dutch oven (or any oven-safe pot with a lid) inside to preheat for at least 30 minutes. This is **super important** for that amazing crust!
Bake Your Masterpiece: Carefully remove the scorching hot Dutch oven from the oven (use oven mitts, obviously!). If your dough is on parchment, simply lift and lower it into the hot pot. If not, carefully transfer it in. Score the top with a sharp knife if you’re feeling fancy (a single slash works wonders). Put the lid back on and bake for 20 minutes.
Get That Crust! After 20 minutes, remove the lid. The bread should look puffy and slightly golden. Continue baking for another 10-15 minutes, or until it’s deeply golden brown and sounds hollow when tapped on the bottom. Remove the bread from the Dutch oven and let it cool on a wire rack for at least 30 minutes before slicing. Trust me, waiting is the hardest part, but **it’s crucial for the texture**!
Common Mistakes to Avoid
- Using Too Hot/Cold Water: Remember Goldilocks? Too hot will kill your yeast, too cold will make it sleep forever. Lukewarm is just right for happy bubbles.
- Skipping the Preheating: Thinking you don’t need to preheat the Dutch oven? Rookie mistake! That initial burst of high heat is what gives you that glorious, shatteringly crisp crust.
- Over-Working the Dough: This isn’t a sourdough starter that needs an hour-long massage. Gentle handling is key to keeping those precious air bubbles that make it light and airy.
- Not Cooling Enough: Slicing into hot bread is tempting, but it can make the inside gummy. Let it cool; good things come to those who wait!
Alternatives & Substitutions
Feeling adventurous? This recipe is pretty chill about modifications:
- Flour Power: Want to use whole wheat flour? Go for it! Just know it might absorb a bit more water, so you might need an extra splash or two to get that sticky consistency.
- Add-ins for Flair: Mix in a tablespoon of dried herbs (rosemary, thyme, oregano), a handful of shredded cheese, or some minced garlic during step 1. Savory bread, anyone?
- No Dutch Oven? No Problem!: If you don’t have a Dutch oven, you can bake this on a baking sheet. Just add a pan of hot water to the bottom rack of your oven to create some steam, which helps with the crust. It won’t be *quite* the same, but still delicious!
FAQ (Frequently Asked Questions)
- Can I double this recipe for more bread? Absolutely! Just make sure you have a larger Dutch oven or split the dough into two smaller loaves to bake separately. The rise times might be slightly longer, FYI.
- How long does this crusty bread last? Freshly baked, it’s best eaten the same day for maximum crustiness. Stored in an airtight container at room temp, it’ll be good for 2-3 days, though it will soften.
- My bread didn’t rise, help! What went wrong? Bummer! The most common culprit is inactive yeast (too old, or water was too hot/cold). Make sure your yeast is fresh and your water temp is just right!
- Can I use bread flour instead of all-purpose? Oh yeah! Bread flour has higher protein, giving you an even chewier crumb. It might absorb a tiny bit more water, so adjust if needed.
- What’s the deal with cooling the bread? Can’t I just eat it hot? Well, technically yes, but why hurt your soul like that? Cooling allows the starches to set, resulting in the perfect texture and flavor. Patience, padawan!
Final Thoughts
See? Told you it was easy! Now go forth and spread the gospel of small batch bread. Or just hoard it all for yourself, your secret’s safe with me. You’ve officially leveled up your home chef game, and your tastebuds (and maybe a lucky friend’s) will thank you. Time to get baking, superstar!

