So, your sweet tooth is doing a full-on conga line in your head, but the thought of baking a whole batch of cookies that you’ll inevitably eat all by yourself (no judgment, we’ve all been there!) feels like too much work, right? And maybe, just *maybe*, you want to share a *little* bit without feeling guilty? Or perhaps you just want a single, perfect, warm, gooey cookie experience that feels like a hug in a skillet. Welcome, my friend, to your new favorite dessert: the Cookie Skillet For Two. It’s basically a hug, but with chocolate.
Why This Recipe is Awesome
Let’s be real, sometimes you want dessert, but you don’t want a commitment. That’s where this beauty shines. Why is it awesome? Let me count the ways:
- **It’s for two!** Which means no awkward leftovers tempting you from the counter for days. Unless “two” means “you and your future self,” which is also totally acceptable.
- **Single skillet, fewer dishes!** We’re talking minimal cleanup, maximum joy. Your dishwasher (or your hands) will thank you.
- **Ridiculously fast!** Seriously, from zero to hero (aka warm cookie heaven) in like, 20-25 minutes. Instant gratification is key in this busy world, IMHO.
- **It’s idiot-proof.** No, really. Even if your kitchen skills peak at “making toast,” you can nail this. I didn’t mess it up, so you definitely won’t.
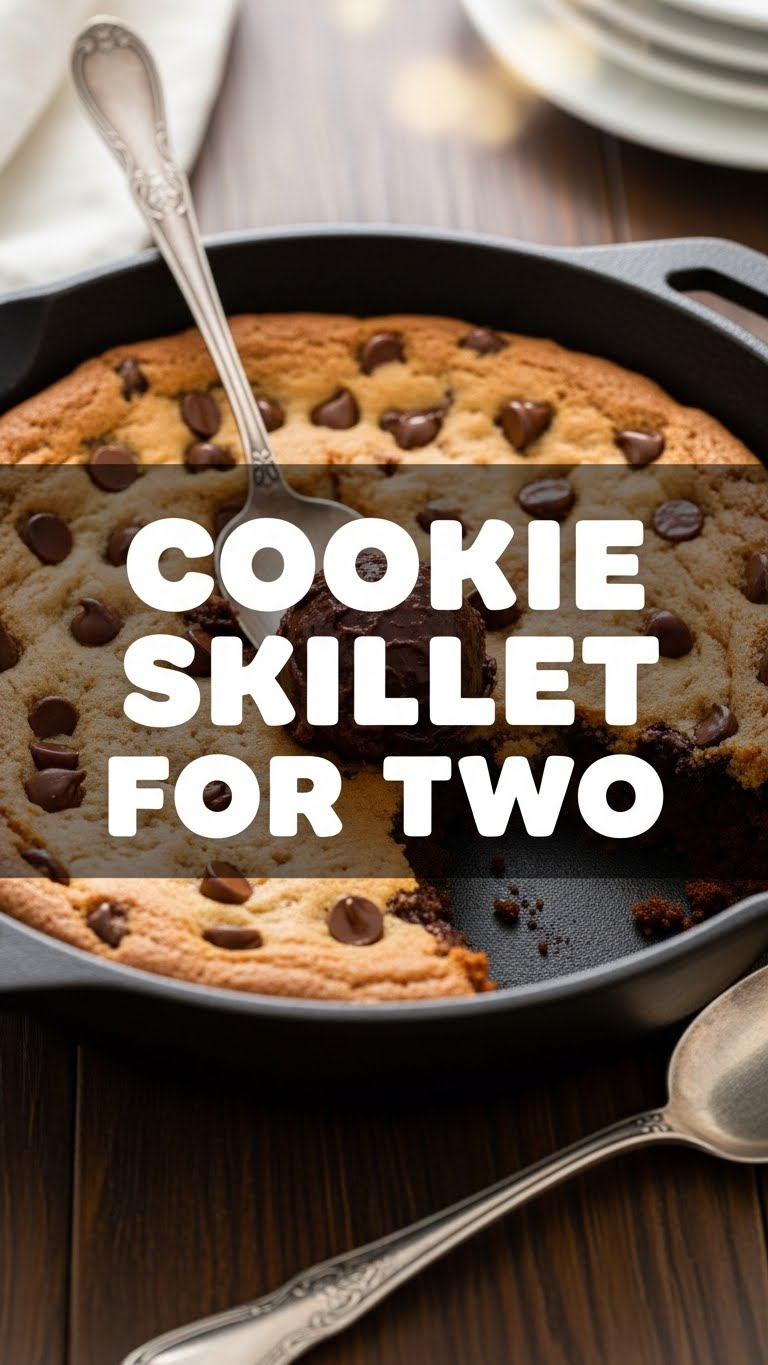
- It’s the perfect excuse to buy a cute mini cast iron skillet. Not that you needed an excuse, but now you have one!
Ingredients You’ll Need
Gather ’round, my culinary comrades! Here’s what you need to conjure this magic. Don’t worry, it’s nothing too wild.
- **2 tablespoons (28g) Unsalted Butter, melted:** The good stuff. Don’t cheap out here, your soul deserves real butter.
- **2 tablespoons Granulated Sugar:** Just your basic sweet stuff.
- **2 tablespoons Light Brown Sugar, packed:** This gives it that chewiness and depth. Don’t skip it, it’s a game-changer.
- **1 large Egg Yolk:** Just the yolk! We’re being precise here. It helps with richness and texture. Save the white for an omelet later, or, you know, discard it dramatically.
- **¼ teaspoon Vanilla Extract:** The essence of happiness. Don’t skimp on the quality.
- **¼ cup (30g) All-Purpose Flour:** The backbone of our cookie dreams.
- **⅛ teaspoon Baking Soda:** Our little lift-off agent.
- **Pinch of Salt:** Balances all that sweetness. Don’t forget it, seriously.
- **¼ cup Chocolate Chips (or more!):** Milk, semi-sweet, dark, white… whatever your heart desires. Go wild, or stick to classic semi-sweet. No judgment if you add an extra handful.
Step-by-Step Instructions
Alright, apron on (or not, we’re informal here), let’s make some magic. These steps are so easy, you might think you missed one. You didn’t.
- **Preheat Your Oven:** Set it to **350°F (175°C)**. While it’s heating up, grab an oven-safe 5-inch or 6-inch skillet. If you don’t have one, a small oven-safe ramekin or baking dish will do the trick. No need to grease it, the butter in the dough will handle that.
- **Melt the Butter:** In a small microwave-safe bowl (or directly in your skillet if you’re feeling brave and a little lazy, like me), melt the 2 tablespoons of butter. It should take about 20-30 seconds.
- **Mix the Wet Stuff:** Pour the melted butter into a small mixing bowl (if you didn’t melt it there). Add both the granulated sugar and brown sugar. Whisk them together until they’re well combined and look like a happy, sandy mixture.
- **Add the Flavor Bombs:** Stir in the egg yolk and vanilla extract until everything is smooth and glossy. You’re building the flavor base here, so give it a good mix.
- **Combine Dry Ingredients:** In a separate, even smaller bowl (or just dump them straight into the wet mixture, rebel!), whisk together the flour, baking soda, and salt. Then, add these dry ingredients to your wet mixture.
- **Don’t Overmix!** Gently stir until *just* combined. You don’t want to develop the gluten too much, or your cookie will be tough. We’re aiming for tender, folks.
- **Fold in the Chips:** Stir in your glorious chocolate chips. If you want a few extra on top for aesthetics (and because, chocolate!), save some for later.
- **Into the Skillet:** Scoop your glorious cookie dough into your prepared oven-safe skillet. **Press it down evenly** with the back of a spoon or your fingers. If you saved any, scatter those extra chocolate chips on top.
- **Bake It Up:** Pop that skillet into your preheated oven. Bake for **12-16 minutes**, or until the edges are golden brown and the center looks set but still a little gooey. Remember, ovens vary, so keep an eye on it!
- **Cool (a Little!) and Serve:** Remove from the oven and let it cool for about 5 minutes. This helps it set up a bit. Then, grab two spoons (or one, if it’s truly a “for one” situation), maybe some ice cream, and dig in!
Common Mistakes to Avoid
Even the simplest recipes have traps! Here are a few rookie errors to steer clear of, because nobody wants a sad cookie skillet.
- **Thinking you don’t need to preheat the oven:** Rookie mistake! Cold ovens lead to uneven baking and sad, flat cookies. **Always preheat!**
- **Overmixing the dough:** Once you add the flour, stir just until combined. Aggressive mixing develops gluten, which makes your cookie tough. We want tender, not chewy like old gum.
- **Forgetting the salt:** A tiny pinch of salt isn’t just for flavor; it actually enhances the sweetness and balances everything out. Without it, your cookie might taste a little… flat.
- **Eating the entire raw dough batch:** Look, I get it, it’s tempting. But it has raw egg. A little lick? Maybe. The whole thing? Probably not the best idea. (Unless you use pasteurized eggs, then go wild!)
- **Not sharing (if it’s actually for two):** This is perhaps the gravest error of all. Although, if you *accidentally* eat it all, we won’t tell.
Alternatives & Substitutions
Feeling adventurous? Or maybe you’re just missing an ingredient (it happens!). Here are some ideas to mix things up:
- **Chocolate Chip Varieties:** Not a semi-sweet fan? Use milk chocolate, dark chocolate, white chocolate, butterscotch chips, or even a mix! Chocolate chunks work beautifully too for bigger melty pockets.
- **Add-ins:** Feeling extra? Stir in a tablespoon of chopped nuts (pecans, walnuts), sprinkles (because why not?), a pinch of cinnamon, or even a drizzle of caramel/peanut butter swirled into the dough before baking.
- **No Brown Sugar?** You can get away with using all granulated sugar, but your cookie will be less chewy and have a slightly different texture. **For best results, stick to the brown sugar.**
- **Dairy-Free Option:** Use a good quality plant-based butter (like Miyoko’s or Earth Balance sticks) and dairy-free chocolate chips. The egg yolk will still be there, so it won’t be fully vegan, FYI.
- **Gluten-Free Flour:** You can usually substitute with a 1:1 gluten-free baking blend that contains xanthan gum. Results may vary slightly in texture, but it should still be delicious.
FAQ (Frequently Asked Questions)
Got questions? I’ve got (mostly sarcastic) answers!
- **Can I use margarine instead of butter?** Well, technically yes, but why hurt your soul like that? Butter just tastes better, period. But if that’s all you have, it’ll work.
- **My cookie is too crumbly/dry, what happened?** You probably overmixed the dough or added too much flour. Next time, measure your flour properly (scoop and level, don’t pack it!) and mix just until combined.
- **Can I make a bigger skillet cookie?** Absolutely! Double or triple the recipe and use a larger skillet (like an 8-inch or 10-inch). Adjust baking time accordingly—it’ll need longer, likely 20-30 minutes for a larger size.
- **Can I prepare the dough ahead of time?** You betcha! Mix up the dough, press it into the skillet, cover it with plastic wrap, and pop it in the fridge for up to 24 hours. When you’re ready, bake as usual, adding a few extra minutes to the baking time since it’s cold.
- **What are the best toppings for this?** Oh, where to begin?! A scoop of vanilla ice cream is non-negotiable, IMO. But also: a drizzle of caramel sauce, hot fudge, whipped cream, sprinkles, extra chocolate chips, or even a sprinkle of sea salt to cut the sweetness.
- **My skillet is smoking in the oven, help!** Did you grease it? If you used too much butter/oil to grease (which isn’t needed for this recipe), it might smoke. Also, some cast iron skillets seasoned with certain oils can smoke a bit at higher temps. As long as it’s not a burning smell, you’re probably okay!
Final Thoughts
There you have it, folks! You just made a warm, gooey, chocolatey masterpiece with minimal effort and maximum satisfaction. Now go impress someone—or yourself—with your new culinary skills. You’ve earned it! Grab those spoons, kick back, and enjoy every single bite. You’re officially a dessert wizard. You’re welcome.


