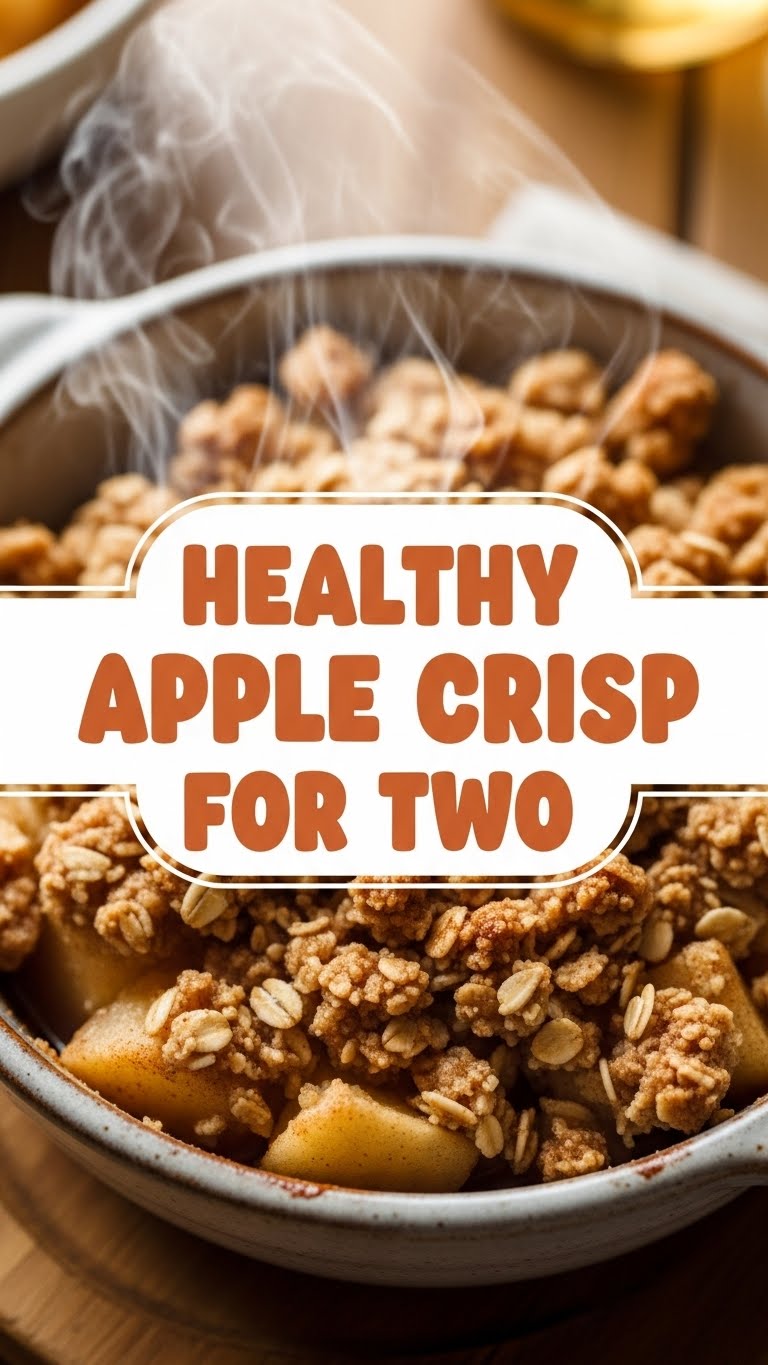
So you’re craving something warm, sweet, and comforting but also don’t want to eat your weight in sugar or spend an entire afternoon in the kitchen, huh? And, like, you only need *two* servings because, hello, who needs leftover apple crisp judging them from the fridge all week? You’ve come to the right place, friend. We’re about to whip up a Healthy Apple Crisp for Two that’s so good, you’ll wonder why you ever bothered with those giant, guilt-inducing versions.
Why This Recipe is Awesome
Ever tried making a dessert for just two people and ended up with enough to feed a small army? Yeah, me too. This recipe gets it. It’s perfectly portioned, surprisingly healthy (we’re talking fruit, people!), and so easy, your cat could probably supervise without messing things up. Seriously, it’s **perfect for a cozy night in** when you want a treat without the guilt trip or the hour-long clean-up. Plus, it smells incredible while baking, which is basically free aromatherapy.
Ingredients You’ll Need
Gather ’round, my fellow lazy-but-lovable chefs. Here’s what you’ll need to make magic happen for two:
- Your Favorite Apples (2 medium): Granny Smith if you like a little tart zing, or Honeycrisp if you’re a sweet tooth. Pick firm ones, no mushy business.
- Rolled Oats (1/2 cup): The old-fashioned kind, please! Not instant. We’re building texture here, not sad oatmeal.
- All-Purpose Flour (2 tbsp): Or almond flour if you’re feeling fancy or avoiding gluten. It helps bind the topping into glorious crumbles.
- Brown Sugar or Maple Syrup (2-3 tbsp total): We’re splitting this. About 1 tbsp for the apples, and the rest for the topping. Adjust to your sweetness preference, but remember, we’re aiming for ‘healthy-ish’!
- Cinnamon (1/2 tsp): The queen of cozy spices. Don’t skip her!
- Nutmeg (Pinch): Cinnamon’s quiet, yet equally important sidekick.
- Butter or Coconut Oil (2 tbsp, melted): Just a little dab for that rich, crispy topping.
- Lemon Juice (1 tsp, optional but recommended): Brightens up the apples and stops them from browning. Like a tiny ray of sunshine for your fruit.
- Pinch of Salt: To make all the sweet flavors sing.
Step-by-Step Instructions
- Preheat & Prep: Preheat your oven to a cozy 375°F (190°C). Grab two small ramekins (about 6-8 oz each) or a small oven-safe dish. Lightly grease them – future you will thank present you for this!
- Apple Attack: Peel, core, and chop your apples into bite-sized pieces. Don’t overthink it, just uniform enough so they cook evenly. Toss them in a medium bowl with 1 tablespoon of your chosen sweetener (brown sugar or maple syrup), 1/4 teaspoon of cinnamon, a tiny pinch of nutmeg, a pinch of salt, and the optional lemon juice. Mix well until everything’s coated and smelling delicious.
- Divide & Conquer: Spoon the apple mixture evenly into your prepared ramekins. Don’t worry if they look a little full; they’ll cook down.
- Topping Time: In the same bowl (because who needs extra dishes?), combine the rolled oats, flour, the remaining 1-2 tablespoons of sweetener, the rest of the cinnamon and nutmeg, and another tiny pinch of salt. Pour in the melted butter or coconut oil and mix with a fork until crumbly. It should look like wet sand with oat chunks.
- Top It Off: Sprinkle the crumble topping generously over the apples in each ramekin. Make sure those apples are nicely covered.
- Bake to Perfection: Pop your ramekins on a baking sheet (to catch any enthusiastic bubbling) and bake for 20-25 minutes. You’re looking for the apples to be tender (test with a fork if you’re brave enough to peek) and the topping to be golden brown and gloriously crispy.
- Serve & Savor: Let them cool for a few minutes (they’ll be molten lava hot, promise!) before digging in. Serve warm, perhaps with a tiny dollop of Greek yogurt or a small scoop of low-fat vanilla ice cream if you’re feeling extra indulgent.
Common Mistakes to Avoid
We’ve all been there, staring at a culinary disaster. Learn from my oopsies:
- Thinking you don’t need to preheat the oven: Rookie mistake! Your oven isn’t magic; it needs a warm-up. **Always preheat!**
- Using instant oats: Seriously, don’t. They turn to mush, and we’re going for a delightful chew, not a sad gruel.
- Overcooking the apples: Nobody likes mushy apples unless they’re in baby food. Keep an eye on the clock; you want them tender-crisp, not soup.
- Going wild with the sugar: Remember, we said ‘healthy-ish.’ A little sweetness goes a long way, especially with naturally sweet apples.
- Forgetting to grease your ramekins: Ever tried to scrape burnt, sticky apple goo off ceramic? It’s not fun. Just do it.
Alternatives & Substitutions
Feeling creative? Here are some ways to shake things up:
- Fruit Fiesta: Swap out half the apples for pears, berries, or even sliced peaches. A mix is often divine!
- Flour Power: Almond flour or whole wheat flour can easily replace all-purpose in the topping. Just be aware of slight texture differences.
- Sweetener Swaps: Honey, agave, or even a sugar substitute like erythritol can stand in for brown sugar/maple syrup. Adjust to taste.
- Boost the Topping: Add a tablespoon of chopped nuts (pecans, walnuts) or shredded coconut to the oat mixture for extra crunch and flavor. IMO, it’s worth it!
- Dairy-Free Delight: Coconut oil or your favorite vegan butter work perfectly in the topping.
FAQ (Frequently Asked Questions)
Got questions? I’ve got answers (mostly humorous ones):
- Can I use other fruits? Absolutely! Pears, berries, peaches, or a mix of any of these are fantastic. Just make sure they’re not too watery, or you’ll have a soggy bottom situation.
- Is it *really* healthy? Well, it’s healthier than a deep-fried Mars bar, but it’s still dessert. It’s packed with fruit and fiber from the oats, so let’s call it a ‘virtuous indulgence.’ Portion control, my friend!
- What if I don’t have ramekins? No stress! Use a small oven-safe dish (like a mini loaf pan or a very small pie dish). Baking time might vary slightly, so keep an eye on it.
- Can I make it ahead of time? You can assemble the apple filling and the topping separately, then combine and bake just before serving. If you put the topping on too early, it might get a little soggy. Nobody likes soggy crisp.
- Can I double this recipe? Of course! Just multiply all ingredients by two and use a larger baking dish. FYI, it’s still just as easy!
- My topping isn’t crispy, what gives? Either your oven wasn’t hot enough, or it needed a few more minutes. Don’t be shy; let it get good and golden!
Final Thoughts
There you have it! A warm, comforting, slightly virtuous dessert, just for you (and your lucky plus-one). **Go on, you deserve this.** Your taste buds will thank you, and your kitchen won’t look like a war zone. Now go impress someone—or yourself—with your new culinary skills. You’ve earned it!


