So you’re craving something tasty but too lazy to spend forever in the kitchen, huh? Same. And let’s be real, cooking for one often feels like a punishment, not a pleasure. But what if I told you there’s a ridiculously easy way to whip up some seriously delicious baked cod without turning your kitchen into a disaster zone or having enough leftovers to feed a small army? Prepare to have your mind (and your taste buds) gently blown.
Why This Recipe is Awesome
Okay, listen up. This isn’t just a recipe; it’s a survival guide for the solo diner who values flavor AND their precious Netflix time. It’s **idiot-proof**, I swear – even *I* haven’t messed it up, and my track record with delicate fish is… questionable, at best. Plus, cleanup is a breeze. We’re talking minimal dishes, maximum deliciousness. Your inner chef (and your dish-washing self) will absolutely thank you for this one.
Ingredients You’ll Need
- Cod Fillet (about 4-6 oz): Your magnificent star! Look for fresh or frozen (thawed, obvs).
- Olive Oil (1-2 tsp): Just a drizzle, not a swim. We’re aiming for healthy, not greasy.
- Lemon (a wedge or a slice): Because fish without lemon is like a joke without a punchline. Essential!
- Garlic Powder (1/4 tsp-ish): Or fresh minced garlic if you’re feeling fancy (and want to chop something).
- Paprika (a pinch): For a little color and a dash of je ne sais quoi.
- Salt & Black Pepper: To taste. Don’t be shy, but don’t overdo it either. Balance is key, friend.
- Optional but highly recommended:
- Fresh Parsley (chopped): For that “I know what I’m doing” garnish.
- Butter (1 tsp): If you’re feeling extra decadent. Why not, right? You’re worth it.
Step-by-Step Instructions
Get Hot, Get Ready: Preheat your oven to a cozy 400°F (200°C). Seriously, don’t skip this; a hot oven makes all the difference. While it’s heating, grab a small baking dish or line a baking sheet with foil. We’re all about that easy cleanup life, right?
Pat It Dry: Take your beautiful cod fillet and pat it thoroughly dry with a paper towel. This step is crucial, folks! A dry fish gets a better sear, prevents steaming, and gives you that perfect flaky texture.
Season Like a Pro: Place the cod in your prepared dish. Drizzle it with olive oil, then sprinkle generously with garlic powder, paprika, salt, and pepper. If using butter, pop a tiny pat on top. Give it a good rub-down so every inch is seasoned to perfection.
Lemon Time: Lay a lemon slice or two on top of the cod, or just give it a good squeeze of fresh lemon juice. This brightens everything up and truly makes the fish sing. It’s the secret ingredient for maximum zing.
Bake It Till You Make It: Slide that dish into your preheated oven. Bake for **10-15 minutes**. The exact time depends on your fillet’s thickness, so keep an eye on it. You’ll know it’s done when it flakes easily with a fork. Don’t overcook it unless you enjoy rubbery fish!
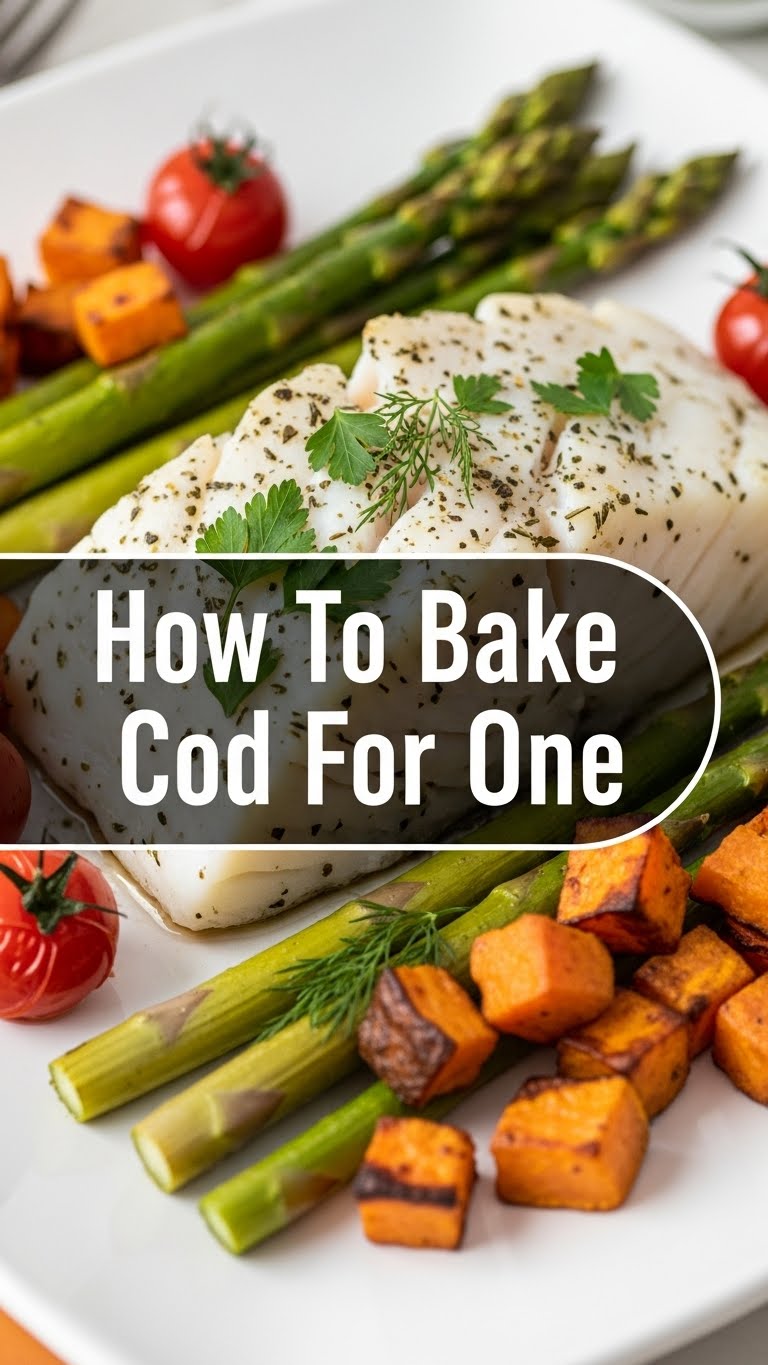
Garnish & Devour: Carefully remove from the oven. If you’re using fresh parsley, sprinkle it on top for a pop of color and freshness. Let it rest for a minute (patience, young padawan!), then transfer to your plate. Pair with your favorite side (hello, roasted asparagus or rice!) and enjoy your culinary masterpiece!
Common Mistakes to Avoid
- No Preheat, No Party: Thinking you don’t need to preheat the oven? **Rookie mistake!** Your fish will cook unevenly and take forever. Just don’t do it.
- The “Wet Fish” Fiasco: Forgetting to pat your cod dry. You’ll steam your fish instead of getting those lovely flaky results. Think of it as a fish spa day – it needs to be dry before it gets its glow on.
- Over-Seasoning Oh-No: Drowning your poor fish in spices. Start small, taste, and add more if needed. You can always add, but you can’t take away!
- The Rubber Fish Conundrum: Overcooking it. Cod is delicate, so keep an eye on it. The moment it flakes easily, it’s done. **Seriously, less is more here.**
- No Rest for the Weary: Eating it straight out of the oven. A minute or two of rest lets the juices redistribute, making every bite juicier. Patience, grasshopper.
Alternatives & Substitutions
- Fish Swap: Not a cod fan? Or just can’t find it? This recipe works great with other mild white fish like haddock, tilapia, or halibut. Just adjust baking time slightly based on thickness.
- Spice It Up (or Down): Feeling adventurous? Try a sprinkle of dill, a dash of smoked paprika, or a pinch of chili flakes for a kick. Not a fan of garlic powder? A tiny bit of onion powder can work wonders too.
- Herb Garden Raid: No fresh parsley? Dried works in a pinch (use less!), or try fresh chives or cilantro if that’s your vibe. Or just skip it; it’s mostly for looks, IMO.
- Fat Swaps: Out of olive oil? Melted butter or even a neutral oil like avocado oil will do the trick. Just keep it a light coating; we’re not frying here.
FAQ (Frequently Asked Questions)
- Can I use frozen cod? Absolutely! Just make sure it’s fully thawed before you start. Pat it super dry, and you’re good to go.
- What if I don’t have parchment paper or foil? A lightly oiled baking dish works perfectly. Just be prepared for a *tiny* bit more scrubbing later.
- My cod is really thick, will it still cook in time? Thicker fillets might need an extra 5-7 minutes. Look for the flakiness. **That’s your cue!** Don’t rely solely on the clock.
- Can I add veggies to the same pan? You bet! Thinly sliced zucchini, asparagus spears, or cherry tomatoes can roast alongside your fish. Just toss them with a little oil, salt, and pepper. It’s a one-pan wonder!
- No lemon? Disaster?! Not a disaster, but a tragedy. Just kidding (mostly)! A splash of white wine vinegar or a tiny bit of lime juice can offer a similar acidic brightness.
- What’s the best way to reheat leftovers? Honestly, baked fish is best fresh. But if you *must*, a quick zap in the microwave (30-60 seconds) or a gentle reheat in a low oven (275°F/135°C) for 5-7 minutes will do. Just don’t expect miracles.
Final Thoughts
See? That wasn’t so scary, was it? You just whipped up a delicious, healthy, and impressive (for how little effort it took) meal for yourself. No fuss, no muss, just pure satisfaction. Now go impress someone—or yourself—with your new culinary skills. You’ve earned it! And hey, next time you’re feeling fancy, remember this little gem. You’ve officially leveled up your solo dining game. Congrats, chef!


