So, you’ve got a sudden, urgent craving for something creamy, dreamy, and utterly decadent, but the thought of baking a gigantic cheesecake that will haunt your fridge for days just isn’t cutting it, huh? Same, friend. We’ve all been there. You want all the joy, none of the commitment (or the leftover guilt). Well, buckle up, because I’ve got your back with a recipe for Cheesecake For Two that’s so ridiculously easy, you might just feel like you’re cheating. (Spoiler: You are, but in the best possible way.)
Why This Recipe is Awesome
Let’s be real: baking can sometimes feel like a high-stakes science experiment. But not this time! This recipe is practically idiot-proof. Seriously, even if your previous baking attempts resulted in smoke alarms and questionable lumps, you can nail this. It’s perfectly portioned, which means less waste and less temptation to eat an entire cake by yourself (though, again, no judgment here). Plus, it bakes faster than its full-sized counterpart, so you’re on your way to dessert heaven in record time. It’s the ultimate “I tried, but not *too* hard” dessert for date night, a solo treat, or just because Tuesday exists.
Ingredients You’ll Need
Gather your mighty arsenal! Here’s what we’re wrangling for our tiny triumph:
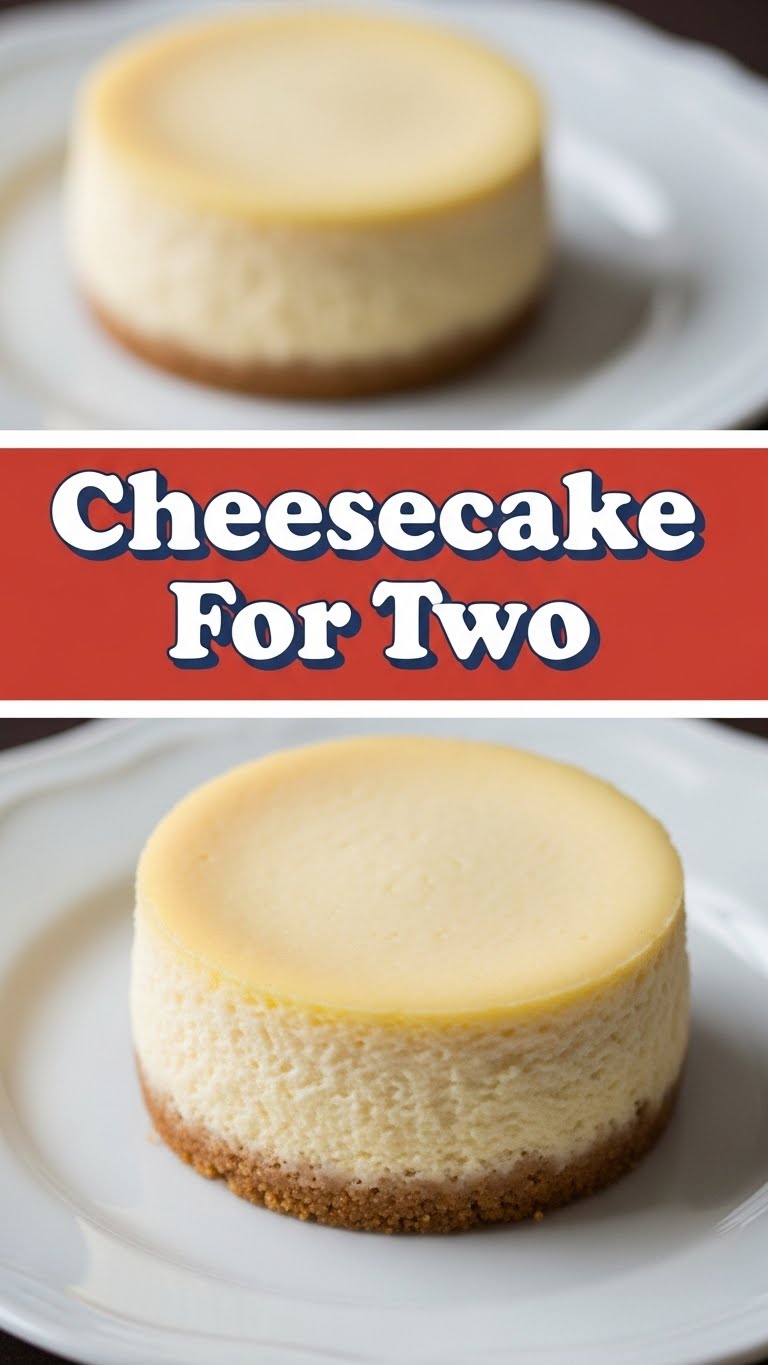
- Graham Crackers (4-5 full sheets): The backbone of our glorious crust. Crushed, obviously.
- Unsalted Butter (2 tbsp), melted: Because everything’s better with butter, duh.
- Cream Cheese (8 oz block), full-fat, softened: The undisputed star. Don’t skimp on the full-fat; this isn’t a diet, it’s an experience.
- Granulated Sugar (1/4 cup + 2 tbsp): For that sweet, sweet bliss.
- Large Egg (1), room temperature: Just one! Don’t panic.
- Vanilla Extract (1/2 tsp): For a little razzle-dazzle and warmth.
- Lemon Juice (1/4 tsp), fresh is best: Our secret weapon for brightness. Trust me on this one.
Step-by-Step Instructions
- Prep Your Pan: First things first, grab a 4-inch or 6-inch springform pan (or even a small ramekin for a crustless version if you’re feeling wild). Lightly grease it. If you’re using a springform, wrap the bottom in foil to prevent any leaks.
- Crush the Crackers: Get out some aggression! Place graham crackers in a Ziploc bag and smash them with a rolling pin (or your fists, I won’t tell). You want fine crumbs, about 1/2 cup’s worth.
- Make the Crust: In a small bowl, mix those graham cracker crumbs with the melted butter. Press this mixture firmly into the bottom of your prepared pan. Pop it in the freezer for about 10 minutes while you work on the filling. Preheat your oven to 325°F (160°C).
- Cream it Up: In a medium bowl, beat the softened cream cheese and sugar together with an electric mixer on medium speed until it’s super smooth and fluffy. Scrape down the sides of the bowl often to ensure no lumps remain.
- Add the Rest: Gently mix in the egg, vanilla extract, and lemon juice. Mix just until combined – don’t overmix, or you risk cracks in your cheesecake. FYI, overmixing introduces too much air, which can cause it to puff up and then sink dramatically.
- Pour and Bake: Pour the luscious cream cheese mixture over your chilled crust. Carefully place the pan in your preheated oven. Bake for 30-35 minutes, or until the edges are set but the center still has a slight wobble when you gently jiggle the pan.
- Cool Down: Turn off the oven, crack the door open slightly, and let the cheesecake cool inside the oven for another hour. This prevents drastic temperature changes and helps avoid cracks.
- Chill Out: Once completely cool, transfer the cheesecake to the fridge. Cover it loosely and chill for at least 3-4 hours, or ideally, overnight. Patience is a virtue here, my friend.
- Serve It Up: Once thoroughly chilled, carefully run a thin knife around the edge before removing the springform side. Top with your favorite berries, a dollop of whipped cream, or just enjoy it plain!
Common Mistakes to Avoid
- Using Cold Cream Cheese: Don’t even think about it! Cold cream cheese leads to lumpy batter, and nobody wants a lumpy cheesecake. Plan ahead and let it soften at room temp for at least an hour.
- Over-Mixing the Batter: This isn’t a soufflé, so don’t beat it into oblivion. Mixing too much introduces too much air, which will make your cheesecake puff up dramatically in the oven and then tragically crack and fall. Mix just until combined.
- Opening the Oven Door Too Often: Resist the urge to peek every five minutes! Fluctuating oven temperatures are the enemy of a smooth, crack-free cheesecake.
- Skipping the Chill Time: Thinking you can eat it warm? Rookie mistake! Cheesecake needs that crucial chilling time to firm up properly and develop its full flavor and texture. Don’t rush perfection.
Alternatives & Substitutions
Feeling creative? Or maybe your pantry is looking a bit sparse? No problem!
- Crust: No graham crackers? Use digestive biscuits, shortbread, or even crushed Oreos (remove the cream first for a less sweet crust, or leave it in for extra decadence!). For a gluten-free option, use GF graham crackers or nuts.
- Toppings: The world is your oyster! Fresh berries (strawberries, raspberries, blueberries, oh my!), a drizzle of chocolate sauce, a dollop of whipped cream, a spoonful of lemon curd, or even a simple fruit compote. Let your imagination run wild!
- Flavor Variations: Swap out some vanilla for almond extract, or add a pinch of cinnamon to the crust. For a citrusy kick, increase the lemon juice or add some orange zest to the filling.
- Dairy-Free: There are some fantastic plant-based cream cheeses out there now! Just make sure they’re designed for baking, as some can have different consistencies.
FAQ (Frequently Asked Questions)
Got questions? I’ve got answers (and a little sass)!
Can I use low-fat cream cheese? Well, technically yes, you *could*. But why hurt your soul like that? This is cheesecake, not a health retreat. For the best flavor and texture, stick with full-fat. IMO, it’s worth it.
How do I know when it’s done? Give the pan a gentle jiggle. If the edges are set but the center still jiggles slightly like a firm Jell-O, you’re golden. It will continue to cook and firm up as it cools.
My cheesecake cracked! What happened? Oh, the horror! Usually, this happens from over-mixing, over-baking, or too drastic a temperature change during cooling. But hey, that’s what toppings are for, right? Cover it up with some berries, and no one will ever know.
Can I make this ahead of time? Absolutely! Cheesecake is actually better the next day once all those delicious flavors have had time to meld. Just cover it loosely and keep it in the fridge.
Do I *really* need a springform pan? For easy removal and a pretty presentation, yes. But if you don’t have one, you can bake it in an oven-safe ramekin. Just know you’ll be serving it directly from the ramekin, which is still perfectly cute!
How long does it last in the fridge? Assuming you haven’t devoured it all in one sitting (which is totally acceptable), it’ll be good for about 3-4 days, covered.
Final Thoughts
See? That wasn’t so scary, was it? You just whipped up a fancy-pants dessert fit for a king (or, you know, just you and your significant other/cat). This Cheesecake For Two is proof that good things come in small packages, especially when those packages involve cream cheese and sugar. So go forth, my friend, and impress someone—or yourself—with your new culinary skills. You’ve earned it!


