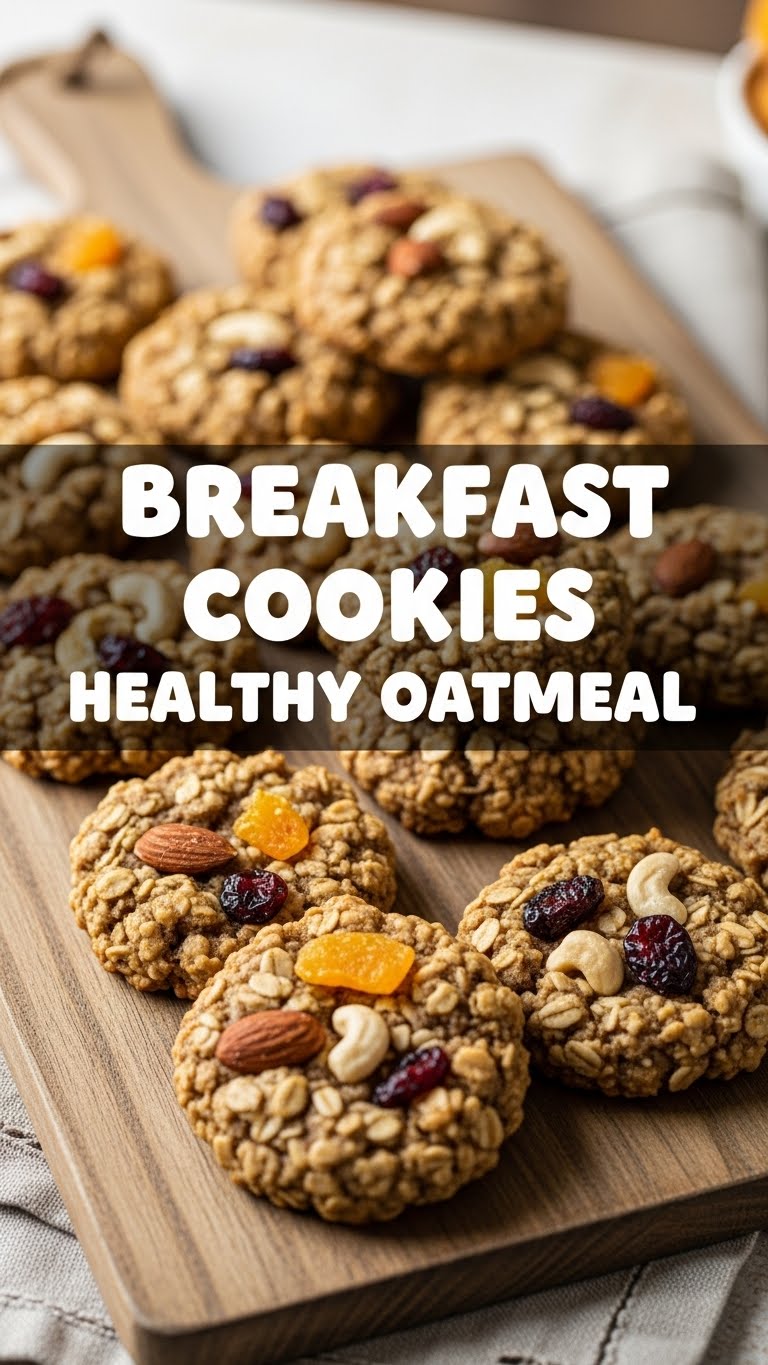
Ever woken up and thought, “Gee, I wish I could have cookies for breakfast without feeling like a total rebel?” Well, my friend, today’s your lucky day. We’re diving headfirst into the glorious, guilt-free world of Healthy Oatmeal Breakfast Cookies. Yes, you heard that right: *healthy* cookies for breakfast. Mind blown, right? Get ready to swap your sad cereal for something far more exciting and just as easy. Your taste buds (and your morning routine) will thank you!
Why This Recipe is Awesome
Okay, let’s be real. We all want delicious food, but sometimes the effort-to-reward ratio in cooking just feels… off. Not with these bad boys! This recipe is awesome because:
- It’s genuinely quick. Like, 20 minutes start to finish quick. You could practically make these in your sleep. (Please don’t.)
- You get to eat cookies for breakfast and actually feel good about it. Nutritionists, eat your heart out!
- They’re super customizable. Think of it as a blank canvas for your wildest (or most sensible) add-in dreams.
- It’s idiot-proof. Seriously, if I can whip these up before my first coffee, anyone can. No fancy techniques, no culinary degree required.
- Perfect for meal prep; bake a batch, and you’ve got grab-and-go goodness all week long. Score!
Ingredients You’ll Need
Gather your troops! Here’s what you’ll need to make these magical morning morsels. Don’t worry, it’s nothing too exotic.
- 2 ripe bananas: Your natural sweetener superhero. We’re talking spotty, almost-ready-for-the-bin bananas here. The spottier, the sweeter!
- 1 cup old-fashioned rolled oats: The OG of oats. These give the cookies that perfect chewy texture.
- ½ cup nut butter: Peanut, almond, cashew, whatever floats your boat! Adds delicious richness and some healthy fats. Pro tip: creamy works best.
- 1-2 tbsp maple syrup or honey (optional): Just a touch for that extra sweet oomph, but totally optional if your bananas are super ripe.
- 1 tsp vanilla extract: Because everything needs a hug from vanilla, IMO.
- ½ tsp ground cinnamon: Spice it up, buttercup! Or omit if you’re a cinnamon hater (we can still be friends).
- Pinch of salt: Don’t skip this! It enhances all the other flavors. Trust me on this one.
- Optional Mix-ins (¼-½ cup): Dark chocolate chips (for “healthy,” obvs), dried cranberries, chopped nuts, shredded coconut, chia seeds. Get creative!
Step-by-Step Instructions
Alright, apron on (or not, we’re not judging), let’s get baking! These steps are so easy, they practically bake themselves.
- Preheat & Prep: Get that oven heated to a cozy 350°F (175°C). Line a baking sheet with parchment paper or a silicone mat. This makes cleanup a breeze!
- Mash Bananas: In a medium bowl, peel and mash your ripe bananas until they’re mostly smooth. A few lumps are totally fine; adds character!
- Mix Wet: To the mashed bananas, add the nut butter, maple syrup (if using), and vanilla extract. Stir it all together until well combined and looking deliciously creamy.
- Add Dry & Mix: Now, dump in the rolled oats, cinnamon, salt, and any of your chosen mix-ins. Stir gently until everything is just combined. **Don’t overmix!** Overmixing can lead to tough cookies, and nobody wants a tough cookie.
- Scoop & Shape: Spoon dollops of the mixture onto your prepared baking sheet. For best results, use the back of a spoon or your fingers to flatten them slightly into cookie shapes, as they won’t spread much during baking.
- Bake ‘Em Up: Pop your baking sheet into the preheated oven for 12-15 minutes. Keep an eye on them; the edges should be lightly golden, and they should feel set.
- Cool Down: Let the cookies cool on the baking sheet for a few minutes before carefully transferring them to a wire rack to cool completely. They firm up as they cool!
Common Mistakes to Avoid
Even though this recipe is practically foolproof, there are a few rookie errors that can derail your breakfast cookie dreams. Learn from my mistakes, people!
- **Using under-ripe bananas:** This is a biggie. Greenish bananas won’t mash well, and more importantly, they won’t give you that natural sweetness. **Always use spotty, super ripe bananas!** Seriously, the spottier, the better.
- **Overmixing the batter:** Once you add the oats, just mix until everything is incorporated. Keep your enthusiastic stirring in check, or you might end up with dense, tough cookies.
- **Not flattening the cookies:** These cookies don’t spread on their own. If you just drop them in mounds, you’ll get lumpy oat balls instead of flat cookies. Give ’em a gentle press!
- **Baking too long:** While you want them cooked through, baking for too long will result in dry, sad cookies. They should still be slightly soft in the middle when you take them out.
- **Forgetting to preheat the oven:** Rookie mistake! An oven that isn’t up to temperature won’t bake your cookies evenly and can totally mess with the texture.
Alternatives & Substitutions
This recipe is super flexible! Feel free to play around with ingredients based on what you have or what you love. It’s your kitchen, after all!
- **Oats:** While old-fashioned rolled oats are king for texture, quick oats *can* work in a pinch. Just be aware the texture will be a bit softer. Steel-cut oats? Absolutely not, save those for your porridge.
- **Nut Butter:** Any nut butter is fair game! Peanut, almond, cashew, even sunflower seed butter if you have nut allergies. Just make sure it’s natural and creamy for the best consistency.
- **Sweetener:** Maple syrup, honey, agave nectar, or even a couple of soaked, pitted dates blended with a little water. If your bananas are extra ripe, you might not even need any added sweetener. Taste the batter and decide!
- **Mix-ins:** The world is your oyster! Try shredded coconut, chopped dried apricots, dates, pecans, walnuts, pumpkin seeds, flax seeds, or even a pinch of nutmeg or ginger for different flavor profiles. **Your cookie, your rules!**
FAQ (Frequently Asked Questions)
Got questions? I’ve got answers! (Mostly.)
- Are these *really* healthy? Well, they’re packed with oats, fruit, and good fats, and significantly less sugar than your average store-bought cookie. So, yes, relatively speaking, they’re a much healthier option for breakfast or a snack. It’s all about balanced indulgence!
- Can I make these gluten-free? Absolutely! Just make sure you’re using certified gluten-free rolled oats. Everything else in the recipe is naturally GF.
- How do I store them? Once completely cooled, store them in an airtight container at room temperature for 3-4 days, or in the fridge for up to a week. They also freeze wonderfully for up to a month – just thaw at room temp or pop in the microwave for a few seconds.
- Can I skip the maple syrup? Definitely! Especially if your bananas are super ripe. Give the batter a quick taste (it’s safe!) and see if it’s sweet enough for your liking. You might be surprised how sweet those bananas make it.
- What if I don’t have vanilla extract? It’s not the end of the world, but vanilla really adds a lovely depth of flavor. If you skip it, maybe add a tiny bit more cinnamon or a pinch of nutmeg to compensate.
- Can my kids help make these? Oh, heck yes! Mashing bananas is the ultimate kid-friendly task, and they’ll love stirring in the mix-ins. Just supervise the oven part, obviously! It’s a great way to get them involved in healthy eating.
- Can I use quick oats instead of old-fashioned? While old-fashioned oats provide the best texture, quick oats *can* work. The cookies will be a bit softer and less chewy. I wouldn’t recommend steel-cut oats for this recipe, though.
Final Thoughts
See? You’re practically a pastry chef now, just with way less fuss and way more breakfast-appropriate treats. These healthy oatmeal cookies are your new secret weapon for busy mornings, afternoon slumps, or whenever you just need a little sweet, guilt-free joy. They’re proof that healthy eating doesn’t have to be boring or complicated. Now go impress someone—or yourself—with your new culinary skills. You’ve earned it!

