So you’re craving something tasty, packed with goodness, but you’re too busy (or, let’s be honest, a *little* lazy) to spend forever in the kitchen, huh? Same, friend, same. We’ve all been there: that mid-afternoon slump, the pre-workout “I need fuel NOW” panic, or just the pure, unadulterated desire for a treat that doesn’t feel like you’ve completely derailed your health goals. Well, pull up a chair (or just stand there, I don’t judge) because I’ve got a recipe that’s about to become your new best friend. Seriously, it’s that good and that easy.
Why This Recipe is Awesome
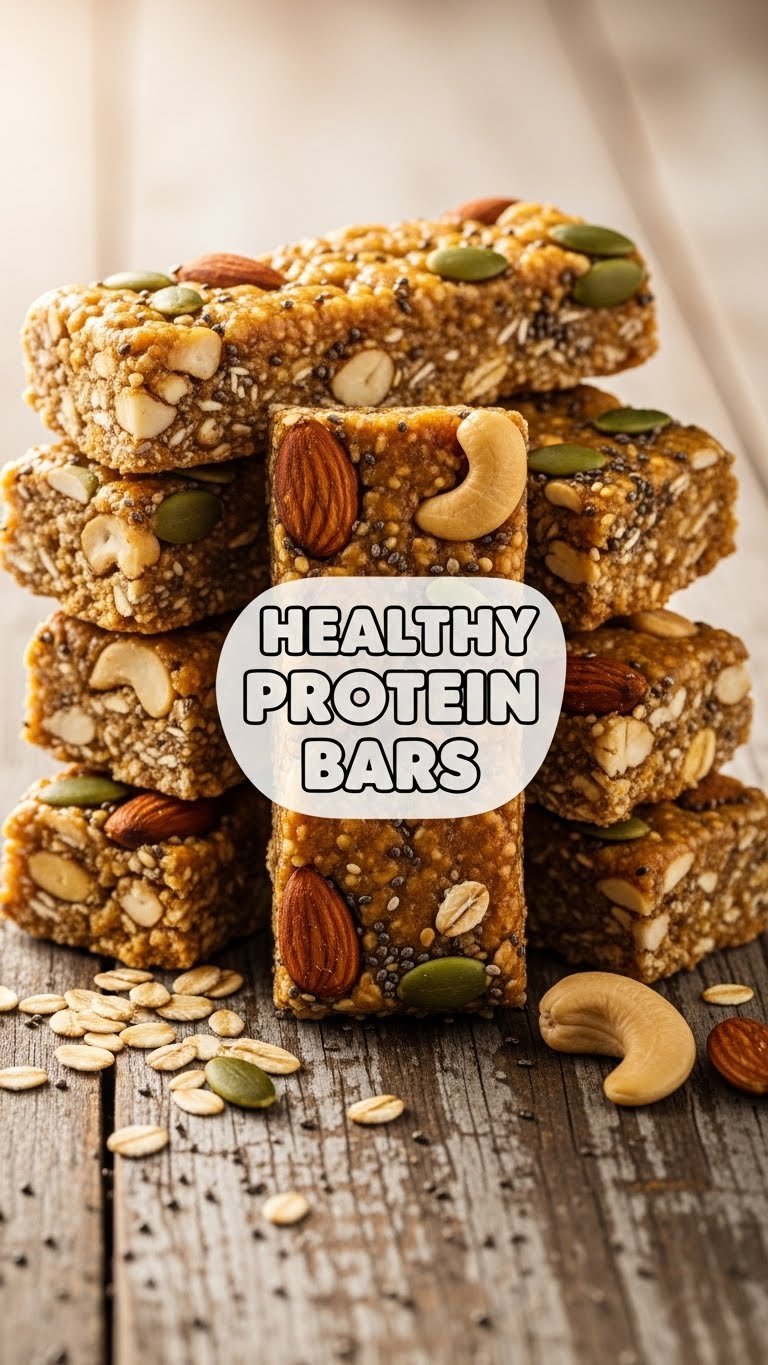
Okay, let’s spill the tea on why these Healthy Protein Bars are about to change your life. First off, they’re **no-bake**. That’s right, no oven drama, no worrying about burning anything (unless you burn water, in which case, we need to talk). Secondly, they’re packed with protein and fiber, meaning you’ll actually feel full and satisfied, not just momentarily sugar-buzzed. And thirdly, it’s genuinely idiot-proof. I’m talking “I can barely boil an egg without a Google tutorial” level of easy. Even I didn’t mess it up, and that’s saying something! Plus, they taste like a delicious, chewy dream, not like cardboard that someone whispered “protein” to. You’re welcome.
Ingredients You’ll Need
Gather ’round, my little culinary apprentice! Here’s what we’re rounding up for our epic protein bar adventure:
- **1 ½ cups Rolled Oats:** The good old-fashioned kind. Not instant, unless you want sad, mushy bars. We’re going for texture, baby!
- **½ cup Protein Powder:** Your favorite flavor. Vanilla or unflavored are usually safe bets, but chocolate is also a power move. This is where the protein party starts!
- **½ cup Nut Butter:** Peanut butter, almond butter, cashew butter – whatever your heart desires. Make sure it’s a natural, drippy kind, not the super stiff stuff that’s impossible to stir. Trust me on this.
- **⅓ cup Maple Syrup or Honey:** Our natural sweetener. Gives it that perfect chewiness and just enough sweetness without going overboard.
- **¼ cup Milk (or dairy-free alternative):** Almond milk, oat milk, regular milk – whatever floats your boat. We need a little liquid love to bring it all together.
- **½ tsp Vanilla Extract:** Because everything is better with vanilla, IMO.
- **Pinch of Salt:** Don’t skip this! It really makes all the flavors pop.
- **Optional Add-ins (choose a few!):**
- **¼ cup Mini Chocolate Chips:** Because life’s too short for no chocolate.
- **¼ cup Chia Seeds or Flax Seeds:** Sneaky superfoods! Extra fiber and omegas.
- **¼ cup Chopped Nuts:** Almonds, walnuts, pecans – for extra crunch.
Step-by-Step Instructions
- **Prep Your Pan:** Grab an 8×8 inch baking dish. Line it with parchment paper, leaving a little overhang on the sides. This is your secret weapon for easy bar removal later. Don’t skip this step, future you will thank you!
- **Combine Dry Ingredients:** In a large mixing bowl, dump in your rolled oats, protein powder, and that tiny pinch of salt. Give it a quick whisk or stir to make sure everything is buddies.
- **Mix Wet Ingredients:** In a separate, smaller bowl (or just a microwave-safe measuring cup), combine your nut butter, maple syrup (or honey), milk, and vanilla extract. Pop it in the microwave for about 30-45 seconds, just until it’s warm and runny enough to easily stir together. This makes a huge difference!
- **Bring it All Together:** Pour the warm wet mixture into your dry ingredients. Now, get ready for an arm workout! Stir, stir, stir until everything is thoroughly combined. You want a thick, sticky dough-like consistency. If it seems too dry, add a tiny bit more milk, one tablespoon at a time.
- **Fold in Goodies:** If you’re adding any optional mix-ins (chocolate chips, seeds, nuts), gently fold them in now. Distribute them evenly, so every bar gets some love.
- **Press it Down:** Transfer the mixture into your prepared 8×8 inch pan. Now, this is crucial: **press it down FIRMLY and evenly** into the pan. Use the back of a spoon, your clean hands, or even the bottom of a glass. The firmer you press, the less crumbly your bars will be.
- **Chill Out:** Cover the pan and pop it into the fridge for at least 2 hours. Seriously, don’t rush this. This is where the magic happens and they firm up into perfect, sliceable bars.
- **Slice and Devour:** Once thoroughly chilled, use the parchment paper overhang to lift the slab out of the pan. Place it on a cutting board and slice into 10-12 bars. Now, go on, you’ve earned it!
Common Mistakes to Avoid
Listen up, buttercup! Even easy recipes have their pitfalls. Here are a few rookie mistakes to dodge:
- **Not Lining the Pan:** Seriously, I warned you! You’ll be chiseling your bars out, and nobody wants that kind of stress. **Parchment paper is your friend.**
- **Skimping on Chill Time:** Patience is a virtue, especially here. If you cut them too soon, they’ll be crumbly and sad. **Give those bars at least two hours in the fridge.** They need their beauty sleep.
- **Not Pressing Firmly Enough:** This isn’t a gentle pat; it’s a firm, decisive press. The tighter you compact that mixture, the better your bars will hold together. **Squish it good!**
- **Using Stiff Nut Butter:** If your nut butter is super thick and hard, warming it up won’t be enough. It needs to be the drippy, natural kind. Otherwise, your mixture will be a dry, unmixable mess.
- **Over-adding Liquid:** It’s tempting to keep adding milk if the mixture seems dry, but a little goes a long way. Add just a tiny bit at a time, otherwise, you’ll end up with mush.
Alternatives & Substitutions
Feeling adventurous? Or maybe just missing an ingredient? No stress! Here are some swaps:
- **Nut Butter Swaps:** Almond butter, cashew butter, sunflower seed butter (for nut allergies), or even tahini. Just make sure it’s the creamy, natural kind.
- **Sweetener Swaps:** Agave nectar or brown rice syrup can totally step in for maple syrup or honey. They’ll give you a similar texture and sweetness.
- **Protein Powder Power:** Any protein powder works! Whey, casein, pea protein, soy protein – just pick your fave. The flavor will definitely influence the final taste, so choose wisely, young padawan.
- **Milk Alternatives:** Almond milk, oat milk, soy milk, coconut milk, or regular dairy milk – all good!
- **Gluten-Free?** Make sure your rolled oats are certified gluten-free. Easy peasy.
- **Vegan Vibes:** Use maple syrup instead of honey, a plant-based protein powder, and dairy-free milk. Voila! Vegan protein bars!
FAQ (Frequently Asked Questions)
Got questions? I’ve got (casual and witty) answers!
- **Can I skip the protein powder?** Well, you *can*, but then they’re just “healthy oat bars,” not “healthy *protein* bars,” are they? The texture might be a little different too. So, technically yes, but why miss out on all that muscle-loving goodness?
- **How long do these last?** Stored in an airtight container in the fridge, they’re good for about a week. If you manage to make them last that long, you have more willpower than me!
- **Can I freeze them?** Absolutely! Wrap individual bars in plastic wrap, then pop them into a freezer-safe bag or container. They’ll last for a month or two. Just let them thaw a bit before devouring.
- **My bars are too crumbly! What went wrong?** Ah, the age-old crumbly bar dilemma! You probably didn’t press them firmly enough into the pan, or they didn’t chill long enough. Go back to step 6 and 7 next time, champ!
- **Can I use quick oats instead of rolled oats?** You *could*, but the texture will be softer, less chewy, and potentially a bit mushy. Rolled oats give you that satisfying bite. So, for the best results, stick with the rolled kind.
- **What if my nut butter is super thick?** Warm it gently in the microwave or a double boiler to get it nice and runny *before* mixing. It makes a world of difference for incorporation.
Final Thoughts
And there you have it, folks! Your very own batch of homemade, healthy, ridiculously easy, and utterly delicious protein bars. You’ve just leveled up your snack game, bypassed all those questionable store-bought ingredients, and saved a few bucks in the process. Now go impress someone—or, more importantly, impress yourself—with your newfound culinary prowess. You’ve earned it! Enjoy that healthy, happy fuel!

