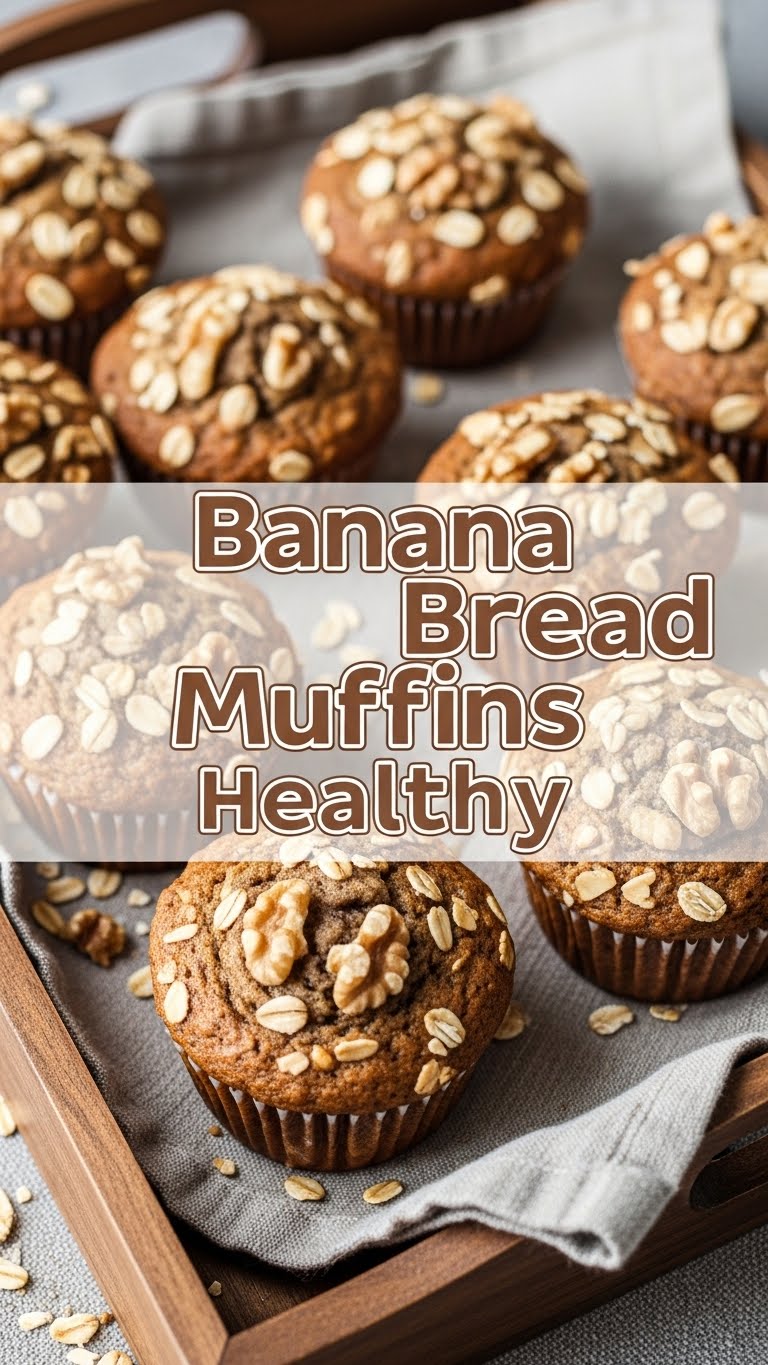
So you’re craving something tasty but too lazy to spend forever in the kitchen, huh? Same. Look, we’ve all got those spotty, suspiciously dark bananas haunting our fruit bowl, mocking us with their rapidly approaching expiration date. And while a full-on banana bread loaf is glorious, sometimes you just need a quick win. Enter: Banana Bread Muffins. But wait, these aren’t just *any* banana bread muffins. These are the *healthy-ish* kind. You know, the ones that let you pretend you’re making good life choices while still devouring something absolutely scrumptious. No guilt, just pure, unadulterated muffin joy. Let’s get baking!
Why This Recipe is Awesome
Okay, let’s be real. If you’re here, you probably fall into one of two camps: either you’re a seasoned baker looking for a guilt-free treat, or you’re me, someone who occasionally bakes and is constantly surprised when things actually turn out edible. Good news! This recipe is **idiot-proof**. I’ve personally tested it on multiple occasions, and even I didn’t mess it up. Plus, there are so many wins here:
- Speedy Gonzales: Muffins bake faster than a whole loaf, meaning you get to eat them sooner. Priorities, people.
- Portion Control (lol, maybe): They’re pre-portioned! So, theoretically, you’ll only eat one. Or two. Or three. No judgment here.
- Healthy-ish Glow Up: We’re swapping some ingredients for healthier alternatives, so you can tell yourself it’s practically a salad. (It’s not, but shhh.)
- Uses Those Sad Bananas: Don’t toss ’em! The browner they are, the sweeter and more banana-y your muffins will be. It’s like magic, but with fruit.
- Freezer Friendly: Make a big batch, freeze ’em, and have a healthy-ish breakfast on demand. You’re basically a life hacker.
Ingredients You’ll Need
Gather your troops! Most of these are probably chilling in your pantry already. No fancy-pants, hard-to-find stuff here.
- 3 Ripe Bananas: The browner, the better. We’re talking almost black, squishy goodness. Embrace the mush!
- 1 ½ cups Whole Wheat Flour: Or whole wheat pastry flour for an even lighter texture. We’re getting that fiber in, sneakily.
- ½ cup Rolled Oats: For a little chew and extra goodness. Who knew “healthy” could be so textural?
- 1 tsp Baking Soda: The MVP for lift.
- ½ tsp Baking Powder: Its trusty sidekick, ensuring maximum fluffiness.
- ½ tsp Ground Cinnamon: Because what’s banana bread without a warm, spicy hug?
- ¼ tsp Salt: Don’t skip this! It enhances all the flavors.
- 1 large Egg: Our binding agent.
- ⅓ cup Maple Syrup or Honey: Natural sweetness! Adjust to your sweet tooth.
- ¼ cup Unsweetened Applesauce or Greek Yogurt: This is our secret weapon for moisture and cutting down on oil/butter. Greek yogurt adds a protein punch too, FYI.
- 2 tbsp Melted Coconut Oil or Light Olive Oil: Just a touch for tenderness.
- 1 tsp Vanilla Extract: A splash of liquid gold for ultimate deliciousness.
- Optional Add-ins: ½ cup chocolate chips (duh), chopped walnuts or pecans (for crunch!), or even some dried cranberries.
Step-by-Step Instructions
Alright, apron on, let’s do this! It’s super simple, promise.
- Preheat & Prep: Crank your oven to 375°F (190°C). Line a 12-cup muffin tin with paper liners or grease it generously. No sticking allowed!
- Mash ‘Em Up: In a medium bowl, mash your ripe bananas with a fork until mostly smooth. A few lumps are totally fine; they add character.
- Wet Ingredients Unite: Add the egg, maple syrup (or honey), applesauce (or Greek yogurt), melted coconut oil, and vanilla extract to the mashed bananas. Whisk everything together until well combined.
- Dry Mix: In a separate, larger bowl, whisk together the whole wheat flour, rolled oats, baking soda, baking powder, cinnamon, and salt. Make sure there are no clumpy bits.
- Combine & Conquer: Pour the wet ingredients into the dry ingredients. **Gently fold** them together with a spatula until *just* combined. A few streaks of flour are okay! **Do not overmix**, or you’ll end up with tough muffins. Nobody wants a tough muffin.
- Add Your Flair: If you’re using chocolate chips, nuts, or other fun add-ins, gently fold them into the batter now.
- Fill ‘Em Up: Divide the batter evenly among the 12 muffin cups. They should be about two-thirds full.
- Bake Away: Pop the tin into your preheated oven and bake for 18-22 minutes, or until a toothpick inserted into the center of a muffin comes out clean.
- Cool Down: Let the muffins cool in the tin for a few minutes before transferring them to a wire rack to cool completely. Or, you know, eat one while it’s still warm and risk burning your mouth. Your call!
- Devour: Seriously, go enjoy your masterpiece!
Common Mistakes to Avoid
Even though this recipe is practically foolproof, there are a few banana peels (pun intended) you might slip on. Learn from my mistakes, because I’ve made them all!
- Overmixing the Batter: This is the cardinal sin of muffin making. Once you combine wet and dry, mix *just* until no dry streaks remain. Overmixing develops the gluten, leading to rubbery, tough muffins. You’ve been warned!
- Under-ripe Bananas: Using yellow, firm bananas? **Rookie mistake.** They won’t be sweet enough, and the banana flavor won’t shine. Wait for those spotty, almost-black beauties. Patience is a virtue.
- Forgetting to Preheat: Thinking you can just shove them in a cold oven? Nope! A hot oven helps activate the leavening agents immediately, giving you that lovely muffin top.
- Not Lining/Greasing the Tin: Unless you enjoy scraping muffins out of the tin with a butter knife and a lot of frustration, please line or grease your muffin tin.
- Opening the Oven Door Too Soon: Curiosity killed the muffin! Resist the urge to peek during the first 15 minutes. This lets the heat escape and can cause your muffins to collapse.
- Eating Them All Immediately: (Just kidding, mostly.) But seriously, letting them cool completely helps them set and makes them easier to handle. Unless you’re like me, then just go for it.
Alternatives & Substitutions
Feeling adventurous? Or just realized you’re missing an ingredient? No worries, we’ve got options!
- Flour Power: Don’t have whole wheat? All-purpose flour works just fine, though you’ll lose some of the “healthy-ish” fiber. You could also try a 50/50 blend of whole wheat and all-purpose. For a gluten-free option, use a good quality gluten-free all-purpose flour blend (one that includes xanthan gum).
- Sweetener Swaps: If you’re out of maple syrup or honey, you can use ½ cup of brown sugar instead. The texture might be slightly different, but still delicious.
- Yogurt/Applesauce Alternatives: No Greek yogurt or applesauce? You can use an equal amount of buttermilk, sour cream, or even a mashed avocado (don’t worry, you won’t taste it!). These all add moisture and richness.
- Oil Play: If coconut oil isn’t your jam, any neutral-flavored oil like canola or vegetable oil will work. Melted butter also adds a lovely flavor, if you’re not strictly counting calories.
- Vegan Vibes: To make these totally plant-based, swap the egg for a “flax egg” (1 tbsp ground flaxseed mixed with 3 tbsp water, let sit for 5 minutes). Ensure your Greek yogurt is plant-based, or just stick to applesauce.
- Spice It Up: A pinch of nutmeg or allspice can really elevate the flavor profile. Get creative!
FAQ (Frequently Asked Questions)
Got questions? I’ve got (mostly) snarky answers!
- Can I use unripe bananas? Well, technically yes, but why hurt your taste buds like that? Unripe bananas are starchy, not sweet, and your muffins will lack that deep, lovely banana flavor. **Always use ripe (spotty!) bananas!**
- How long do these healthy muffins last? If you manage not to eat them all in one sitting, they’ll stay fresh in an airtight container at room temperature for 2-3 days, or in the fridge for up to a week. They also freeze beautifully for up to 3 months. Future you will thank present you!
- Can I bake this as a loaf of bread instead? Absolutely! Just pour the batter into a greased 9×5 inch loaf pan. You’ll need to bake it longer, likely 50-60 minutes, or until a toothpick comes out clean. Cover loosely with foil if the top starts to brown too quickly.
- I don’t have oats, can I skip them? Yep, you can totally skip the oats if you’re not into them or just don’t have any. The texture will be slightly different (less chewy), but still delicious.
- Are these *really* healthy? Let’s say they’re **healthier**. They’re packed with whole grains, use natural sweeteners, and have less fat than traditional banana bread muffins. They’re not a kale smoothie, but they’re a delicious step in the right direction!
- My muffins didn’t rise much, what happened? Usually, this means your baking soda/powder is old (check the dates!), you overmixed the batter, or your oven wasn’t hot enough. Make sure your leavening agents are fresh!
- Can I add more sugar? I like things really sweet! You *can*, but I’d recommend trying them as is first. The ripe bananas provide a lot of natural sweetness. If you still want more, add an extra tablespoon or two of maple syrup, but remember, we’re trying for “healthy-ish” here!
Final Thoughts
And there you have it, folks! Your very own batch of healthy-ish banana bread muffins, ready to impress (or just to be secretly devoured by you alone, no judgment). They’re the perfect breakfast on the go, a delightful afternoon snack, or even a guilt-free dessert. Now go forth and impress someone—or yourself—with your new culinary skills. You’ve earned it! Happy baking, my friend!

