So you’re craving something tasty but too lazy to spend forever in the kitchen, huh? Same. And you also want it to be… you know… *not* feel like a crime against your future self? Double same. Well, my friend, gather ’round, because I’ve got a treat for you that’s about to become your new kitchen MVP: Healthy Oatmeal Bars!
Why This Recipe is Awesome
Let’s be real, life’s too short for complicated recipes, especially when your stomach is rumbling with purpose. This recipe is awesome for a few ridiculously good reasons:
- It’s practically **idiot-proof**. Seriously, if I can make these without setting off the smoke alarm, you’re golden.
- We’re talking **wholesome ingredients** that actually taste good together. No weird chemicals, no ingredients you can’t pronounce. Just good stuff.
- They’re **customizable**. Feeling fancy? Add chocolate chips. Feeling virtuous? Extra seeds it is!
- **Perfect for meal prep**. Whip up a batch on Sunday, and you’ve got grab-and-go goodness all week. Your future self will high-five your past self, I promise.
- **No fancy equipment needed.** Just your basic kitchen arsenal and a sprinkle of confidence (or desperation, whatever works).
Ingredients You’ll Need
Time to raid your pantry! Here’s what you’ll need for these magnificent bars:
- 2 cups Rolled Oats: And I mean *rolled* oats, not instant. Unless you like sad, mushy bars. We want texture, people!
- 1/2 cup Creamy Almond Butter: Or peanut butter, cashew butter, sunflower seed butter… your pick! Almond is feeling fancy today, though.
- 1/2 cup Honey or Maple Syrup: The sweet stuff. Choose your fighter based on what you have and what vibe you’re going for. Both work wonders!
- 1/4 cup Coconut Oil (melted): The good kind of fat. It helps bind everything together and gives a lovely subtle flavor.
- 1 tsp Vanilla Extract: Don’t skip this. It’s the Beyoncé of flavor enhancers, making everything taste a little bit better.
- 2 tbsp Chia Seeds: Tiny but mighty! They sneak in some omega-3s and help with binding. Total overachievers.
- 1/4 tsp Salt: Just a pinch, wakes everything up and balances the sweetness. Trust me on this.
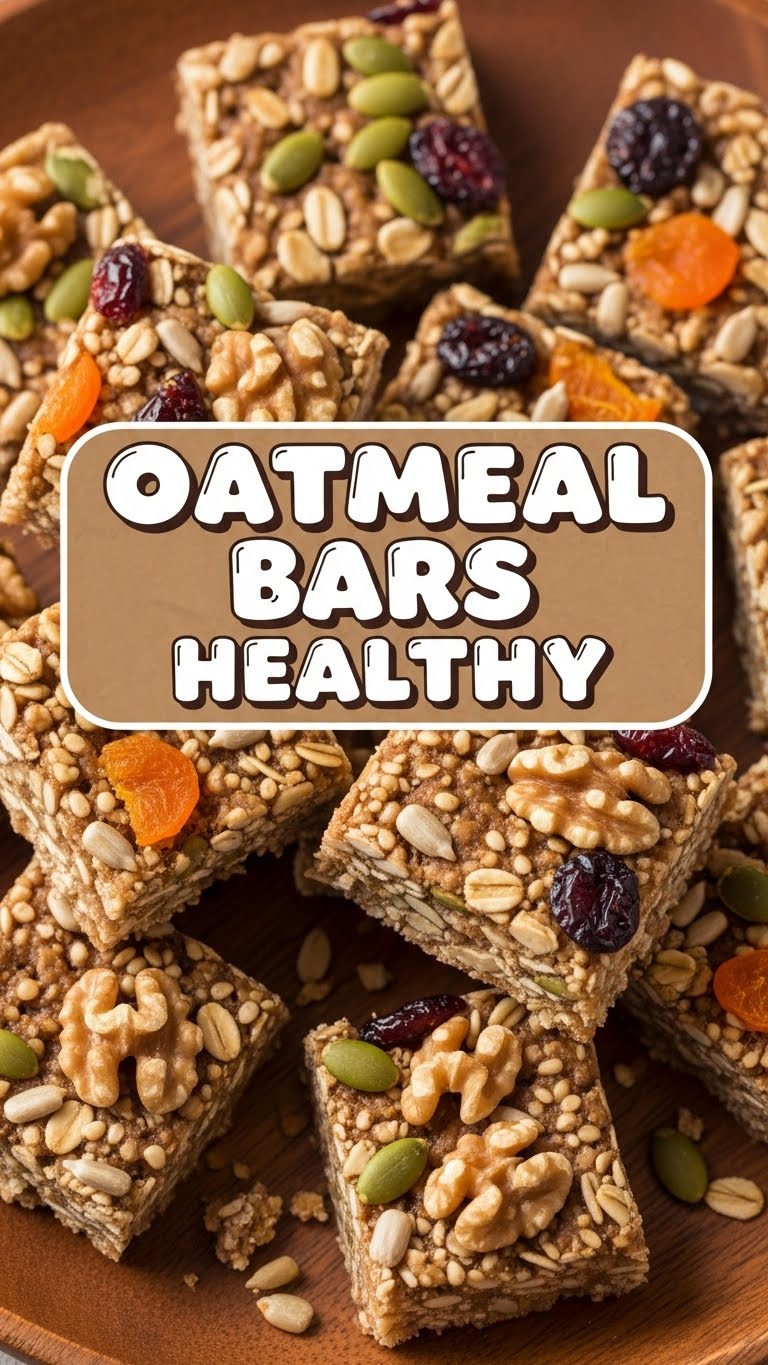
- Optional Mix-ins (get wild!): 1/4 cup dark chocolate chips, dried cranberries, chopped nuts, a sprinkle of cinnamon… whatever makes your heart sing.
Step-by-Step Instructions
Alright, apron on (or not, I don’t judge). Let’s do this!
- Preheat & Prep: First things first, fire up that oven to 350°F (175°C). Then, grab an 8×8 or 9×9 inch square baking dish and line it with parchment paper, leaving a little overhang. This makes getting the bars out a breeze, FYI.
- Wet Mix Magic: In a medium bowl, whisk together your almond butter, honey (or maple syrup), melted coconut oil, and vanilla extract. Keep whisking until it’s all smooth and glorious.
- Dry Mix Dance: In a separate, larger bowl, combine your rolled oats, chia seeds, and salt. If you’re adding any optional mix-ins like chocolate chips or dried fruit, toss them in here now.
- Combine & Conquer: Pour the wet ingredients into the dry ingredients. Grab a sturdy spoon or spatula and mix everything together really well until all the oats are coated in that sweet, sticky goodness.
- Press for Success: Transfer the mixture to your prepared baking dish. Now, this is important: **press it down *firmly* and evenly**. Use the back of your spoon, a flat spatula, or even your hands (lightly dampened to prevent sticking) to really compact it. This is key for bars that hold together!
- Bake It ‘Til You Make It: Pop the dish into your preheated oven and bake for 20-25 minutes, or until the edges are lightly golden brown. You want them cooked through, but not dried out.
- Cool Down, Buttercup: The hardest part! Let the bars cool in the pan on a wire rack for at least 1-2 hours, preferably longer, or even in the fridge for 30 mins. Seriously, **do not skip this step**. They need to firm up properly. Once cool, use the parchment paper overhang to lift the slab out and cut into 9-12 bars.
Common Mistakes to Avoid
Look, we all make mistakes. Here are a few to steer clear of so your bars turn out perfectly:
- Cutting Them Too Soon: This is the cardinal sin of oatmeal bars. If you cut them while they’re warm, you’ll end up with a delicious pile of crumbles instead of neat bars. Patience, young padawan!
- Using Instant Oats: I said it once, I’ll say it again. Instant oats create a sad, mushy texture that just isn’t right for these. Stick to rolled oats!
- Not Pressing Firmly Enough: If your bars fall apart, this is probably why. Get in there and show those oats who’s boss! A well-compacted mixture is a happy mixture.
- Overbaking: Dry, crumbly bars are no fun. Keep an eye on them towards the end of the baking time. Golden edges are good; burnt edges are… well, you know.
Alternatives & Substitutions
Feeling adventurous? Or just realized you’re out of almond butter? No worries, here are some easy swaps:
- Nut Butter: Peanut butter, cashew butter, or even sunflower seed butter (for a nut-free option!) all work great. Each gives a slightly different flavor profile, so experiment!
- Sweetener: Agave nectar is a good 1:1 substitute for honey or maple syrup. Brown rice syrup also works but is a bit thicker.
- Coconut Oil: Unsalted butter (melted) or another neutral oil like avocado oil can be used, though IMO coconut oil adds a nice subtle flavor.
- Mix-ins Galore: The world is your oyster! Add chopped walnuts, pecans, pepitas, dried blueberries, shredded coconut, or a dash of cinnamon or pumpkin pie spice.
- Extra Protein: Want to boost the protein? Add a scoop of unflavored or vanilla protein powder. You might need to add a tiny splash more liquid (milk, water, or extra syrup) to maintain the right consistency.
FAQ (Frequently Asked Questions)
Got questions? I’ve got answers. Mostly.
- Are these *really* healthy? Well, compared to a candy bar or a store-bought pastry, absolutely! They’re packed with whole grains, healthy fats, and natural sweeteners. It’s all about balance, folks.
- How long do they last? In an airtight container, they’ll last about a week at room temperature, or up to two weeks in the fridge. Or, like, two days if you live with me.
- Can I make them gluten-free? Absolutely! Just make sure to use certified gluten-free rolled oats, and you’re golden. The other ingredients are naturally GF.
- What if I don’t have parchment paper? Foil works in a pinch, just grease it well. Or, live dangerously and just grease the pan really, really well. But I warned you!
- Can I use steel-cut oats? Nope, sorry! Steel-cut oats need a lot more liquid and cooking time. Stick to rolled oats for this one, trust me. It’s a texture thing.
- Why do they need to cool completely? It’s torture! Because warm bars are fragile and will disintegrate. They firm up as they cool, giving you that perfect bar consistency. **This is probably the most important step for structural integrity!**
- Can I freeze these? Heck yes! Wrap individual bars in plastic wrap, then store them in a freezer-safe bag for up to 3 months. Thaw at room temp or pop them in the microwave for a quick warm-up.
Final Thoughts
And there you have it! Your ticket to delicious, healthy-ish snacking without the guilt or the hours of kitchen slavery. These oatmeal bars are so good, you might even *forget* they’re good for you. They’re perfect for breakfast on the go, a midday pick-me-up, or even a healthier dessert option.
Now go impress someone—or yourself—with your new culinary skills. You’ve earned it, you kitchen wizard, you!


