So you’re craving something tasty but too lazy to spend forever in the kitchen, huh? Same. High five! We all get that sudden urge for something sweet, but then the thought of complex ingredients and a pile of dishes just… *ugh*. Fear not, my friend, because I’ve got the perfect antidote to your sweet tooth woes and your aversion to actual effort. Prepare yourself for the glorious, no-fuss world of **No-Bake Chocolate Peanut Butter Energy Bites**!
Why This Recipe is Awesome
Okay, let’s be real. This recipe isn’t just “awesome”; it’s basically the culinary equivalent of finding twenty bucks in your old jeans. It’s **ridiculously easy**, even for those of us who consider burning water a personal achievement. Seriously, it’s idiot-proof, even I didn’t mess it up, and my kitchen skills are usually limited to ordering takeout. There’s no oven involved (hallelujah!), minimal cleanup, and it takes less time than deciding what to watch on Netflix. Plus, you get that sweet-and-salty combo we all secretly crave, packed with stuff that’s actually good for you. It’s like a tiny, healthy hug in snack form. You’re welcome.
Ingredients You’ll Need
Gather ’round, my fellow lazy foodies! Here’s your shopping list. Don’t worry, it’s short and sweet:
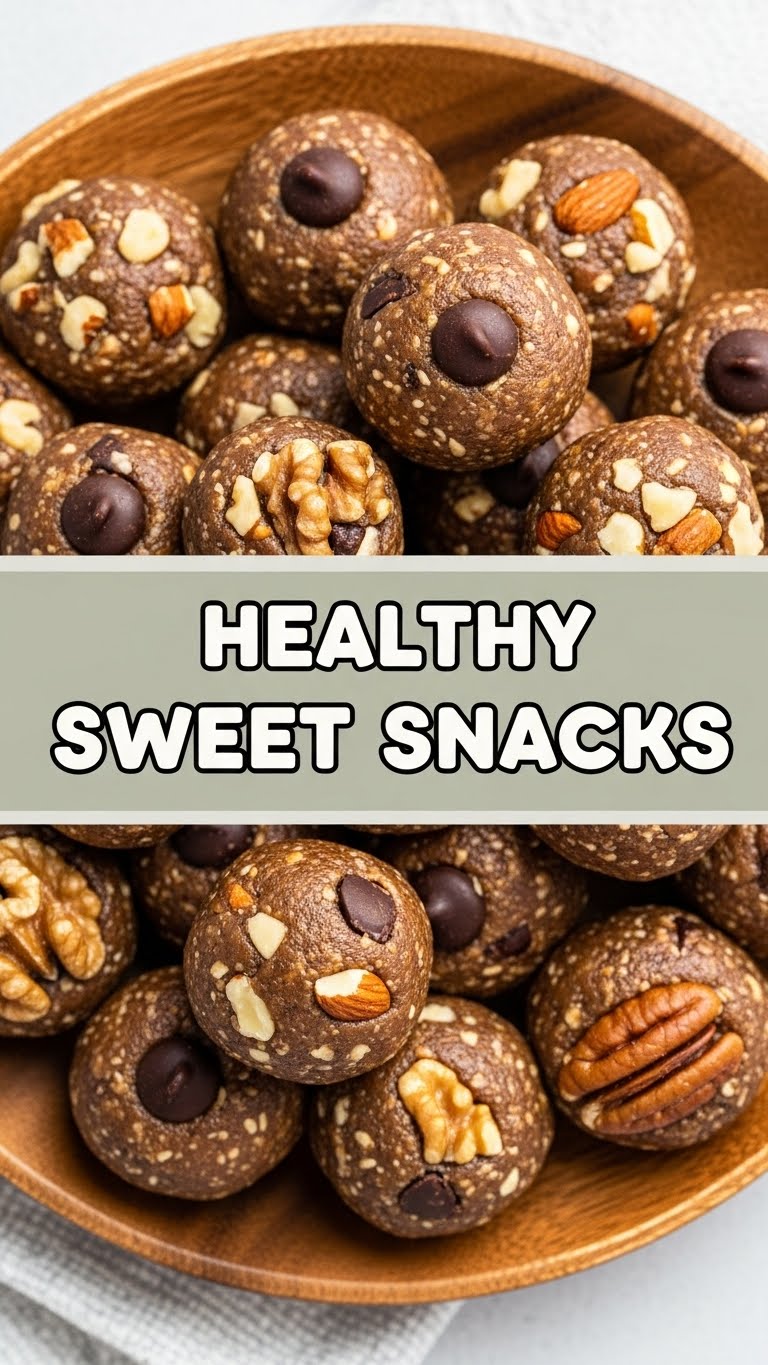
- **1 cup rolled oats:** The OG base for all things energy. Don’t use instant oats unless you *want* weird texture. (You don’t.)
- **½ cup natural peanut butter:** Or almond butter, cashew butter, whatever nut butter floats your boat. Just make sure it’s the drippy, natural kind, not the super-processed stuff that tastes like sugar and sadness.
- **⅓ cup honey or maple syrup:** Your choice of sticky sweetness. Honey’s classic, maple syrup is vegan-friendly. Both are delicious.
- **¼ cup unsweetened cocoa powder:** For that rich, chocolatey goodness without the sugar overload. Because we’re fancy like that.
- **1 teaspoon vanilla extract:** A little splash for a lot of flavor. Don’t skip it!
- **Pinch of salt:** Enhances all the flavors. Trust me on this one, it’s a game-changer.
- **Optional: ¼ cup mini chocolate chips (dark is best!):** Because a little chocolate never hurt anyone. And mini means less guilt, right? It’s science.
Step-by-Step Instructions
Get ready for the easiest “cooking” you’ll do all week. You might even feel like a chef. Almost.
- **Grab a big bowl:** Seriously, a big one. You don’t want oats flying everywhere.
- **Dump it all in:** Throw in the oats, peanut butter, honey (or maple syrup), cocoa powder, vanilla extract, and that tiny pinch of salt. If you’re using mini chocolate chips, add ’em now too!
- **Mix it like you mean it:** Use a sturdy spoon or spatula. Or your clean hands, if you’re feeling wild and don’t mind getting sticky. Mix until everything is thoroughly combined and looks like a glorious, thick dough. **No dry patches allowed!**
- **Roll ’em up:** Take small amounts of the mixture and roll them into bite-sized balls. Think golf ball or ping pong ball size. Make them pretty, or don’t. They’ll taste good either way.
- **Chill out:** Place your beautiful energy bites on a plate or baking sheet lined with parchment paper. Pop them into the fridge for at least **30 minutes** to firm up. This is crucial for structural integrity, my friend.
- **Enjoy!** Once chilled, grab one (or three, I won’t tell) and bask in your culinary genius. Store any leftovers in an airtight container in the fridge.
Common Mistakes to Avoid
Even simple recipes have their pitfalls. Learn from my past (sticky, crumbly) mistakes:
- **Not chilling them enough:** This isn’t a suggestion, it’s a command. If you skip the chilling, you’ll have delicious-tasting but sad, mushy blobs. Don’t disrespect the blob.
- **Using crunchy peanut butter:** While delicious, the chunks can make rolling a pain. Stick to smooth for ease, unless you’re a masochist.
- **Overly processed peanut butter:** The kind with a ton of added sugar and oils is often too thick or too oily, throwing off the consistency. **Natural is key!**
- **Making them too big:** Resist the urge to create mega-bites. Smaller bites mean more servings (psychological victory!) and less mess.
Alternatives & Substitutions
Feeling adventurous? Or just missing an ingredient? I got you.
- **Nut Butter Swap:** Out of peanut butter? Almond butter, cashew butter, or even sunflower seed butter (for nut allergies!) work great. Each brings its own vibe.
- **Sweetener Switch:** Maple syrup or agave nectar can easily replace honey. Choose your fighter!
- **Add-ins Galore:**
- **Chia seeds or flax seeds:** A tablespoon or two adds extra omega-3s and fiber. Totally worth it.
- **Coconut flakes:** For a tropical twist. Unsweetened, please!
- **Protein powder:** A scoop of your favorite vanilla or chocolate protein powder boosts the protein content. Hello, post-workout snack!
- **Chopped nuts:** A little crunch never hurt anybody.
- **Spices:** A pinch of cinnamon or a dash of cayenne pepper (if you’re feeling spicy!) can add an interesting kick.
FAQ (Frequently Asked Questions)
Got questions? I’ve got (casual, humorous) answers!
- **Can I make these vegan?** Absolutely! Just use maple syrup (or agave) instead of honey, and ensure your chocolate chips are dairy-free. Voila, vegan magic!
- **How long do these last?** Stored in an airtight container in the fridge, they’ll happily last for about a week. But honestly, they’ll probably be gone much faster.
- **Can I freeze them?** **Yes!** They freeze beautifully. Pop them in a freezer-safe bag or container for up to 3 months. Just let them thaw for 10-15 minutes at room temp before devouring. Perfect for meal prepping your snack game!
- **My mixture is too dry/too wet, help!** If it’s too dry, add a tiny bit more nut butter or honey/syrup, ½ teaspoon at a time. If it’s too wet, add a tablespoon or two more oats or a pinch more cocoa powder. Adjust till it’s perfect for rolling. It’s an art, not a science, kinda.
- **Are these *actually* healthy?** Compared to a donut, yes! They’re packed with whole grains, healthy fats, and natural sweeteners. **Everything in moderation, right?** It’s a much better choice than reaching for that candy bar, IMO.
Final Thoughts
And there you have it, superstar! You’ve just whipped up a batch of delicious, healthy-ish, no-bake goodness without breaking a sweat (or a dish). See? I told you it was easy. Now go impress someone—or yourself—with your new culinary skills. You’ve earned it! Maybe make an extra batch to share, or just hoard them all for yourself. No judgment here. Happy snacking!


