So you’re craving something tasty but too lazy to spend forever in the kitchen, huh? Same. You want a dessert that screams “I’m fancy and put effort into this” but actually whispered “I spent 5 minutes assembling fruit and dairy.” Good news, my friend. I’ve got just the thing to satisfy that sweet tooth without making you feel like you need to run a marathon afterwards. Get ready for your new favorite go-to, the **Berry Bliss Parfait**.
Why This Recipe is Awesome
Okay, let’s be real. This isn’t just “awesome,” it’s practically a culinary magic trick. First, it’s **idiot-proof**. Seriously, if you can scoop and layer, you’ve already mastered it. Even I, Queen of “Oops, did I burn the water?”, can pull this off without setting off the smoke alarm. Second, it’s lightning fast. We’re talking 5 minutes from “I’m hungry” to “I’m eating something delicious.” Third, it’s actually *good for you*. Shocking, right? No heavy creams, no pounds of butter, just wholesome goodness that makes your tastebuds sing and your body thank you. Plus, it looks ridiculously Instagrammable. You’re welcome.
Ingredients You’ll Need
Gather ’round, my sweet-toothed conspirator! Here’s your hit list of deliciousness. You probably have half of this stuff already lurking in your fridge, which is a win in itself!
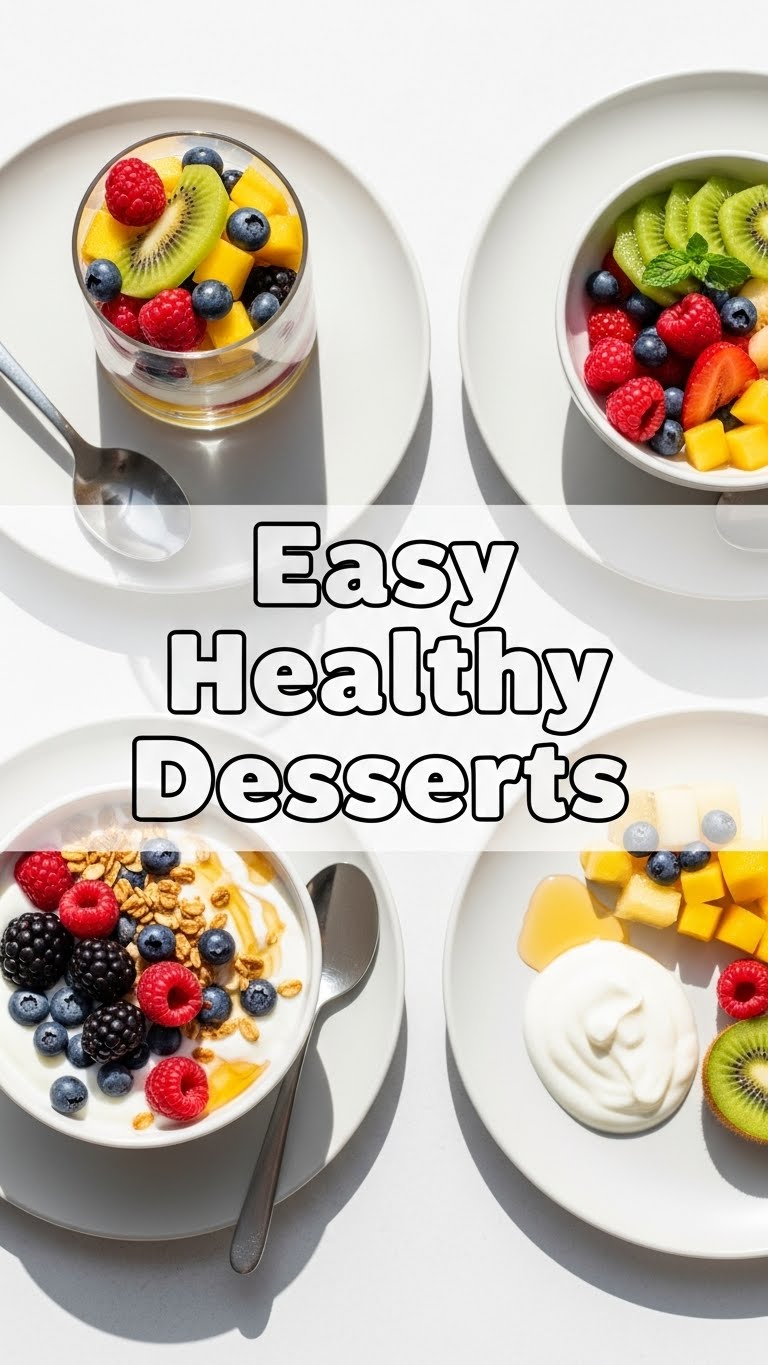
- **Greek Yogurt (plain, full-fat or 2%):** This is your creamy canvas. Go Greek or go home, seriously. It’s thicker and packed with protein, so you won’t be raiding the pantry an hour later.
- **Mixed Berries (fresh or frozen):** Strawberries, blueberries, raspberries, blackberries – the whole colorful gang! If using frozen, let them thaw a bit first, or just embrace the frosty crunch.
- **Granola (low sugar, whole grain):** The crunch factor! Read those labels, folks. We want crunch, not a sugar rush.
- **Honey or Maple Syrup (optional, for a kiss of sweetness):** Just a drizzle, if your berries aren’t super sweet or you just *really* need that extra oomph.
- **A sprinkle of chopped nuts or seeds (optional, for extra fancy points):** Think almonds, walnuts, chia seeds, or flax seeds. Adds texture and healthy fats!
Step-by-Step Instructions
Alright, put on your metaphorical chef’s hat (or just grab a spoon), because this is about to get real… easy.
- Grab your favorite fancy-ish glass or bowl. We’re going for presentation here, even if it’s just for you.
- Spoon about a quarter to a third of your Greek yogurt into the bottom of the glass. Smooth it out a little; you’re building a foundation!
- Next, add a layer of your glorious mixed berries. Don’t be shy!
- Sprinkle a generous amount of granola over the berries. This is where the magic crunch happens.
- Repeat the layers! Another scoop of yogurt, more berries, more granola. Keep going until you reach the top of your glass or run out of ingredients. The number of layers depends on your glass size and how extra you’re feeling.
- If you’re feeling fancy (or your berries are a bit tart), drizzle a tiny bit of honey or maple syrup over the top.
- For extra *oomph*, sprinkle on those optional chopped nuts or seeds. You’ve earned those extra points.
- Grab a spoon, take a picture for the ‘gram (or don’t, I won’t tell), and **dig in immediately!** Fresh is best.
Common Mistakes to Avoid
Listen, even with something this simple, there are pitfalls. Learn from my past (occasionally messy) experiences:
- **Using watery yogurt:** Seriously, don’t use regular plain yogurt unless you *want* a soupy mess. Greek yogurt is your bestie here for a reason.
- **Going overboard with sweetener:** The point here is “healthy-ish.” Let the natural sweetness of the berries shine. A little drizzle is good; a flood is just syrup with fruit.
- **Pre-making it too far in advance:** While it’s great for meal prep, don’t assemble it 12 hours before. The granola will get soggy, and nobody wants that. **Assemble right before serving for maximum crunch.**
- **Forgetting the layers:** You *could* just mix it all in a bowl, but where’s the fun in that? The layers are part of the aesthetic and the texture journey. Embrace the layers!
Alternatives & Substitutions
This recipe is like a choose-your-own-adventure book, but with deliciousness! Feel free to mix and match to your heart’s content:
- **Yogurt swap:** Not a fan of Greek? Try skyr (even thicker!) or a plant-based yogurt like almond or oat, just ensure it’s thick and unsweetened. Vanilla Greek yogurt is also a tasty shortcut, but check the sugar content!
- **Fruit fiesta:** Mango, peaches, sliced bananas, kiwi, cherries – literally any fruit works here. Just make sure it’s ripe and delicious.
- **Granola gone wild:** If you’re out of granola, crushed whole-wheat biscuits, a handful of toasted oats, or even a sprinkle of crumbled nuts can give you that desired crunch.
- **Sweetener switch-up:** Agave nectar, stevia drops, or even a tiny pinch of cinnamon mixed into the yogurt can add flavor without too much extra sugar.
- **Extra toppings:** Shredded coconut (unsweetened, naturally!), a dollop of nut butter, a sprinkle of dark chocolate chips (because balance, right?).
FAQ (Frequently Asked Questions)
Got questions? I’ve got answers (and probably a few jokes). Let’s dive in:
- **Can I use frozen fruit without thawing?** Technically yes, but it makes the yogurt super cold and can sometimes leave a watery residue as it thaws. **IMO**, a quick thaw makes for a better texture.
- **Is this *really* healthy if I add honey/maple syrup?** Good question! A little bit adds flavor without derailing the “healthy-ish” train. Portion control is key. Think of it as a flavor enhancer, not a main ingredient.
- **What if I don’t like Greek yogurt?** My heart breaks a little, but fear not! Skyr is an excellent alternative for thickness and protein. Or try a plain, unsweetened plant-based yogurt.
- **How long can I store this in the fridge?** Assembled? About 30-60 minutes before the granola starts waving the white flag. If you prep the ingredients separately, they’re good for 2-3 days. Just layer when ready to eat!
- **Can I make a big batch for a party?** Absolutely! Lay out all the ingredients and let guests build their own. It’s fun, interactive, and less work for you. Win-win!
- **Is this suitable for breakfast too?** Um, is the sky blue? Heck yes! It’s basically a super-powered, delicious breakfast masquerading as dessert. Double duty!
Final Thoughts
So there you have it, folks! Your secret weapon against unhealthy cravings, a dessert that’s quick, easy, and genuinely delicious. No more excuses for reaching for that highly processed snack. You just made something fabulous with minimal effort, and you should totally pat yourself on the back. Now go impress someone – or, more importantly, yourself – with your new culinary superpower. You’ve earned it!


