So you’re craving something tasty but too lazy to spend forever in the kitchen, huh? Same. What if I told you there’s a dessert so ridiculously easy, it practically makes itself? Something that screams “homemade deliciousness” but whispers “I barely lifted a finger”?
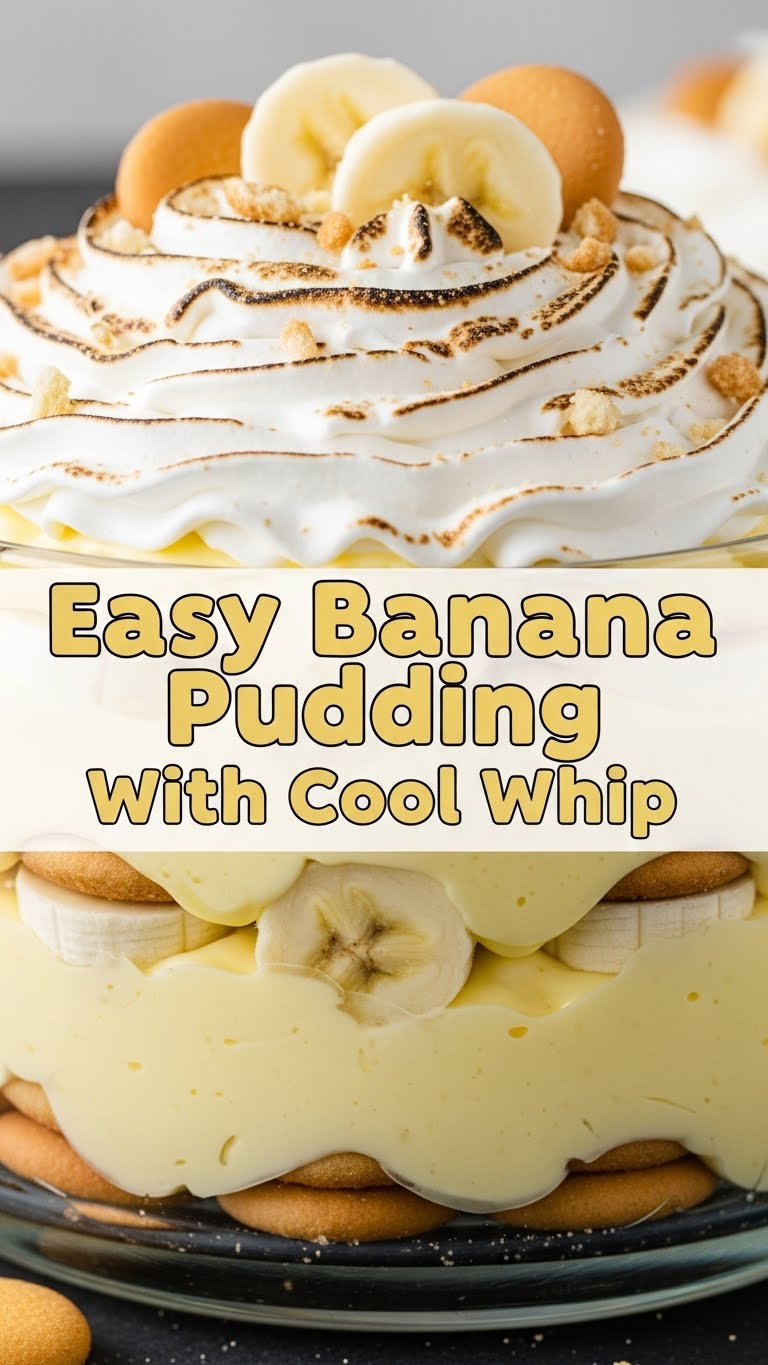
Enter your new best friend: Easy Banana Pudding with Cool Whip. Get ready for some no-bake magic that’s about to make your taste buds do a happy dance. No fancy techniques, no crazy ingredients, just pure, unadulterated comfort in a dish. Let’s get pudding!
Why This Recipe is Awesome
Listen, we’ve all been there. You want to impress, but your culinary skills lean more ‘ordering takeout’ than ‘gourmet chef.’ This recipe? It’s **idiot-proof**. Seriously, even I, the queen of kitchen catastrophes, didn’t mess it up. It’s a no-bake wonder, meaning zero oven-induced stress and no sweaty kitchen antics. Plus, it tastes like a hug from your grandma, but with way less effort. And let’s be real, who doesn’t love something that comes together faster than your latest streaming binge?
This isn’t just a recipe; it’s a passport to dessert glory with minimal fuss. Think layers of creamy pudding, sweet bananas, and crunchy-yet-soft vanilla wafers, all topped with a cloud of dreamy Cool Whip. It’s the ultimate comfort food, perfect for potlucks, lazy Sundays, or just Tuesday. Because why not?
Ingredients You’ll Need
Gather ’round, my sweet-toothed companions! Here’s your simple shopping list. Don’t worry, nothing too exotic here. We’re keeping it real.
- **1 box (11 oz) Nilla Wafers:** The OG. Don’t even *think* about substituting with kale chips. We’re going classic here.
- **3-4 ripe bananas:** Ripe, not green! We’re making pudding, not a science experiment. Look for those lovely yellow ones with a few brown speckles.
- **1 large tub (8 oz) Cool Whip:** Thawed. The star of our fluffy show. No judgment here, it’s a staple for a reason.
- **1 package (3.4 oz) instant vanilla pudding mix:** *Instant* is the key word, folks. We’re not making this harder than it needs to be.
- **2 cups cold milk:** Any kind you prefer, but whole milk makes it extra creamy and delicious. Don’t use water. Seriously.
Step-by-Step Instructions
Alright, apron on (or not, we’re not judging), let’s make some magic happen. These steps are so easy, you could probably do them blindfolded. (Please don’t, safety first.)
- **Prep Time!** Grab a pretty serving dish (a 9×13-inch usually works best, or individual cups if you’re feeling fancy). Set it aside for now.
- **Pudding Power:** In a medium bowl, whisk together the instant pudding mix and cold milk for about 2 minutes. Make sure it’s nice and smooth, with no lumps. **Let it set for 5 minutes** to thicken up. This waiting game is crucial!
- **Layer One: Wafers:** Spread a single layer of vanilla wafers across the bottom of your chosen dish. Don’t be shy, cover that base thoroughly!
- **Banana Bonanza:** Slice your ripe bananas into ¼-inch rounds. Arrange a layer of these beautiful banana coins over the wafers. Overlap them slightly for maximum banana goodness.
- **Pudding Perfection:** Carefully spoon half of your thickened vanilla pudding mixture over the bananas. Spread it gently so it covers everything evenly, like a creamy blanket.
- **Repeat the Magic:** Add another layer of vanilla wafers, then another generous layer of bananas, and finally, the remaining pudding mixture. You’re building a delicious tower!
- **Cool Whip Cloud:** Dollop the thawed Cool Whip generously on top. Use an offset spatula or the back of a spoon to spread it out into a beautiful, fluffy cloud. This is where it starts to look like a real dessert!
- **Chill Out:** **This is the hardest part: wait.** Cover the dish and refrigerate for at least 4 hours, or even better, overnight. This gives the wafers time to soften and all those delicious flavors to meld into pure harmony.
- **Garnish (Optional but Recommended):** Before serving, crumble a few extra wafers on top, or add a fresh banana slice. Voila! Instant showstopper.
Common Mistakes to Avoid
Nobody’s perfect, but we can try to avoid these rookie errors. Consider this your cheat sheet to banana pudding success!
- **Using unripe bananas:** Nobody wants crunchy, bland bananas in their pudding. Wait for those beautiful yellow ones with a few brown spots. **Patience, young grasshopper.**
- **Skipping the chill time:** I get it, you’re hungry. But seriously, **don’t skimp on the refrigeration**. The wafers need to soften, and the flavors need to get cozy. Otherwise, you just have sad, separate layers instead of glorious pudding.
- **Over-mixing the pudding:** Whisk for 2 minutes, then stop. Over-mixing can make instant pudding too thin, and nobody wants soupy banana pudding. Trust the package instructions!
- **Using *actual* pudding mix, not instant:** FYI, there’s a difference. Unless you’re trying to make this harder than it needs to be and cook it on the stove, stick to the ‘instant’ kind. Read the label!
Alternatives & Substitutions
Feeling a little adventurous? Or maybe you just don’t have something on hand? No worries, here are some ways to shake things up!
- **Wafers:** Not a Nilla fan? Try shortbread cookies or even graham crackers for a different vibe. Just make sure they’re not too hard; they need to soften up in the pudding.
- **Pudding Flavor:** Vanilla is classic, but chocolate, banana cream, or even cheesecake instant pudding can totally change the game. Experiment! Life’s too short for boring pudding.
- **Cool Whip Alternative:** If you’re feeling fancy (or just don’t do Cool Whip), homemade whipped cream works too! Just be aware it might not hold its shape as long. You could also try a cream cheese frosting layer for extra decadence. **No, seriously, try that.**
- **Add-ins:** A sprinkle of shredded coconut? A drizzle of caramel? Mini chocolate chips? Your pudding, your rules. Get creative! A pinch of cinnamon or nutmeg in the pudding also adds a nice, warm touch.
FAQ (Frequently Asked Questions)
Got questions? I’ve got answers (and probably a few jokes). Let’s dive in!
- **Can I make this ahead of time?** Absolutely! In fact, it’s **better** when made a day in advance. The flavors really get to know each other, and the wafers achieve peak softness. Plan ahead, future you will thank you.
- **My bananas turned brown! What gives?** Oh, that’s oxidation, a cruel mistress! To minimize it, you can lightly toss banana slices in lemon juice before layering, but honestly, it’s mostly cosmetic for home use. They’ll still taste great within a day or two.
- **How long does it last?** Kept refrigerated, it’s usually good for 2-3 days. Beyond that, the bananas might get a bit mushy, but honestly, it probably won’t last that long anyway once people discover it.
- **Can I use non-dairy milk?** Yep! Almond, soy, oat milk – most work just fine with instant pudding. Just ensure it’s cold for best results.
- **Can I freeze banana pudding?** Technically, yes, but the texture changes a lot. The wafers can get soggy, and the bananas become watery. IMO, **best enjoyed fresh from the fridge.** Freezing is like sending it to a sad, watery dimension.
- **What if I don’t have a 9×13 dish?** No biggie! Any similar-sized baking dish or even individual parfait glasses work perfectly. Adjust layers as needed. Be flexible!
Final Thoughts
And there you have it, fellow dessert enthusiast! A masterpiece of minimal effort and maximum deliciousness. You’ve conquered the no-bake banana pudding. See? I told you it was easy!
Now go impress someone—or yourself—with your new culinary skills. You’ve earned it! Seriously, go make some now. You won’t regret it. Unless you eat the whole thing yourself, then maybe just a *little* regret. But it’ll be worth it. Happy pudding-ing!


