So you’re craving something warm, sweet, and comforting but also, like, too lazy to spend forever in the kitchen, huh? Same, friend, same. We’ve all been there – staring into the fridge, contemplating ordering takeout, when suddenly, a wild apple appears! And thus, the glorious, ridiculously easy journey to fried apple nirvana begins. Forget complicated desserts; this is your new go-to for when you want to feel fancy without actually doing any heavy lifting. You’re welcome.
Why This Recipe is Awesome
Let’s be real, life is short, and deliciousness shouldn’t require a culinary degree or a 10-hour commitment. This fried apple recipe is so awesome because:
- It’s practically **idiot-proof**. Seriously, even if your previous kitchen exploits involved burning water, you’ve got this.
- It’s **lightning fast**. From “apple in hand” to “apple in mouth” is like 15 minutes, tops. Perfect for those instant gratification cravings.
- It makes your house smell like a cozy autumn dream, even if it’s 90 degrees outside and you’re wearing flip-flops. Scent marketing, but for your soul.
- You probably already have all the ingredients. No special trips to the artisanal truffle farm required.
- It pairs with EVERYTHING: ice cream, pork chops, pancakes, or just a spoon. It’s the ultimate culinary chameleon.
Ingredients You’ll Need
Gather ’round, my sweet-toothed companions! Here’s your minimal shopping list:
- **2-3 Medium Apples:** Any kind that isn’t already bruised to oblivion. Granny Smith for a tart kick, Fuji for sweetness, or Honeycrisp if you’re feeling bougie.
- **2 Tablespoons Unsalted Butter:** Real butter, people. Don’t cheap out on deliciousness. Your taste buds will thank you.
- **2-3 Tablespoons Brown Sugar:** The MVP for that deep, caramel-y flavor. Light or dark, your choice. If you’re out, white granulated sugar works too, but consider this your friendly nudge towards the good stuff.
- **1/2 Teaspoon Ground Cinnamon:** The spice of life, or at least of fried apples. Don’t skimp!
- **Pinch of Salt (Optional, but highly recommended):** Just a tiny pinch, like a shy little secret ingredient, to make all those sweet flavors truly pop.
Step-by-Step Instructions
Alright, apron on (or not, we’re not judging), let’s get cooking!
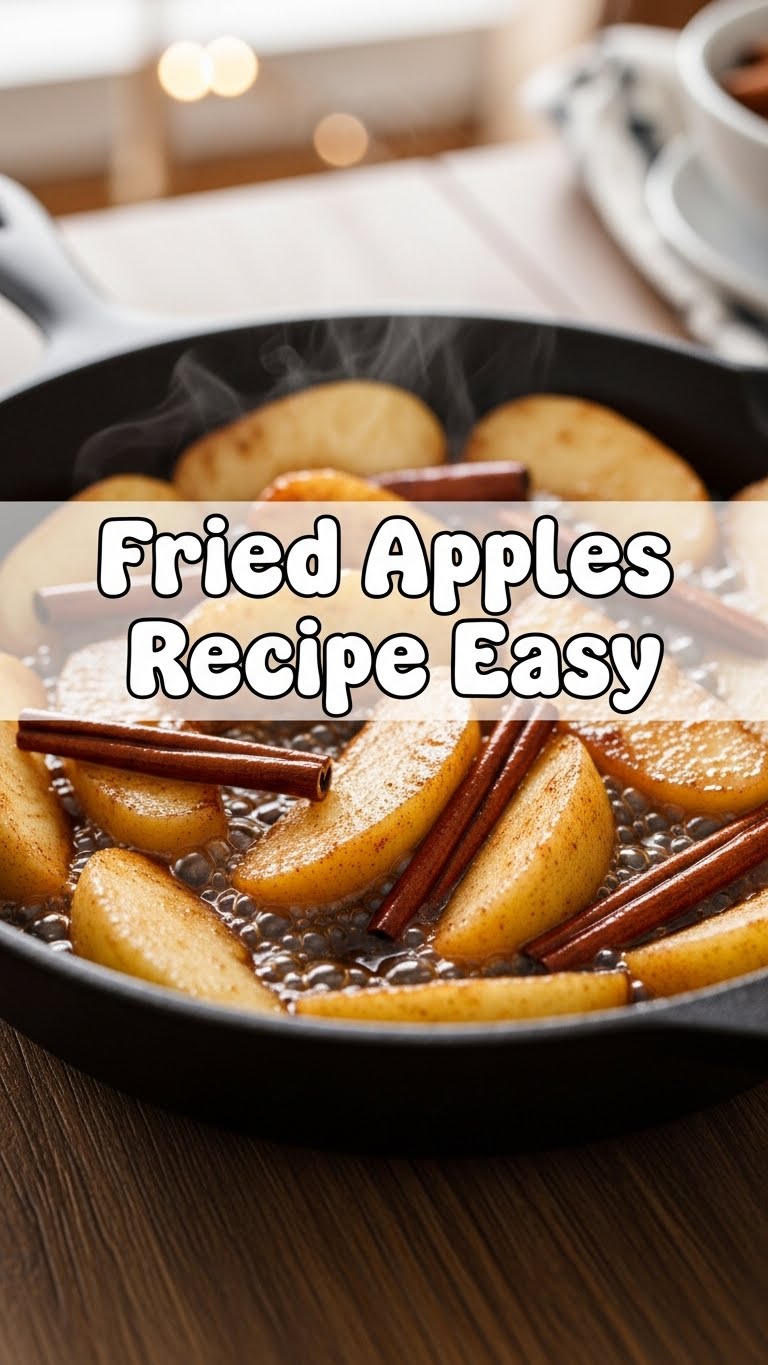
- **Prep Your Apples:** First things first, wash those apples. Then, peel them if you prefer (I usually do for a smoother texture, but skin-on is totally fine!). Core your apples and slice them into roughly 1/4-inch thick wedges or chunks. Try to keep them somewhat uniform so they cook evenly.
- **Melt the Butter:** Grab a non-stick skillet or a cast-iron pan (my personal faves for this). Heat it over medium heat. Toss in your butter and let it melt until it’s bubbly and fragrant. Don’t let it burn, though! We’re making apples, not charcoal.
- **Add the Apples:** Gently place your sliced apples into the melted butter. Spread them out as much as you can in a single layer. Let them cook for about 5-7 minutes, stirring occasionally, until they start to soften slightly and get a little golden-brown around the edges. This is where the magic begins!
- **Sugar and Spice and Everything Nice:** Now, sprinkle your brown sugar, cinnamon, and that tiny pinch of salt (if using) over the apples. Give everything a good stir to coat all those apple pieces evenly.
- **Simmer to Sweet Perfection:** Continue cooking for another 5-10 minutes, stirring frequently. The sugar will melt and combine with the butter and apple juices to create a glorious, syrupy glaze. The apples should become tender but still hold their shape – we’re going for soft, not mushy!
- **Serve ‘Em Up:** Once they’re tender and glistening, remove the skillet from the heat. Spoon your perfect fried apples into bowls and prepare for a standing ovation (even if it’s just from your cat).
Common Mistakes to Avoid
Nobody’s perfect, but we can avoid these rookie errors together!
- **Overcrowding the Pan:** Trying to cram too many apples in your skillet is a recipe for steaming, not frying. Cook in batches if your pan isn’t big enough. You want that direct heat, people!
- **Burning the Butter:** Keep an eye on that butter! Medium heat is your friend. Burnt butter tastes… well, burnt. And nobody wants that.
- **Uneven Apple Slices:** If some slices are thick and some are paper-thin, you’ll end up with a mix of crunchy and mushy. Aim for consistency!
- **Forgetting the Cinnamon (Gasp!):** This isn’t just “cooked apples,” it’s “fried *cinnamon* apples.” The spice is crucial, IMHO.
- **Overcooking to Mush:** Unless you’re going for apple sauce (which is a different delicious endeavor), pull them off the heat when they’re tender but still have a bit of bite.
Alternatives & Substitutions
Feeling adventurous? Or just working with what you’ve got? No stress!
- **Different Sugars:** Out of brown sugar? White granulated sugar works just fine for sweetness, though you’ll miss a bit of that deep caramel flavor. You could also try a drizzle of maple syrup or honey at the end for a different kind of sweet.
- **Spice it Up:** Add a pinch of nutmeg or allspice along with the cinnamon for a more complex “apple pie” vibe. A tiny splash of vanilla extract at the very end is also a game-changer!
- **Dairy-Free Option:** Swap out the butter for coconut oil or a dairy-free butter substitute. The flavor will be slightly different but still delicious.
- **Add a Little Zest:** A squeeze of lemon juice (about a teaspoon) can brighten up the flavors and cut through some of the sweetness, especially if you’re using very sweet apples.
FAQ (Frequently Asked Questions)
Got questions? I’ve got (mostly sassy) answers!
- **Can I use margarine instead of butter?** Well, technically yes, but why hurt your soul like that? Butter just tastes better, provides a superior texture, and honestly, you deserve real butter. Treat yourself!
- **Do I *have* to peel the apples?** Nope! If you don’t mind the texture of the peel, leave it on for extra fiber and a bit of color. Just make sure to wash them thoroughly.
- **What kind of apples are best for frying?** Honestly, most firm apples work well! Granny Smiths offer a nice tart contrast, while Honeycrisp, Fuji, Gala, or Golden Delicious will give you a sweeter, softer result. Pick your pleasure!
- **Can I make these ahead of time?** You *can*, but they’re best served warm and fresh. If you do make them ahead, store them in an airtight container in the fridge for up to 3 days and gently reheat them on the stovetop or in the microwave. They might lose a *little* bit of their fresh sizzle, but still yummy.
- **What if my apples are getting too mushy too fast?** You might have your heat too high, or your slices might be too thin. Next time, try reducing the heat slightly and ensure your slices are a consistent 1/4 inch thick.
- **Is this healthy?** Okay, let’s not lie to ourselves. It’s apples and butter and sugar. It’s a treat! Enjoy it in moderation. It’s certainly better than a deep-fried candy bar, right? Perspective!
Final Thoughts
And there you have it, folks! Your new favorite, super-simple, ridiculously delicious fried apple recipe. It’s perfect for breakfast, dessert, or a midnight snack when you just need a little hug in a bowl. Now go impress someone—or yourself—with your new culinary skills. You’ve earned it! Seriously, go make these. Right now. What are you waiting for?!


