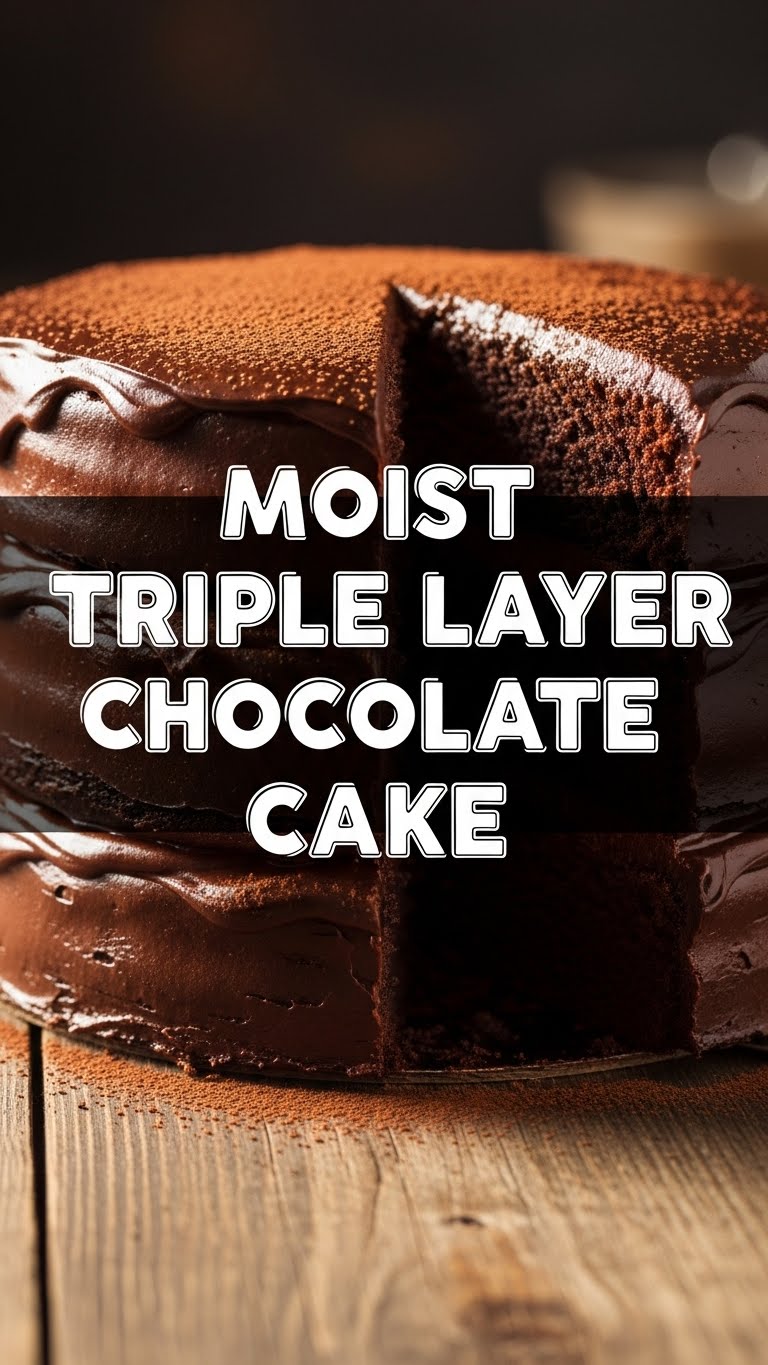
So, you’ve scrolled past one too many drool-worthy chocolate cake photos on Instagram, and now your soul is whispering (or, let’s be honest, screaming) for something dark, decadent, and utterly delicious? And you want it to be *moist*? Like, properly, unapologetically moist? You’ve come to the right place, my friend. We’re about to embark on a culinary adventure that ends with you looking like a baking genius, without, you know, actually having to *be* a baking genius. Consider this your cheat sheet to chocolate nirvana.
Why This Recipe is Awesome
Let’s be real, life is too short for dry, crumbly cake that tastes like sad dust. This recipe? It’s basically the superhero of chocolate cakes. It’s so moist, it practically melts in your mouth. And the best part? It’s **super forgiving**. Seriously, even if your baking skills are usually reserved for burning toast (no judgment!), you can nail this. It’s a triple-layer wonder that looks fancy but requires minimal fuss. Plus, the secret ingredient (shhh!) elevates the chocolate flavor to an “oh-my-gosh-what-is-this-magic” level. **No fancy equipment needed**, just your standard kitchen gear and a healthy dose of chocolate craving.
Ingredients You’ll Need
Gather your troops, fellow dessert warrior! Here’s what you’ll need to make this masterpiece:
For the Cake:
- All-Purpose Flour: 2 ½ cups. The backbone of our cakey dreams.
- Granulated Sugar: 2 cups. Sweet, sweet joy. Don’t skimp!
- Unsweetened Cocoa Powder: ¾ cup. Go for a good quality one; it really makes a difference. This is where the chocolate magic starts.
- Baking Soda: 2 teaspoons. Our lift-off agent!
- Baking Powder: 1 teaspoon. More lift, more fluff!
- Salt: 1 teaspoon. Don’t skip it; it balances the sweetness.
- Large Eggs: 2. Room temperature, please! They mix better.
- Whole Milk (or Buttermilk): 1 cup. Room temp is ideal here too. Buttermilk adds a lovely tang.
- Vegetable Oil (or other neutral oil): ½ cup. This is key for that incredible moistness.
- Vanilla Extract: 2 teaspoons. Use the good stuff!
- Hot Coffee (or hot water): 1 cup. This is the **secret weapon** for intensifying chocolate flavor. Trust me on this one.
For the Chocolate Buttercream Frosting:
- Unsalted Butter: 1 cup (2 sticks), softened. Not melted, just soft enough to poke.
- Powdered Sugar (Confectioners’ Sugar): 4 cups, sifted. Essential for a smooth frosting.
- Unsweetened Cocoa Powder: ½ cup, sifted. Again, quality matters!
- Heavy Cream (or milk): ¼ cup (or more, as needed). For creamy dreamy consistency.
- Vanilla Extract: 1 teaspoon.
- Pinch of Salt: Just a tiny bit to cut through the sweetness.
Step-by-Step Instructions
Alright, apron on, game face ready! Let’s bake some happiness.
- Prep Your Battleground: Preheat your oven to 350°F (175°C). Grease and flour three 8-inch round cake pans. Or, even easier, line the bottoms with parchment paper. This prevents sticking, **FYI**.
- Dry Mix Magic: In a large bowl, whisk together the flour, sugar, cocoa powder, baking soda, baking powder, and salt. Make sure there are no lumps—we’re aiming for smooth sailing.
- Wet Mix Wonder: In a separate medium bowl, whisk together the eggs, milk, vegetable oil, and vanilla extract until well combined.
- Combine Forces: Pour the wet ingredients into the dry ingredients. Mix on low speed (or by hand) until just combined. Don’t overmix! Overmixing is the enemy of a tender cake.
- The Hot Secret: Slowly pour in the hot coffee (or hot water) while mixing on low speed until the batter is smooth. Yes, the batter will be quite thin—this is exactly how it should be!
- Divide and Conquer: Evenly divide the batter among your three prepared cake pans. Eyeballing it is fine, but if you’re a perfectionist, use a kitchen scale.
- Bake ‘Em Up: Bake for 28-32 minutes, or until a wooden skewer inserted into the center of a cake comes out clean.
- Cool Down: Let the cakes cool in the pans on a wire rack for about 10-15 minutes. Then, carefully invert them onto the wire rack to cool completely. **This step is crucial!** Don’t even think about frosting a warm cake unless you want a melted mess.
- Whip Up the Frosting: While the cakes cool, make your buttercream. In a large bowl, beat the softened butter with an electric mixer until light and fluffy (about 2-3 minutes).
- Sweeten the Deal: Gradually add the sifted powdered sugar and cocoa powder to the butter, alternating with the heavy cream and vanilla extract. Beat until smooth and creamy. If it’s too thick, add a tiny bit more cream; too thin, add a bit more powdered sugar. Stir in the pinch of salt.
- Assemble Your Masterpiece: Once the cakes are COMPLETELY cool, place one layer on your serving plate. Spread about ⅓ of the frosting evenly over the top. Repeat with the second layer and frosting, then place the final cake layer on top. Frost the top and sides of the entire cake. Get creative with your swirls or keep it smooth!
- Admire (and Devour!): Slice into your magnificent creation and prepare for compliments. You earned it!
Common Mistakes to Avoid
We’ve all been there. Here are a few “oops” moments to sidestep:
- Not Preheating Your Oven: Rookie mistake! A cold oven won’t bake evenly, leading to sad, dense cake. Always preheat!
- Overmixing the Batter: This activates too much gluten, resulting in a tough, chewy cake. Mix *just* until combined. Embrace the lump or two.
- Not Cooling Cakes Completely: I can’t stress this enough. If your cakes are warm, your frosting will melt into a pathetic puddle. Patience, young padawan.
- Substituting Oil for Butter in Frosting: Don’t do it! Butter provides the structure and flavor for buttercream. Oil will give you a greasy, weird mess.
- Eyeballing “Hot Coffee”: While we’re all for some kitchen spontaneity, make sure that coffee is actually *hot* to help bloom the cocoa and ensure proper batter consistency.
Alternatives & Substitutions
Feeling a little rebellious? Here are some simple swaps:
- Coffee vs. Water: If you’re not a coffee fan (gasp!) or don’t have any, hot water works perfectly fine. The coffee just deepens the chocolate flavor; you won’t taste “coffee” in the final product, promise!
- Buttermilk Boost: Don’t have buttermilk? Make your own! Add 1 tablespoon of white vinegar or lemon juice to a measuring cup, then fill to the 1-cup line with whole milk. Let it sit for 5 minutes. Voila! Instant buttermilk for a slightly tangier, more tender cake.
- Dairy-Free? You can definitely use plant-based milk (like almond or soy) for the cake. For the frosting, look for dairy-free butter alternatives and plant-based cream. The texture might be slightly different, but still delicious!
- Flavor Fun: Want a different vibe? Add a tiny bit of peppermint extract to the frosting for a mint chocolate cake, or a splash of orange zest to the batter for a chocolate-orange delight. Get creative!
FAQ (Frequently Asked Questions)
- Can I use margarine instead of butter for the frosting? Well, technically yes, but why hurt your soul like that? Butter tastes infinitely better and gives you that classic, rich buttercream texture. Margarine can result in a greasier, less flavorful frosting. Just sayin’.
- My cake turned out dry! What went wrong? Most likely culprits are overbaking, overmixing the batter, or using too much flour. Next time, try checking for doneness a few minutes earlier and **measure your flour correctly** (scoop and level, don’t pack it in!).
- Can I make this cake ahead of time? Absolutely! Unfrosted cake layers can be wrapped tightly in plastic wrap and stored at room temperature for up to 2 days, or frozen for up to 2 months. The frosted cake is best enjoyed within 3-4 days at room temperature (or refrigerated for longer storage).
- What if I don’t have three 8-inch pans? You can use two 9-inch pans instead, but adjust the baking time (it might be slightly shorter) and expect slightly thinner layers. Or, make it in a 9×13 inch pan for a sheet cake (bake time will be longer, 35-45 mins).
- Can I halve this recipe? Sure thing! Just divide all ingredients by two and bake in two 6-inch pans or one 8-inch pan. Great for when you need a smaller chocolate fix.
Final Thoughts
So there you have it, folks! Your new favorite triple layer chocolate cake recipe. It’s rich, it’s moist, it’s chocolaty beyond belief, and it makes you look like a total kitchen wizard. Go forth, bake this beauty, and share it with someone you love (or, let’s be honest, hoard it all for yourself—no judgment here!). Now go impress someone—or yourself—with your new culinary skills. You’ve earned it!


