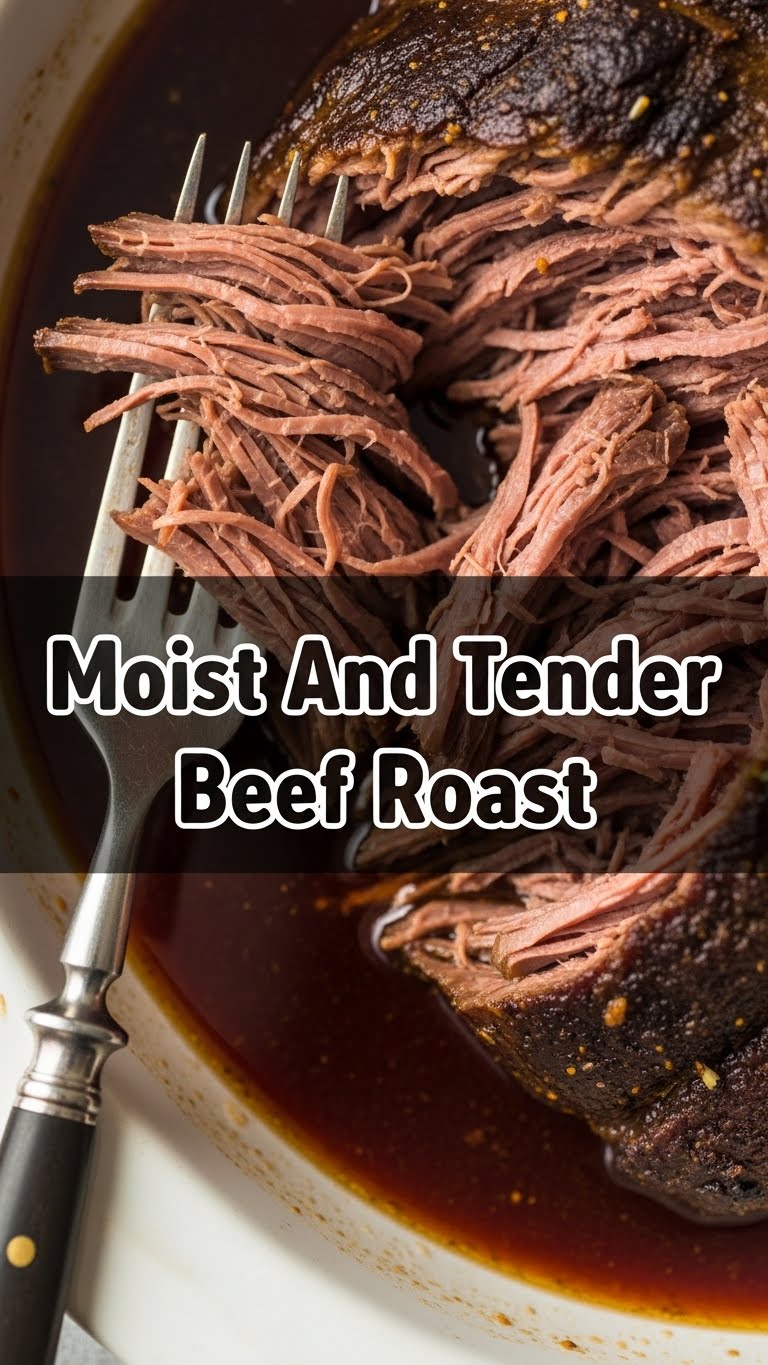
So you’re craving something ridiculously tasty but also kinda want to chill on the couch and not spend forever slaving in the kitchen, huh? Same, friend, same. You want that melt-in-your-mouth, fall-apart beef roast that makes you feel like a culinary god, but without the actual “culinary god” effort. Guess what? Your wish is my command (ish). We’re making a moist and tender beef roast that’s so easy, you’ll wonder why you ever ordered takeout.
Why This Recipe is Awesome
Okay, let’s be real. This isn’t just a recipe; it’s a magic trick. You throw a few simple ingredients together, pop it in the oven, and hours later, you’ve got a masterpiece that practically shreds itself with a fork. It’s the kind of dish that screams “I tried really hard!” when in reality, you were probably binging Netflix. It’s practically idiot-proof. Seriously, even I, the queen of occasionally burning toast, managed not to mess this up. Plus, your kitchen will smell divine, which is a major bonus, IMO.
Ingredients You’ll Need
- Your Trusty Beef Roast (2-4 lbs): Chuck roast is the MVP here. It’s got marbling for days and gets super tender. Top round or bottom round works too, but chuck is less demanding, just like us.
- Olive Oil (1-2 tbsp): Just a little slick for searing and flavor. Fancy schmancy extra virgin? Nah, your regular cooking oil is fine.
- Salt & Freshly Ground Black Pepper (to taste): Don’t be shy! This is where the flavor party starts.
- Garlic Powder (1 tsp): Because everything is better with garlic, duh.
- Onion Powder (1 tsp): Garlic’s best friend, adding that extra layer of savory goodness.
- Dried Rosemary or Thyme (1 tsp, optional): Adds a little aromatic flair. If you don’t have it, don’t sweat it.
- Beef Broth (1-2 cups): This is your liquid gold for keeping things moist and making gravy later. Water works in a pinch, but broth is *chef’s kiss*.
Step-by-Step Instructions
- Get Your Roast Ready: First things first, take your beef out of the fridge about an hour before cooking. This helps it cook more evenly. Pat it super dry with paper towels. This is crucial for a good sear!
- Season Like a Pro: Drizzle your roast with olive oil, then rub it all over. Now, go wild with the salt, pepper, garlic powder, onion powder, and any herbs you’re using. Make sure it’s coated beautifully on all sides.
- Sear It Like You Mean It: Heat a heavy-bottomed pan (like a cast iron skillet or Dutch oven) over medium-high heat. Once it’s hot, carefully place the seasoned roast in. Sear for about 3-4 minutes per side, until it has a gorgeous, deep brown crust. This step locks in flavor, trust me!
- Oven Time!: Preheat your oven to a cozy 300°F (150°C). If you used a Dutch oven, great! If not, transfer the seared roast to a sturdy roasting pan. Pour the beef broth around the base of the roast.
- Low and Slow is the Way to Go: Cover your roasting pan tightly with foil (or put the lid on your Dutch oven). Pop it in the preheated oven. Now, go forth and enjoy your newfound free time. Let it cook for 3-4 hours, or until it’s ridiculously tender. We’re talking fork-tender.
- The Sacred Rest: Once it’s done, take it out of the oven. RESIST THE URGE TO CUT IT IMMEDIATELY! Tent it loosely with foil and let it rest for at least 20-30 minutes. This lets all those delicious juices redistribute, ensuring every bite is moist.
- Shred or Slice & Serve: Now for the fun part! You can shred it with two forks for sandwiches or tacos, or slice it against the grain for a more traditional presentation. Pour those pan juices over it. Yum!
Common Mistakes to Avoid
- Skipping the Pat Dry: Seriously, don’t. A wet surface won’t sear; it’ll steam. And nobody wants a steamed roast when they could have a beautifully crusted one.
- Forgetting to Sear: I know, it’s an extra step, but that golden-brown crust adds a depth of flavor you just can’t get otherwise. Think of it as building the foundation of deliciousness.
- Overcooking (or Undercooking): Dry beef is a sad, sad thing. And tough beef is just frustrating. For fall-apart tenderness, aim for an internal temp of 200-205°F (93-96°C) for chuck roast. A meat thermometer is your best friend here.
- Not Resting the Meat: This isn’t just a suggestion; it’s a commandment! Cutting too soon means all those yummy juices will run out onto your cutting board instead of staying in your beef. Heartbreaking!
- Cutting With the Grain: Rookie mistake! Always slice *against* the grain. This shortens the muscle fibers, making each bite super tender instead of stringy and tough.
Alternatives & Substitutions
Feeling adventurous or just working with what you’ve got? No stress!
- Different Cuts: While chuck roast is our go-to for guaranteed tenderness, a top round or bottom round can work. Just know they’re leaner, so they might need a touch more liquid or slightly less cooking time to avoid drying out.
- Seasoning Swap: Don’t have rosemary? Italian seasoning works great! Or go full smoky with paprika and a pinch of chili powder. Customize it to your heart’s content.
- Liquid Logic: No beef broth? Chicken broth or even plain water will do the trick for moisture. For a richer flavor, a splash of red wine mixed with water is a game-changer.
- Veggies Welcome: Want a one-pot meal? Throw in some chunky carrots, potatoes, and onions during the last hour or two of cooking. They’ll soak up all those incredible flavors. Less dishes? Yes, please!
FAQ (Frequently Asked Questions)
Got questions? I’ve got (casual) answers!
- What if I don’t have a Dutch oven? No problem! A large roasting pan with a tight-fitting lid or heavy-duty foil will work perfectly. Just make sure it’s sealed well to trap the moisture.
- Can I cook it faster at a higher temperature? You *could*, but you risk a less tender, possibly dry roast. The magic of this recipe is the “low and slow” approach. Patience, grasshopper!
- How do I make gravy from the drippings? Oh, heck yes! Strain the drippings, skim off excess fat, then whisk in a slurry of cornstarch and water (about 1 tbsp cornstarch to 2 tbsp cold water for every cup of liquid). Simmer until thickened. Boom, gravy!
- My roast isn’t fall-apart tender after 3 hours. What gives? It probably just needs more time! Different roasts vary in size and fat content. Just put it back in the oven and keep cooking until it reaches that dreamy tenderness.
- Can I marinate the beef beforehand? Absolutely! A simple marinade of soy sauce, Worcestershire, garlic, and herbs for a few hours (or overnight) will add even more depth and help tenderize. Go for it!
- What’s the best way to store leftovers? Store it shredded or sliced in an airtight container with some of the pan juices to keep it moist. It’ll last 3-4 days in the fridge and makes amazing sandwiches or tacos.
Final Thoughts
See? I told you it was easy! You just cooked a moist and tender beef roast that could easily fool anyone into thinking you’re a seasoned chef. Now go forth, impress your significant other, your family, or just yourself (you deserve it!). Seriously, pat yourself on the back, grab a fork, and enjoy the fruits of your very minimal labor. You’ve earned every delicious, tender bite!


