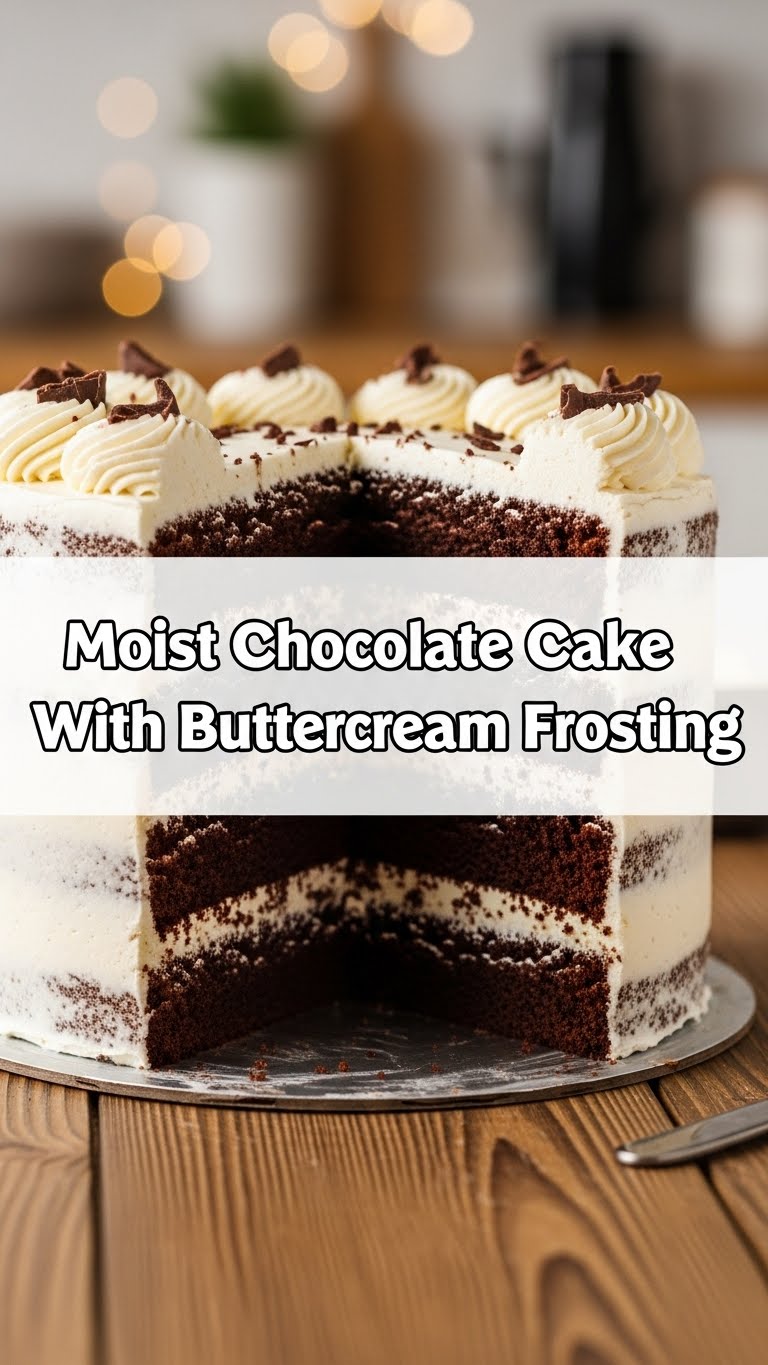
So, you’ve been scrolling through Instagram, seen one too many perfect-looking cakes, and now your sweet tooth is doing the Macarena? Same, friend, same. But who has time for a whole kitchen renovation just for a slice of joy? Today, we’re diving headfirst into a recipe that promises maximum deliciousness with minimum fuss: a ridiculously moist chocolate cake with the silkiest, dreamiest buttercream frosting. Prepare to become a legend.
Why This Recipe is Awesome
Okay, listen up. This isn’t just *any* chocolate cake recipe. This is THE chocolate cake recipe. Why? Because it’s literally **impossible to mess up** (unless you try really, really hard, which, please don’t). It comes out moist, fudgy, and chocolatey every single time. And the buttercream? Silky, sweet, and practically begs you to eat it with a spoon straight from the bowl. Plus, you don’t need a fancy stand mixer – a bowl and a whisk will get you pretty far. You’re welcome.
Ingredients You’ll Need
For the Cake (AKA “The Chocolatey Dream”):
- 1 ¾ cups all-purpose flour: The backbone of all good things.
- 1 ¾ cups granulated sugar: Because happiness is sweet, right?
- ¾ cup unsweetened cocoa powder: Go for the good stuff, your taste buds will thank you.
- 1 ½ teaspoons baking soda: Our trusty leavening agent for that lovely rise.
- ½ teaspoon baking powder: Its sidekick, making sure things get fluffy.
- 1 teaspoon salt: Don’t skip it! It brings out all the chocolatey goodness.
- 2 large eggs: **Room temperature, please.** They mix better, trust me.
- 1 cup whole milk: Also **room temperature!**
- ½ cup vegetable oil: Or any neutral oil. This is our secret weapon for moisture.
- 2 teaspoons vanilla extract: A splash of pure magic.
- 1 cup hot water or freshly brewed hot coffee: **The ultimate secret ingredient for a truly moist and deep chocolate flavor.** Coffee enhances chocolate without making it taste like coffee. Mind blown, right?
For the Buttercream Frosting (AKA “The Cloud of Deliciousness”):
- 1 cup (2 sticks) unsalted butter: **Room temperature, but not melted!** This is crucial for fluffy frosting.
- 4-5 cups powdered sugar (confectioners’ sugar): Sift it if you’re feeling fancy, but no biggie if you don’t.
- 2 teaspoons vanilla extract: More magic for your mouth.
- 2-4 tablespoons heavy cream or whole milk: Just a splash to get that perfect consistency.
Step-by-Step Instructions
First, Let’s Bake That Cake:
- **Get Prepped:** Preheat your oven to 350°F (175°C). Seriously, do it now. Grease and flour two 8-inch round cake pans. Or line with parchment paper. Whatever floats your boat.
- **Dry Mix Fun:** In a large bowl, whisk together the flour, sugar, cocoa powder, baking soda, baking powder, and salt. Make sure there are no lumps. This is the foundation, people!
- **Wet Mix Wonders:** In another medium bowl, whisk together the eggs, milk, oil, and vanilla extract until well combined.
- **Combine Forces:** Pour the wet ingredients into the dry ingredients. Mix on low speed with an electric mixer (or by hand with a whisk) until *just* combined. **Don’t overmix!** Overmixing develops gluten and makes tough cakes, and nobody wants that.
- **The Hot Liquid Magic:** Carefully pour in the hot water or coffee. Mix again until the batter is smooth. It will be thin, and that’s perfectly normal, so don’t panic.
- **Pan It Up:** Divide the batter evenly between your two prepared cake pans.
- **Bake Baby, Bake!** Bake for 30-35 minutes, or until a wooden skewer inserted into the center comes out clean.
- **Cool Down:** Let the cakes cool in the pans for about 10-15 minutes. Then, gently invert them onto a wire rack to cool completely. **This is important!** Trying to frost a warm cake is a one-way ticket to melted frosting disaster.
Now, For That Dreamy Buttercream:
- **Butter Up:** In a large bowl with an electric mixer (or a really strong arm), beat the room temperature butter on medium speed until it’s light and fluffy, about 2-3 minutes.
- **Sugar Rush:** Gradually add the powdered sugar, one cup at a time, mixing well after each addition. It might look dry at first, but keep going!
- **Vanilla & Cream:** Add the vanilla extract and 1 tablespoon of heavy cream or milk. Beat on high speed until the frosting is light, fluffy, and spreadable. Add more cream/milk, a teaspoon at a time, until you reach your desired consistency.
- **Taste Test (aka “Chef’s Privilege”):** Give it a little taste. Need more vanilla? More sugar? Adjust to your heart’s content.
Assembly Time (The Grand Finale):
- Once your cakes are **completely cool** (I cannot stress this enough!), place one layer on your serving plate or cake stand.
- Spread about a third of the buttercream evenly over the top.
- Carefully place the second cake layer on top.
- Use the remaining frosting to cover the top and sides of the cake. Get creative, make swirls, or just slather it on generously. It’s your masterpiece!
Common Mistakes to Avoid
- **Cold Ingredients:** Using cold eggs, milk, or butter for the cake or cold butter for the frosting. **Room temperature is your best friend** for a smooth batter and creamy frosting.
- **Overmixing the Batter:** Seriously, once the flour is incorporated, stop. Overmixing develops gluten, leading to a tough, dry cake. You want moist, remember?
- **Not Greasing/Flouring Pans Properly:** Ever had a cake stick? It’s soul-crushing. Take the extra minute to prep those pans.
- **Frosting a Warm Cake:** This is like trying to ice skate uphill in mud. The frosting will melt, slide off, and you’ll have a sad, naked cake. **Patience, young padawan.**
- **Skipping the Hot Liquid:** That hot water or coffee does wonders for the texture and intensifies the chocolate. Don’t think you can just use cold water and expect the same results.
Alternatives & Substitutions
- **Coffee Phobia?** If the thought of coffee in your cake makes you twitch, hot water works perfectly fine. The coffee just deepens the chocolate flavor without a coffee taste, FYI.
- **Dairy-Free Dream?** You can totally swap whole milk for a non-dairy milk like almond or soy, and use a neutral oil instead of butter in the cake. For the frosting, use a good quality vegan butter alternative.
- **Different Frosting Vibe?** Not a buttercream fan? (Gasp! Just kidding… mostly.) This cake pairs beautifully with a simple chocolate ganache, a cream cheese frosting, or even just a dusting of powdered sugar if you’re feeling minimalist.
- **Flour Power:** While all-purpose is classic, you could experiment with a gluten-free all-purpose blend (just ensure it has xanthan gum) if you’re GF.
FAQ (Frequently Asked Questions)
- **”Can I make this cake ahead of time?”** Absolutely! The unfrosted cake layers can be wrapped tightly in plastic wrap and kept at room temperature for up to 2 days, or frozen for up to a month. The buttercream can be made a few days ahead and stored in the fridge, then re-whipped before frosting.
- **”My cake turned out dry, what went wrong?”** Oh no! Most likely culprits: **overmixing the batter**, baking it for too long, or your oven runs hot. Get an oven thermometer, they’re cheap life-savers!
- **”My buttercream is grainy. Help!”** Did you use granulated sugar instead of powdered sugar? Or perhaps didn’t sift your powdered sugar? Also, ensure your butter was truly room temperature.
- **”Do I really need room temperature ingredients?”** Yes, darling, yes! They emulsify better, creating a smoother, more uniform batter and a fluffier frosting. It’s a small step that makes a huge difference, IMO.
- **”Can I add chocolate chips to the batter?”** You bet! Stir in about 1 cup of your favorite chocolate chips at the end, just before pouring into the pans. More chocolate, more happiness!
- **”How do I store the finished cake?”** Covered, at room temperature, for up to 3 days. If it’s super hot and humid, or if you’re keeping it longer, the fridge is your friend. Just let it come to room temp before serving for best flavor and texture.
Final Thoughts
So, there you have it, your new go-to recipe for a chocolate cake that’s so good, it should probably come with a warning label. It’s simple, it’s moist, it’s chocolatey, and it’s practically begging to be made.
Now go forth and bake! Don’t be shy, get those hands dirty, and whip up this glorious creation. You’ll be a chocolate cake guru in no time, impressing everyone (including yourself) with your mad skills. And hey, if you “accidentally” eat half of it before anyone else gets a slice, no judgment here. You earned it!
