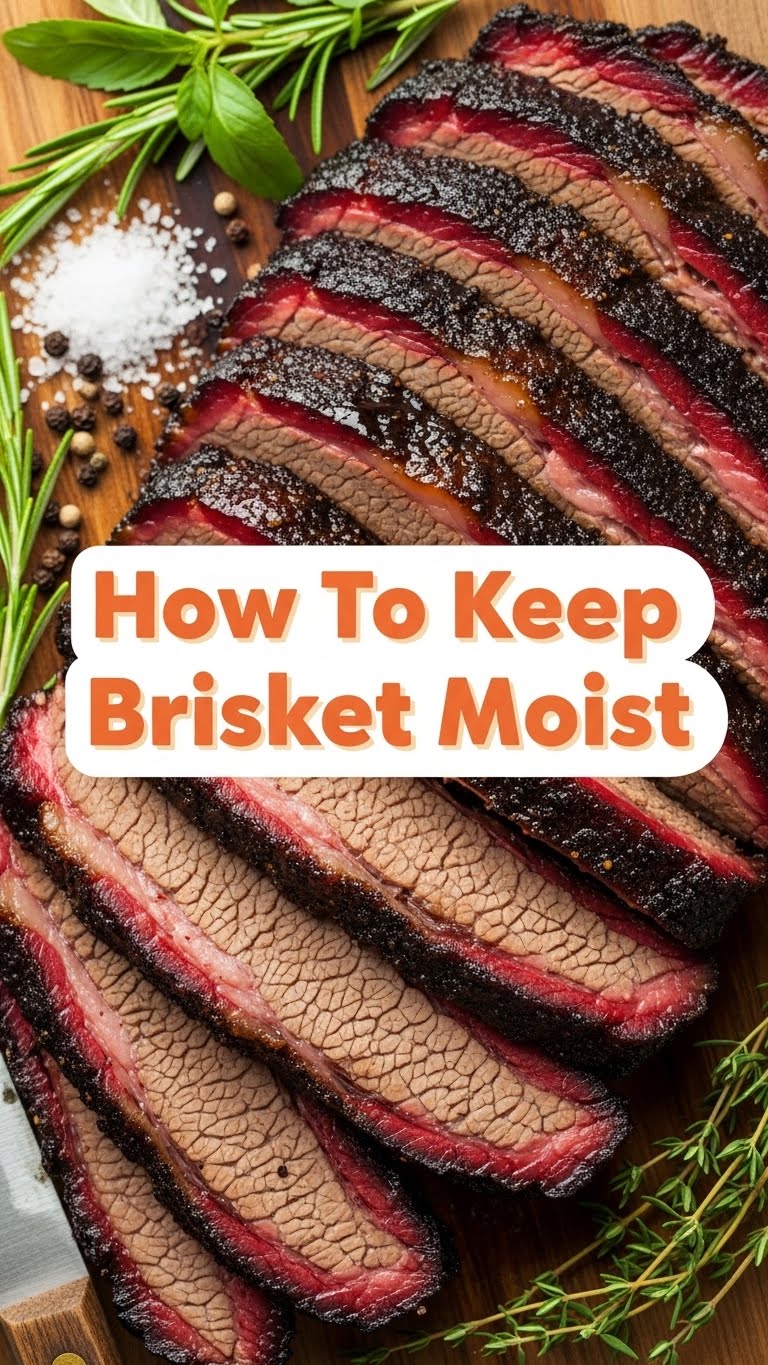
Ever stared at a beautiful, smoky brisket, only for your first slice to reveal a desert more arid than your uncle’s sense of humor? Been there, wept that. We all crave that melt-in-your-mouth, juicy goodness, but sometimes, brisket decides to play hard to get… or just bone-dry. Well, put down that glass of water you were about to offer your meat; we’re about to fix this! Get ready to impress your taste buds (and maybe a few friends, if you’re feeling generous) with a brisket so moist, it’ll make you wonder if it just took a dip in a spa.
Why This Method is Awesome
Because let’s be real, life’s too short for dry brisket. This approach isn’t just about cooking; it’s about nurturing. It’s so good, your brisket will be weeping tears of joy (and delicious juice, **FYI**). We’re talking about a method that’s practically idiot-proof – even I didn’t mess it up, which is saying something. No more hockey pucks, folks! This ensures your brisket is tender enough to cut with a spoon, without sacrificing that glorious bark. Plus, the bragging rights? Priceless.
Ingredients You’ll Need
- **The Star of the Show:** A beautiful, untrimmed or lightly trimmed packer brisket (10-15 lbs). Don’t fear the fat; it’s your friend here!
- **Your Go-To Rub:** Equal parts coarse salt and coarse black pepper, maybe a dash of garlic powder or paprika if you’re feeling spicy. Simple is best for the bark.
- **Spritz Liquid:** 1 cup beef broth, apple cider vinegar, or even a nice dark beer. Your brisket needs hydration too!
- **Wrapping Material:** Butcher paper (unwaxed!) or heavy-duty aluminum foil. Your choice, depending on your bark preference.
- **Equipment:** A reliable smoker or oven, a good meat thermometer (leave the guessing to game shows), and a big ol’ carving board.
Step-by-Step Instructions
- **Prep Your Brisket:** Trim off any hard, thick chunks of fat, but leave a nice 1/4-inch layer on the fat cap. This protects the meat and renders down into pure flavor. Don’t go crazy; fat equals flavor and moisture, remember?
- **Rub-a-Dub-Dub:** Generously apply your rub to all sides of the brisket. Don’t be shy! Gently pat it into the meat; no need to massage it like it’s on a spa day. Let it sit for at least 30 minutes at room temperature, or even overnight in the fridge.
- **Low & Slow Cook (Phase 1):** Preheat your smoker or oven to a consistent 225-275°F (107-135°C). Place the brisket fat-side up (if using a smoker, position it so the heat hits the fat cap first) and let it cook unwrapped until it develops a beautiful bark and reaches an internal temperature of about 160-170°F (71-77°C). This can take 6-8 hours, so chill out.
- **Spritz for Success:** Around the 3-4 hour mark, start spritzing your brisket every hour or so with your chosen liquid. This keeps the surface moist, helps the bark develop, and adds a subtle layer of flavor. Think of it as giving your brisket a refreshing facial.
- **The Texas Crutch (Phase 2):** Once your brisket hits that 160-170°F mark and has a gorgeous bark, it’s time to wrap it. This is crucial! Wrap it tightly in butcher paper (for a breathable wrap that maintains bark) or foil (for maximum moisture retention). This pushes it through the “stall” and keeps the internal moisture locked in.
- **Cook to Tenderness:** Return the wrapped brisket to your smoker or oven and continue cooking until it reaches an internal temperature of around 200-205°F (93-96°C). More importantly, it should feel probe-tender – like sticking a knife into warm butter. This could take another 4-6 hours.
- **The Sacred Rest:** This is arguably the most important step! Once tender, remove the brisket from the heat, leave it wrapped, and let it rest on your counter (or in a cooler) for at least 1-2 hours, but **ideally 3-4 hours**. This allows the juices to redistribute throughout the meat, preventing them from gushing out when you slice. Trust me on this one; patience is a virtue here.
- **Slice Against the Grain:** Unwrap, admire your masterpiece, and slice against the grain for maximum tenderness. Serve immediately and prepare for compliments!
Common Mistakes to Avoid
- **Over-Trimming the Fat:** Leaving too little fat on the brisket is a rookie mistake. That fat renders down, moistens the meat, and adds incredible flavor. Don’t be a hero; leave some on!
- **Cooking Too Hot, Too Fast:** Brisket isn’t a sprint; it’s a marathon. High temperatures dry out the meat and make it tough. Low and slow is the only way to go for that perfect texture.
- **Skipping the Spritz:** Ignoring your brisket during the initial cook means missing an easy opportunity to keep the surface moist and enhance bark development. Don’t leave it high and dry!
- **Not Wrapping (The Texas Crutch):** While some purists argue against it, wrapping is your secret weapon for battling dryness, especially through the stall. It helps retain moisture and speeds up the cook.
- **Forgetting the Rest:** This is a cardinal sin! Cutting into a hot brisket immediately after cooking is like letting all the hard work run onto your cutting board. **Always rest your brisket!**
- **Slicing with the Grain:** This will make even the most perfectly cooked brisket seem tough. Always identify the grain and slice perpendicular to it for tender bites.
Alternatives & Substitutions
Feel free to get creative! For your rub, instead of just salt and pepper, you could try adding brown sugar for a sweeter bark, or chili powder for a bit of a kick. For the spritz liquid, some folks swear by apple juice, beer, or even a mix of Worcestershire sauce and water. It’s all about personal preference and what you have on hand. Don’t have butcher paper? Foil works just fine, though you might get a slightly softer bark. And if you’re feeling adventurous, you can even inject your brisket with beef broth or a marinade for an extra moisture boost, though it’s not strictly necessary with this method. Play around and find what you like best!
FAQ (Frequently Asked Questions)
Do I really need to rest the brisket for so long? What if I’m starving?
Oh, my hungry friend, yes, you absolutely do! Think of it like a delicious, meaty meditation. Resting allows the muscle fibers to relax and reabsorb all those beautiful juices. Cut it too soon, and those juices will run out onto your board, leaving you with a dry, sad brisket. It’s worth the wait, I promise!
Can I really use an oven instead of a smoker? Won’t I miss the smoky flavor?
You absolutely can use an oven! While you might miss some of that deep smoky flavor, you can always use liquid smoke in your rub or spritz to give it a hint. The principles of low and slow cooking and the crutch still apply, guaranteeing a super moist result. **IMO**, a moist oven brisket beats a dry smoked one any day.
My brisket hit the stall and isn’t moving. Is something wrong?
Nope, totally normal! The stall is when moisture evaporating from the surface of the meat cools it, preventing the internal temperature from rising. This is exactly why we wrap it! It pushes through this phase by trapping that moisture and heat. Just be patient, it’ll get there.
How do I know when it’s truly “probe-tender”?
Ah, the feel test! It should feel like pushing a thermometer or skewer into soft butter. No resistance. If it feels tight or tough, it needs more time. The temperature is a guide, but tenderness is the real indicator of doneness.
What if my brisket is still a little dry after all this? What did I do wrong?
Don’t despair! Usually, a dry brisket comes down to not enough rest, slicing with the grain, or possibly pulling it off the heat too soon (not tender enough). Review your steps, especially the rest and the tenderness test. Next time, give it more rest time and make sure it’s truly butter-soft before pulling.
Final Thoughts
So there you have it, folks! The secret (or not-so-secret anymore) to a brisket so moist, it’ll make your taste buds sing opera. It’s all about patience, understanding your meat, and giving it the love it deserves. No more dry, sad briskets living in the shadow of their juicy potential. Now go impress someone – or yourself – with your new culinary superpowers. You’ve earned it! Happy cooking!


