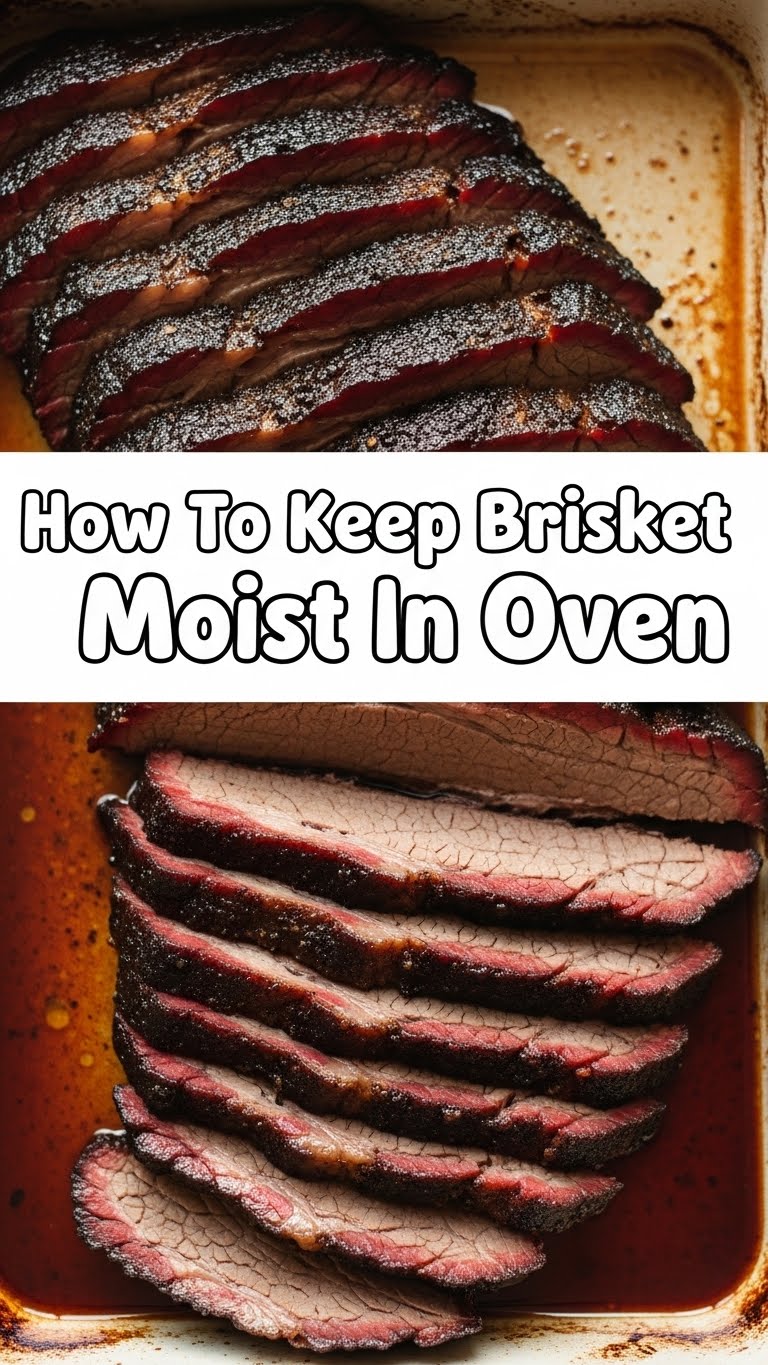
Okay, let’s get real for a sec. You’ve been there, right? Staring down a gorgeous slab of brisket, eyes full of hope, only to pull it out of the oven hours later looking like a sad, leathery shoe. Yeah, that “moist” brisket dream turning into a “dry as the Sahara” nightmare is a universal heartbreak. But fear not, my fellow home-cookin’ adventurer! I’m here to spill the beans (or rather, the savory juices) on how to keep that beautiful hunk of meat so unbelievably moist, it’ll make you question all your life choices up until this point. Get ready to ditch the dry and dive into delicious!
Why This Method Is Your New Best Friend
Because nobody has time for dry, sad meat! Seriously, this isn’t just a recipe; it’s a brisket-saving manifesto. It’s practically idiot-proof, even for those of us who occasionally burn water (no judgment here!). We’re talking fall-apart tender, juicy, flavour-packed brisket that’ll have your taste buds doing a happy dance and your dinner guests wondering if you secretly hired a professional chef. Plus, it requires minimal babysitting, so you can actually, you know, live your life while dinner practically makes itself. Win-win!
Ingredients You’ll Need
- A glorious Brisket: (2-5 lbs, flat cut usually, because we’re going for lean and lovely). The star of our show, obviously.
- Your Favorite Dry Rub: Store-bought or homemade, just make sure it’s packed with flavour. This is where the magic starts!
- Beef Broth (or beer/coffee!): About 1-2 cups. Our secret weapon for moisture – consider it liquid gold.
- Heavy-Duty Aluminum Foil: Seriously, “heavy-duty” is not a suggestion here; it’s a requirement. No flimsy stuff allowed!
- A Roasting Pan with a Rack: To keep our brisket elevated and happy.
- A Meat Thermometer: Your best friend for avoiding overcooked sadness.
Step-by-Step Instructions to Brisket Bliss
- Preheat Your Oven (Don’t Skip This!): Get that oven nice and cozy at a low 275°F (135°C). Low and slow is the name of the game for moist brisket.
- Trim and Rub: Take your brisket out of its packaging. Trim off any excess hard fat, but leave a thin layer of fat cap on top – it’s like a built-in basting system! Now, generously slather that dry rub all over. Don’t be shy; really get it in there.
- Sear for Flavor (Optional, but Recommended!): Heat a large, heavy skillet (cast iron works wonders) over medium-high heat. Add a tiny bit of oil. Sear the brisket on all sides until nicely browned. This adds a fantastic depth of flavour.
- Into the Pan We Go: Place your seared (or un-seared, no judgment!) brisket fat-side up on the rack in your roasting pan.
- Add the Liquid Gold: Pour your beef broth (or chosen liquid) into the bottom of the roasting pan, *under* the rack. You don’t want the brisket sitting directly in it, just benefiting from the steamy goodness.
- Wrap it Up Tightly (This is Key!): Now for the moisture magic! Wrap the entire roasting pan, brisket and all, super tightly with at least two layers of heavy-duty aluminum foil. You’re basically creating a mini, steamy sauna for your brisket. No steam escapes, no moisture leaves!
- Bake, Baby, Bake: Pop that tightly wrapped pan into your preheated oven. Let it cook for approximately 3-4 hours for a 3-pound brisket, or until it reaches an internal temperature of around 200-205°F (93-96°C). Use your meat thermometer!
- The Sacred Rest: Once it hits the temp, take the pan out of the oven. DO NOT UNWRAP IT! Let it rest, still wrapped, on your counter for at least an hour, or even two. This is crucial for the juices to redistribute throughout the meat, resulting in ultimate tenderness and moisture. Seriously, this step is non-negotiable, IMO.
- Slice and Devour: Finally, unwrap your masterpiece. Transfer the brisket to a cutting board and slice it against the grain. Drizzle with the pan juices. Prepare for applause!
Common Mistakes to Avoid (Unless You Like Dry Brisket, Then Go Wild)
- Not Wrapping Tightly Enough: If that steam escapes, so does your moisture. Think of it as a top-secret mission for juiciness.
- Cooking at Too High a Temperature: This isn’t a race, it’s a marathon. High temps equal dry brisket. Stick to low and slow.
- Skipping the Rest: Cutting into the brisket immediately after cooking is a rookie mistake. All those beautiful juices will rush out onto your cutting board instead of staying in the meat. Don’t be that person.
- Over-trimming the Fat: A little fat cap helps keep things moist and adds flavour. Don’t go crazy with the knife.
- Not Using a Meat Thermometer: Seriously, eyeballin’ it is a recipe for disaster. Get one!
Alternatives & Substitutions
Feeling adventurous or just out of beef broth? No stress!
- Liquid Swaps: Instead of beef broth, you can totally use chicken broth, a can of dark beer (stout or porter works wonders!), or even strong brewed coffee. Each will add a slightly different, delicious flavour profile. Why not experiment, right?
- Rub Variations: Don’t have a specific rub? A simple mix of salt, pepper, garlic powder, onion powder, and a touch of paprika will work like a charm. Get creative!
- No Rack? No Problem (kinda): If you don’t have a roasting rack, you can make a “rack” out of thickly sliced onions or carrots at the bottom of the pan to keep the brisket elevated. It’s not ideal, but it’s better than nothing.
FAQ (Frequently Asked Questions)
Got questions? I’ve got answers (and maybe a little sass).
- Do I really need heavy-duty foil? Can’t I just use the regular stuff? Well, technically yes, you *can* use regular, but why invite a leaky, sad, steam-escaping situation into your life? Heavy-duty is your best bet for a truly sealed sauna for your brisket.
- My brisket is smaller/larger than 3 lbs. How do I adjust the time? Good question! Figure roughly 1.5 to 2 hours per pound at 275°F. But remember, the internal temperature is your ultimate guide, not the clock.
- Can I cook it faster by turning up the heat? Oh, sweet summer child, no. That’s how you get jerky. We want moist brisket, not a leather chew toy. Stick to low and slow.
- Is resting *really* that important? It feels like forever! Yes! It’s arguably one of the most important steps. It allows the muscle fibers to relax and reabsorb all those beautiful juices. Skip it at your peril!
- What if I don’t have a dry rub? Can I just use salt and pepper? Absolutely! A good quality salt and freshly cracked black pepper are sometimes all you need to let the beef flavour shine. FYI, some purists swear by it.
Final Thoughts
See? Keeping brisket moist in the oven isn’t some dark art practiced by culinary wizards in secret kitchens. It’s just a few key steps that, once you get ’em down, will make you a brisket legend in your own home. So go forth, my friend! Grab that brisket, crank up some tunes, and get ready to create a masterpiece that’s so tender and juicy, it’ll make your eyes roll back in your head. You’ve totally got this. Now go impress someone—or yourself—with your new culinary skills. You’ve earned it!

