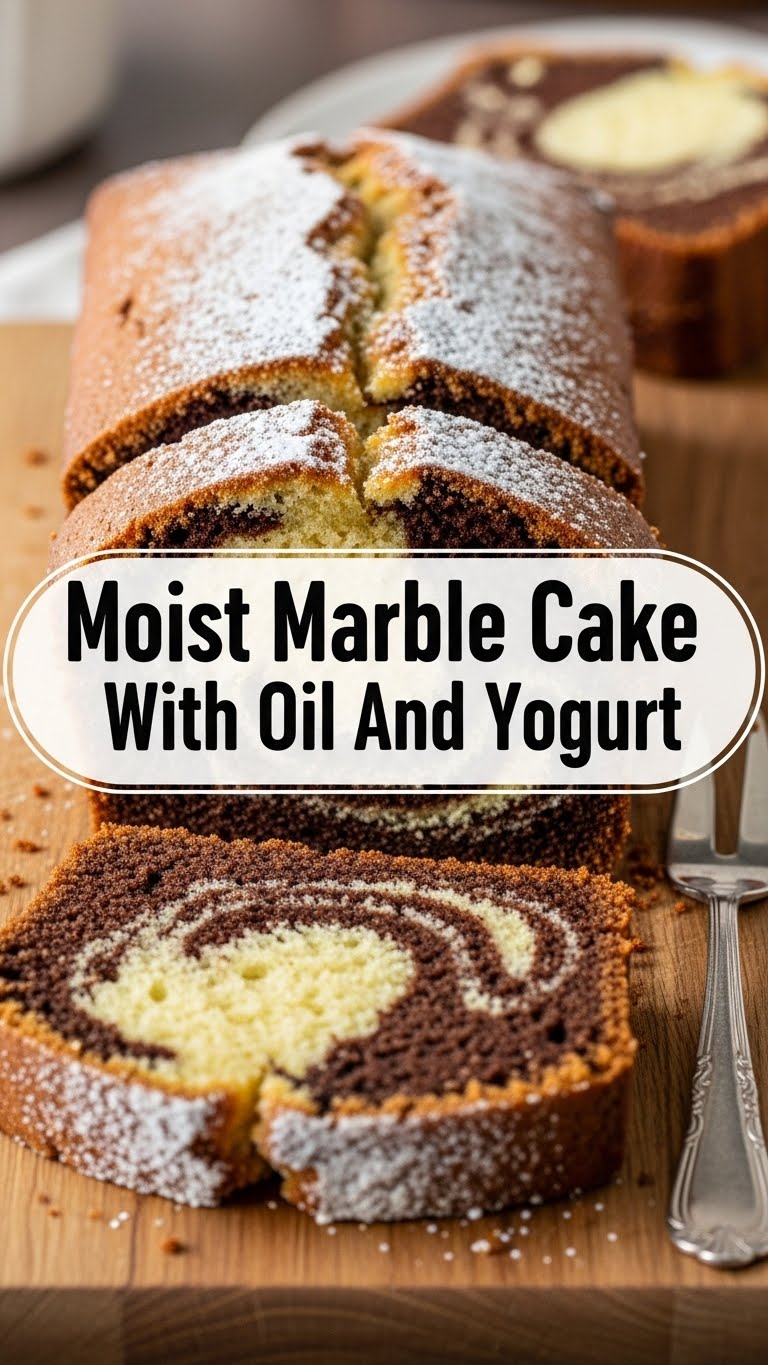
Ever just stare into the void (aka your fridge) and think, “I need cake, but also, effort is a myth”? Yeah, me too. And that’s exactly why we’re whipping up this ridiculously moist marble cake today! Forget butter and all that fuss; we’re going for oil and yogurt, which are basically the secret superheroes of super-tender cakes. This recipe is for those days when you want something impressive without, you know, actually trying too hard. So, grab your apron (or don’t, I won’t judge), and let’s get baking!
Why This Recipe is Awesome
Okay, let’s be real. There are a million cake recipes out there, but this one? It’s special. Why? Because:
- It uses oil and yogurt, which means your cake will be so moist, it practically melts in your mouth. Say goodbye to dry, crumbly cake nightmares!
- No creaming butter! That’s right, we’re skipping a whole step and saving your arm muscles (and probably your sanity). Less faff, more cake.
- The marble swirl looks super fancy, but it’s genuinely **idiot-proof**. Seriously, even I didn’t mess it up, and my kitchen has seen some things.
- It uses basic pantry ingredients. No exotic trips to specialty stores required.
- It’s practically fail-proof. This recipe is incredibly forgiving, making you look like a baking genius even if you usually burn toast.
Ingredients You’ll Need
Gather ’round, my friends. Here’s your shopping list for moist, marbled glory:
- All-Purpose Flour: 2 cups (aka the backbone of our cake dreams).
- Granulated Sugar: 1 ¾ cups (sweetness is key, obviously).
- Baking Powder: 2 teaspoons (for lift and fluff).
- Baking Soda: 1 teaspoon (teams up with yogurt for extra puff).
- Salt: ½ teaspoon (because every good dessert needs a pinch of balance).
- Large Eggs: 3 (the binders of our delicious destiny).
- Vegetable Oil: ½ cup (our moisture MVP – canola, sunflower, whatever neutral oil you have).
- Full-Fat Plain Yogurt: 1 cup (the unsung hero for tenderness and that glorious moist crumb).
- Milk: ½ cup (whole milk is great, but whatever’s in your fridge works).
- Vanilla Extract: 2 teaspoons (don’t skimp on this one!).
- Unsweetened Cocoa Powder: ¼ cup (for the chocolate part of our marble magic).
- Hot Water: ¼ cup (the secret to blooming that cocoa like a boss).
Step-by-Step Instructions
Alright, let’s get this party started! Follow these simple steps, and you’ll be chowing down on cake in no time.
- Prep Your Oven & Pan: Preheat your oven to 350°F (175°C). Grab a 9×13 inch baking pan, grease it up, and dust it lightly with flour (or line with parchment paper for easy removal).
- Whisk the Dry Stuff: In a large bowl, whisk together the flour, sugar, baking powder, baking soda, and salt. Make sure there are no lumpy bits!
- Combine the Wet Magic: In a separate medium bowl, whisk the eggs, vegetable oil, yogurt, milk, and vanilla extract until everything is nicely combined and smooth.
- Mix ‘Em Up: Pour the wet ingredients into the dry ingredients. Stir gently with a spatula or wooden spoon until *just* combined. A few lumps are totally fine! **Do not overmix**, unless you’re aiming for a tough, rubbery cake (you’re not, trust me).
- Divide & Conquer: Divide the batter roughly in half into two separate bowls.
- Chocolate Time! In a small bowl, whisk the cocoa powder with the hot water until it forms a smooth, thick paste. Add this glorious chocolate paste to one half of your cake batter and mix gently until just combined.
- Swirl It Up: Spoon alternating dollops of vanilla batter and chocolate batter into your prepared pan. Once all the batter is in, take a knife (or a skewer, or a chopstick) and gently swirl it through the batters a few times to create that beautiful marble effect. Remember, **less is more** here—we’re going for elegant swirls, not a muddy mess.
- Bake It Off: Pop the pan into your preheated oven and bake for 30-35 minutes, or until a toothpick inserted into the center comes out clean. The top should be golden brown and spring back when lightly touched.
- Cool & Devour: Let the cake cool in the pan on a wire rack for at least 15-20 minutes before attempting to slice it. Then, cut yourself a generous slice (or two, I’m not looking) and enjoy your moist masterpiece!
Common Mistakes to Avoid
We all make mistakes, darling. But these ones? Let’s just avoid them, shall we? Consider this your friendly heads-up:
- Overmixing the Batter: This is a cardinal sin! Overmixing develops the gluten too much, leading to a tough, dry cake. Mix until just combined, a few lumps are your friends!
- Not Preheating the Oven: Rookie mistake! A cold oven means uneven baking and a sad, dense cake. Always give your oven time to get to the right temperature.
- Too Much Swirling: You want a marble cake, not a muddy brown cake! Gentle swirls are key. Think elegant dance, not mosh pit.
- Opening the Oven Door Too Early: Patience, young padawan! Opening the oven door repeatedly or too early can cause your cake to collapse in the middle. Resist the urge to peek until at least two-thirds of the baking time has passed.
- Slicing While Hot: I know, the smell is intoxicating. But warm cake is crumbly cake. Let it cool a bit for clean slices and a better texture. **Patience pays off!**
Alternatives & Substitutions
Feeling a little rebellious? Here are some ways to shake things up or use what you’ve got:
- Oil: Any neutral-flavored oil like canola, sunflower, or grapeseed will work perfectly. Olive oil? Maybe not, unless you want a distinctly savory marble cake, which, well, you probably don’t.
- Yogurt: Greek yogurt is a fantastic substitute for regular plain yogurt; it might make your cake even *more* moist. Just ensure it’s plain and full-fat for the best results. Sour cream also works wonderfully!
- Milk: Any milk will do the trick – dairy, almond, oat, soy. Your cake won’t be picky.
- Vanilla Extract: Want a different vibe? Try almond extract for a marzipan-like twist, or a dash of orange zest for a citrusy hint in the vanilla portion.
- Chocolate Part: Instead of cocoa powder, you could melt down about 3-4 oz of semi-sweet chocolate chips with a tiny bit of milk or cream and fold that into the batter for an extra rich chocolate flavor. Just make sure it’s cooled a bit before adding!
- Add-ins: Feel free to fold in a handful of mini chocolate chips, chopped nuts, or even some sprinkles into the vanilla batter before dividing for an extra surprise!
FAQ (Frequently Asked Questions)
Got questions? I’ve got answers. Mostly.
- Can I use low-fat yogurt? Well, you *can*, but why hurt your cake’s feelings (and its moisture level) like that? Full-fat yogurt gives you the best, richest, most tender crumb. IMO, it’s worth it.
- My marble swirl looks a bit messy. What did I do wrong? You probably over-swirled it! Less is genuinely more. Think of your knife as a gentle painter, not a chaotic conductor. Aim for 3-4 swirls, max.
- How long does this cake last? If you manage not to eat it all in one sitting (which, kudos to you!), it’ll stay wonderfully moist for 3-4 days at room temperature, stored in an airtight container.
- Can I make this cake ahead of time for a party? Absolutely! This cake actually tastes even better the next day as the flavors have a chance to meld and get cozy.
- Do I *have* to use hot water for the cocoa powder? Yes, my friend, **yes!** This step is crucial. The hot water “blooms” the cocoa, intensifying its flavor and making the chocolate batter super smooth. Don’t skip this magic trick!
- Can I add other flavors to the vanilla part? Totally! A bit of orange zest, lemon zest, or even some instant coffee dissolved in the milk (for a coffee marble!) would be delicious.
- Can I bake this in a round pan? You bet! Use a 9-inch round pan and adjust baking time accordingly (likely 35-45 minutes). Just keep an eye on it!
Final Thoughts
See? Told you it was easy! Now you’ve got a ridiculously moist, super-fancy-looking marble cake without breaking a sweat (or your butter budget). You’ve basically just leveled up your baking game, and honestly, you deserve all the applause. Go on, cut yourself a fat slice. You’ve earned it! Now go impress someone—or yourself—with your new culinary skills. Happy baking, you superstar!

