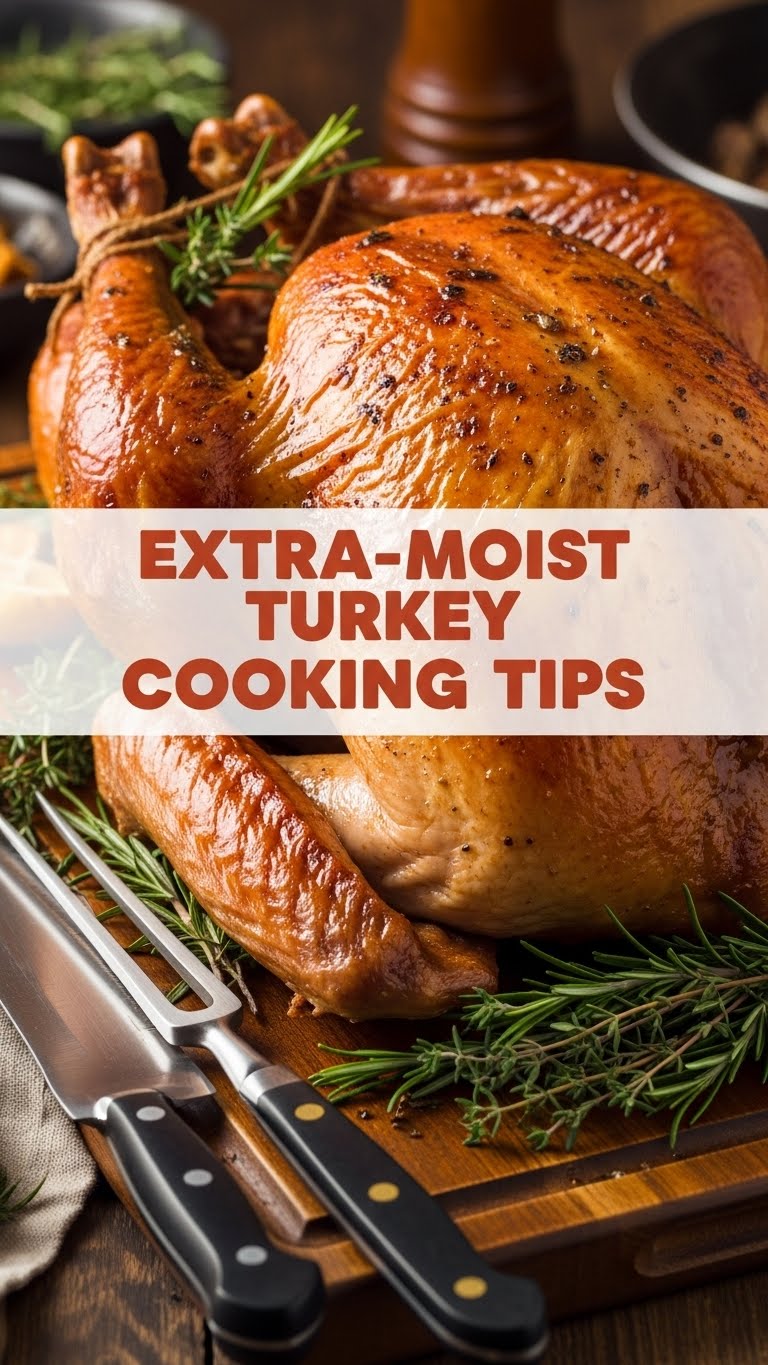
Ever hosted a big dinner, proudly presented your majestic turkey, only for everyone to take a bite and… well, let’s just say it was less “succulent masterpiece” and more “culinary tumbleweed”? Yeah, me too. And honestly, life’s too short for dry turkey. So, grab a drink (or a basting brush, whatever), because we’re about to banish dry birds forever and make a turkey so juicy, it practically weeps with happiness.
Why This Recipe is Awesome
Look, if you’ve ever found yourself secretly praying the gravy would magically rehydrate your bird, this is for you. This isn’t just a recipe; it’s a **dry-turkey-doom-slayer**. We’re talking about a turkey that’s so moist, you’ll wonder if it secretly took a spa day. It’s practically idiot-proof (trust me, I’ve tested it on myself). No more awkward silence at the dinner table while everyone tries to wash down a mouthful with water. We’re aiming for “oh-my-gosh-is-this-even-turkey?!” good. Prepare for compliments, my friend.
Ingredients You’ll Need
Get ready to transform your bird from basic to brilliant. Here’s your shopping list:
- 1 Whole Turkey (the star of the show, obviously. Get one that fits your oven and guest list!)
- 1-2 Sticks Unsalted Butter, softened (because butter makes everything better, duh. Don’t skimp here!)
- 4 cups Chicken or Turkey Broth (your bird’s hydrating spa water – low sodium is your friend)
- 1 large Onion, quartered (for flavor and aromatherapy)
- 4-6 Garlic Cloves, smashed (vampires beware, deliciousness incoming)
- Fresh Herbs (Rosemary, Thyme, Sage – a generous bundle. They’re like perfume for your poultry.)
- 1-2 Lemons or Apples, quartered (optional, but they add a lovely zing and extra moisture inside)
- Kosher Salt & Freshly Ground Black Pepper (the unsung heroes; season generously!)
- Kitchen Twine (to keep those legs looking prim and proper)
Step-by-Step Instructions
Time to get your hands dirty and make some magic happen. These steps are easy-peasy, I promise.
- Prep Your Bird: First things first, get that turkey out of its packaging, remove the giblets and neck (save ’em for gravy if you’re feeling ambitious!). Pat it super, super dry with paper towels. **This is crucial for crispy skin!**
- Butter Up, Buttercup: Gently loosen the skin over the breast meat using your fingers. Now, take half of your softened butter and rub it *under* the skin. Don’t be shy; spread it evenly. Rub the remaining butter all over the exterior of the turkey. Season generously with salt and pepper, making sure to hit every nook and cranny.
- Aromatics In: Stuff the cavity of the turkey with your quartered onion, smashed garlic, fresh herbs, and the lemon or apple quarters. Tie the turkey legs together with kitchen twine. This keeps everything tidy and helps it cook evenly.
- Broth Bath: Pour 2 cups of your chicken or turkey broth into the bottom of your roasting pan. Place the turkey on a rack in the pan. The broth will create a steamy environment, keeping your bird moist.
- Roast to Perfection: Preheat your oven to 425°F (220°C). Roast the turkey for 30 minutes at this high temperature to get that skin nice and golden. Then, reduce the oven temperature to 325°F (160°C) and continue roasting.
- Baste & Chill: Every hour or so, baste the turkey with the pan juices and any remaining broth you have. If the skin is getting too dark, loosely tent it with foil. Roast until a meat thermometer inserted into the thickest part of the thigh (without touching bone) reads **165°F (74°C)**.
- The Golden Rule: Rest! Once it hits 165°F, take that beautiful bird out of the oven. Cover it loosely with foil and let it **rest for at least 20-30 minutes** before carving. Seriously, don’t skip this. This is where all those glorious juices redistribute throughout the meat, making it ridiculously moist.
Common Mistakes to Avoid
Nobody’s perfect, but we can definitely steer clear of these turkey-murdering blunders:
- Not Drying the Skin: If the skin isn’t dry before roasting, it’ll steam instead of crisping. You want that golden, crunchy goodness, right? Pat, pat, pat!
- Forgetting to Rest the Turkey: This is probably the biggest mistake. If you carve immediately, all those precious juices will flood your cutting board instead of staying in the meat. Patience, grasshopper!
- Overcooking: The ultimate sin! A thermometer is your best friend. Don’t just guess or rely on a pop-up timer. 165°F in the thigh, and you’re golden. Every degree past that is a step towards dry-ville.
- Not Using Enough Fat: Butter, broth, basting – these aren’t suggestions, they’re commandments for moisture. Don’t be shy!
- Constant Oven Peeking: Every time you open the oven, you drop the temperature, which extends cooking time and can dry out your turkey. Resist the urge!
Alternatives & Substitutions
Life’s about options, even in the kitchen! Here are a few swaps and upgrades:
- Olive Oil instead of Butter: If dairy isn’t your jam, a good quality olive oil can work for rubbing the skin. But honestly, **IMO**, butter just has that *je ne sais quoi*.
- Vegetable Broth: No chicken or turkey broth? Veggie broth is a perfectly acceptable substitute for the pan liquid.
- Different Herbs: Feel free to mix and match your favorite fresh herbs. Dill, marjoram, or even a bay leaf can add lovely aromatics.
- Bacon Drape: Want to level up your moisture and flavor? Drape strips of bacon over the turkey breast during the last hour or so of cooking. Talk about a glow-up!
- Dry Brine: If you’re feeling extra fancy (and have the fridge space), a dry brine (salting the turkey 24-48 hours in advance) can work wonders for moisture and flavor.
FAQ (Frequently Asked Questions)
Got questions? I’ve got answers! (Mostly.)
- Do I *really* need to brine the turkey? While this specific recipe doesn’t explicitly require a full wet brine, the heavy salting and butter application here achieve a similar, fantastic effect for moisture. If you want to go the extra mile with a traditional brine, go for it! But with these tips, you’ll still get an amazing result.
- My turkey is still frozen! What now? Uh-oh, rookie mistake! You need to thaw it completely before cooking. Plan for about 24 hours in the fridge for every 4-5 pounds of turkey. Don’t rush it with hot water, you’ll end up with funky turkey.
- Can I skip the butter? I’m trying to be healthy. Well, technically yes, you *could*. But why hurt your soul like that? A little bit of butter is a key player in moisture and flavor here. If you absolutely must, use olive oil, but know what you’re sacrificing!
- How do I know when it’s *really* done without overcooking? **Use a meat thermometer, my friend!** Seriously, it’s the only way. Insert it into the thickest part of the thigh, making sure not to touch the bone. When it reads 165°F (74°C), it’s done. Trust the thermometer, not your gut feeling (unless your gut feeling *is* a thermometer, which would be cool).
- What’s the big deal with resting the turkey? It’s science, baby! When meat cooks, the muscle fibers contract and squeeze out juices. Resting allows those fibers to relax and reabsorb those juices, making the meat incredibly tender and moist. If you cut it immediately, all that liquid just runs out.
- My turkey skin isn’t crispy, what went wrong? A few culprits: not patting it dry enough, too much moisture in the roasting pan (if you had too much broth covering the skin), or not roasting at a high enough temperature initially. You can blast it at 400°F (200°C) for the last 15-20 minutes to crisp it up if needed!
Final Thoughts
And there you have it, folks! Your new secret weapon against dry, disappointing turkey. You now possess the ancient wisdom (and some butter) to create a bird that will make your taste buds sing and your guests beg for seconds. So go forth and conquer your holiday meals, or just a Tuesday if you’re feeling fancy. You got this, chef! Now go impress someone—or yourself—with your new culinary skills. You’ve earned it!


